image via – youtube.com
When it comes to decorating for any seasonal holiday, you want to look festive and on-point without breaking your budget. There’s no better way to achieve a fresh, spring or summer look than with these dip-dyed coffee filter flowers. While they may sound cheap and thrifty, which they are, they’ll end up turning out beautiful and vibrant looking every time.
They’re super easy and inexpensive to make even if you’re not a crafty type of person. The homemade, handcrafted flowers make for some uniquely thoughtful decorations and they can be used as neat little candy holders or a centerpiece down a table. They’re even perfect for gifting at any time of the year and no special occasion is needed to hand these beauties out. Present one to someone you appreciate and show them how much you care!
To make your own pretty dip-dyed flowers you will need the following items; coffee filters, food coloring, cups, scissors, a shallow dish or pie plate, warm water, a hot glue gun, a cooling rack, and a baking sheet. In the accompanying video Marianne from HGTV Hand-Made shows us step by step exactly how to make these flowers. Read on below for instructions and watch her transform plain old coffee filters into pretty spring blossoms.
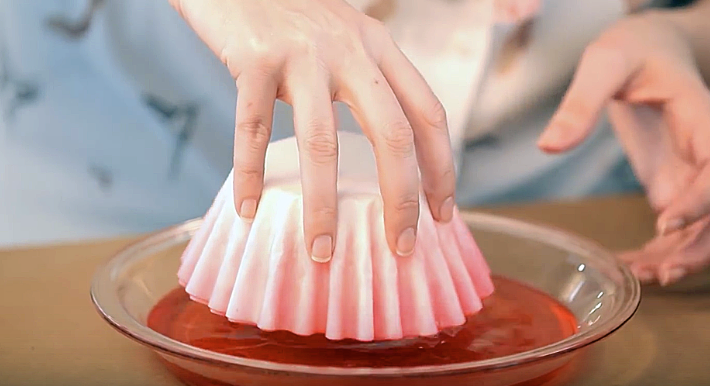
In a shallow dish mix up the dye one color at a time, using a ratio of 10 drops of food coloring to one cup of warm water. Take a stack of about 10 coffee filters and place them upside down in the warm water. Remove them once you notice that the dye reaches the top edge of the filters and place them on a cooling rack to dry.
Make sure to place a baking sheet under the cooling rack to help contain the mess and catch any dye-colored water that drips off the filters. Now repeat the process with the other colors you want to make and allow them all to completely dry before moving on to the next step.
To make the flowers, start off by taking a paper cup and carefully trim it down with a pair of scissors so that it’s about 1½ inches tall. Use a total of 3 coffee filters from 2 different colors each and stack one bunch atop the other. Flatten them down and fold them in half, then cut a 1-inch notch in each fold.
Fold it in half again (so it’s in quarters) and cut a one-inch notch in the resulting fold, plus another notch in the middle of the fan-shape that you have at this point. Unfold it one time, so that it’s still folded in half, and trim away the edges near each of the notches so that they end up resembling petal-like shapes.
To assemble each flower, take a cup and dab a little bit of hot glue in the center of it. Take one colored coffee filter, center it over the cup, and press it down into the glue. Fold the sides down roughly around the cup and then take another filter and glue it atop that one.
Take the third and final filter of that one color and glue it to both the bottom and up the sides of the cup, so that it’s covered. Now take the 3 remaining filters from the second color and glue them all to the bottom of the cup. You can fan the filter edges out gently and arrange them so they look fuller, and now they’re ready to use!
Let us know how yours turn out!
Please Share This With Your Family and Friends 🙂


