He Starts Cutting This Egg Carton In Half. The Reason Is Surprisingly Brilliant!
I don’t know about you, but I love the guy who does these awesome tutorials. His multitude of life hacks really contain useful ideas, and his presentation just makes me laugh out loud. So, for three new practical hacks, all utilizing egg cartons, sit back and enjoy the video below.
His first ingenious idea he calls The FIRE STARTER. Everyone needs help getting the big logs to catch fire, whether it be in a campfire or at home in a fireplace. For me, either kindling wood or store-bought fire starters are the ‘go-to’. Then comes the crumpled newspaper, dirty hands and all, for added fuel. What if all this could be circumvented?
It can! And the CrazyRussianHacker somehow came up with this unusually useful idea, that saves a lot of time. Taking an empty egg carton he stuffs the holes with lint from the dryer, and adds leftover hot wax from a burning candle. Watch what he does next to turn these little gems into fire starters. It’s crazy how well and quickly this works.
Ok, so his next creation which he calls the REFRIGERATOR SPACE-SAVER is truly one of the simplest ideas, that makes you ask yourself why you never thought of this?!! As eggs get used up from the dozen package, he shows you how to reduce it’s size, creating more Frig space, while still storing the remaining eggs. CRAZY SMART!
Last, but not least our CrazyRussianHacker has come up with a really cool MAKE-SHIFT ICE CUBE TRAY. It not only comes in handy when the automatic ice-cube maker freezes up or breaks, but it simply is a way of making cool shaped ice cubes. He does this with empty well-washed egg-carton trays. It’s also a great solution for transporting cubes in a cooler and just tossing the disposable tray.
Sit back and enjoy his tutorial!
Please SHARE These 3 Great Hacks With Family and Friends 🙂
At First I Thought It Was An Old Decayed Tree. But When The Camera Zoomed In WOW!

The oldest living things on earth are our source for wood in all aspects of our lives. Trees are used for building, tools and in many forms of artistic expression. For many centuries, China’s wood carving tradition, has been a dominant art form that has continued to present times.
The awesome and majestic work of art, “Along The River During The Quinming Festival”, carved by Zheng Chunhui, its a prime example of the very best of Chinese carving mastery. This mind-blowing, intricately carved “world” utilized a 12-foot long tree!
It is renowned as the longest wood carving in the world, according to the Guinness Book of World Records. As you watch the video below, which tours the entire 39-foot long piece, you will feel as if you have been transported into a world that contains 550 individually carved characters, buildings and vehicles that bring this village setting to life!
The content of Chunhui’s masterpiece was derived from Zhang Zeduan’s painting from the Song Dynasty era, named “Along The River During The Quinming Festival”. It is believed that it was created at some point between 1085 and 1145. The painting’s depiction of life in the Song dynasty was so astoundingly intricate, that it has inspired many artists through the centuries to artistically reinterpret it.
The masterpiece you are about to tour in the footage below, took Chunhui four years to create. The Quinming Festival is still celebrated to this day on the 15th day of the spring equinox. As you watch this video you will understand the sheer wonder of the renewal of life that is at the essence of this festival. It will take your breath away! Enjoy the tour!
Please SHARE This Story With Your Family and Friends 🙂
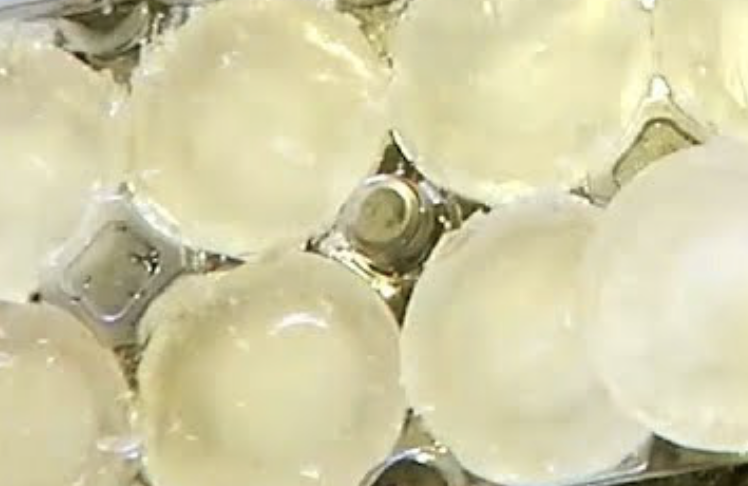
They Found 850 Year Old Seeds And Decided To Plant Them. What Grew Is An Unexpected Surprise!

Every now and then news accounts carry a story about how some plant, insect, and animal is dying out and fast becoming endangered or extinct. There are never any positive stories about how some previously extinct plant has been re-born or brought back into existence, until now.
This seemingly unbelievable tale first began a few years back, in 2008, when a group of archaeologists were conducting a dig on First Nations (Native) land in Wisconsin. During the course of the dig they came across a small clay ball, no larger than a tennis ball, which had been used to store a few handfuls of seeds.
Those seeds were carbon dated back to 850 years ago and identified as “Gete-okosomin,” a type of squash that had not been grown, eaten, or seen by anyone for hundreds of years. The ancient seeds were given to a Native group, who in turn dispersed them to several groups and individuals, all whose goal was to bring them back to fruition.
Eventually the Canadian Mennonite University came to possess some of the heirloom seeds and they gave them to a group of students in Winnipeg, Canada, who were studying and learning about healthy foods. The students planted the seeds in the school garden and tended to them as the plants grew and matured.
By the end of the semester the once extinct squash plants had yielded quite a few orange and yellow streaked, large, tasty squashes. To celebrate their successful growing season and harvest, the students decided to host an end of semester feast. The menu was full of all the healthy foods they had learned about and, above all else, it featured the extremely rare and ancient squash.
Finally, a story about how something that was once extinct was successfully brought back into existence without any modifications or bio-genetic type of alteration. This simple, positive story is just what the world needs this time of year.
As people all over America are about to gather for Thanksgiving and dig into a feast of delicious foods, that likely includes some type of squash, they should remember what the day and coming together is all about. Brian Etkin, the Coordinator of the Garden of Learning in Winnipeg, summed it up best when he said that “this squash is representative of a tribe of a large community and everybody in that community having a place and food being a right of citizenship.” I couldn’t agree more.
Don’t forget to check out the video to see what the 850 year old veggies look like and to learn more about them.
Please Share This Incredible Story With Family and Friends
She Breaks Her Window Blinds Purposely. But What She Creates Is An Unexpected STUNNING Surprise!
Many people love decorating their houses and making it as cozy and comfortable as can be. Interior design is hugely popular and many retail stores are dedicated to the art of interior decorating. They offer everything from rugs, mugs, and vases to the kitchen sink.
However, many of the items found in stores are expensive and only available in limited styles. This is especially true when it comes to window coverings and blinds. While the options run from basic to fancy, the cost increases exponentially as you move up from mini blinds to silk curtains or cedar paneled shades.
If you want gorgeous, custom made window coverings it’s going to cost you, unless you make them yourself! The folks at Better Homes and Gardens made this easy to follow tutorial on how to turn basic mini blinds into beautiful roman shades.
It’s a much more affordable alternative to ordering custom ones and all it requires is a few things that you likely already have on hand. Those items are; white faux wood blinds, thick upholstery fabric, mod podge and a small container for it, a foam brush, pencil, scissors, clothespins, tape measure, and an iron.
Measure how long the blinds need to be before you begin, then lay them on a flat surface facing down. Extend them out to the desired length and cut away the string that connects all of the slats, aka the ladder string, on both sides. Be very careful to avoid cutting the single, thicker cord that moves the shades up and down, because you’re going to need it.
Each slat is going to be 7 inches apart, to figure out how many slats you’ll need simply take the length of the window in inches and divide it by 7, then snap off any extra slats you don’t need. Next, take the fabric and lay it on a flat surface, place the blinds atop it and evenly space out the remaining slats.
Use the tape measure to ensure that they’re approximately 7 inches apart, this way the blinds will fold up neat and evenly.Measure the fabric so that it extends 2 inches beyond the edge of the slats and 2 inches beyond the top and bottom as well.
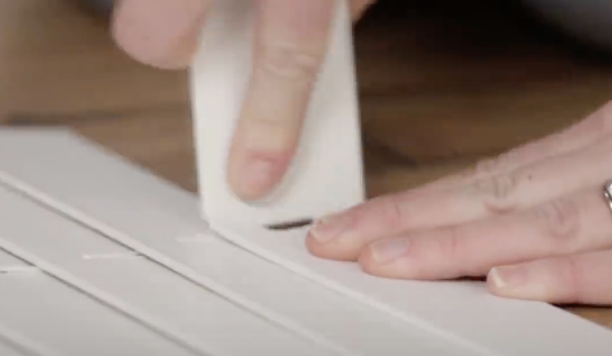
If you need to, iron the edges so that the fabric will form a more even hem. Make sure that the blind operation, the part where the strings come out of the top and extend down from, is placed on the back of the fabric. Remove the stopper, located at the end of the top bracket, and use a pair of scissors to cut a notch in the fabric so that it’ll wrap neatly around that end.
Break out the foam brush and use it to apply a coat of mod podge to both the end of the bracket and the fabric. Wrap the piece of glued fabric around the top of the bracket, press it down firmly and secure it with clothespins while it dries.
Moving down each side, apply glue to the end of each slat and the fabric portion that extends out beyond it, then fold the fabric over and onto the end of the slat and secure with more clothespins. At the bottom of the blinds take the fabric and roll it over so that it forms a clean edge. Brush the bottom bar with mod podge and glue the fabric into place, securing it with clothespins.
Allow the glue to dry completely before removing all the clothespins, and at that point they’re ready to be hung. The shades will still be operational like normal mini blinds, but a lot more appealing and better looking. Plus, things won’t get snagged or hung up in them, (like cat paws!). Best of all, they can be customized to your exact tastes at a fraction of the cost of what you’d end up paying retail.
If you want to give your house or just one room an instant upgrade, try this out!
Please Share This Blinds Hack With Family and Friends
Her Clever Trick For Putting On Eyeliner On Perfectly Every time Is Impressive. This Is So Simple.
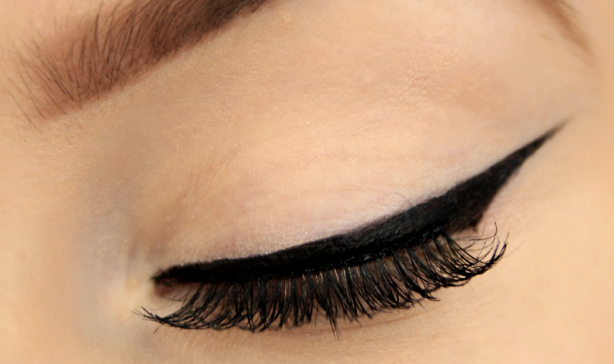
Being able to create the really dramatic look of winged eyeliner, without the help of a makeup artist, would really be a great achievement. The video you are about to watch below, offers an easy-to-follow tutorial, that will allow you to create the nighttime dramatic eye-popping look!
This YouTuber shows you a way to do this in a really sophisticated, tasteful way. She uses a felt-tipped eye makeup pen to place dots in strategic spots along the rim of the eyelid, that will be connected in order to create the outline that will finally be filled in.
Once you have connected the dots to create the outline for the “cat eye”, it’s time to fill in. This can be done with a gel or liquid liner, depending on what you are most comfortable working with. Finally, you can use those pointed q-tips that you have always since in the pharmacy, to clean up any messy edges or do some blending.
Just watch the footage below that takes you through each step, and then try it for yourself. The method is foolproof, and you will find that it is fun to create this look. Let us know if you try it and are happy with the results.
Please SHARE This With Your Family and Friends
Mom Starts Putting Glue On This Sponge. The Reason Is Brilliant!

If you have young children, or are now a grandma, the following Mom Hacks in the video below will be a literal “Godsend!” We know how important craft time is to a developing child’s creativity and even emotional development, but if we are being honest, sometimes we hesitate with the messy process because the cleanup is overwhelming!
Well, the moms from the YouTube channel WhatsUpMoms have come up with a whole slew of tips to remedy the mess and dreaded clean-up; allowing our kids the freedom of the fun of messy crafting without picking up on unneeded tension from the adult supervision.
This fantastic edition of Mom Hacks includes fingerprinting in an extra large ziplock, using hand soap dispensers for kids paint, ingenious clean up tips for overuse of glitter and instant clean up for the dreaded “wall artist!” One of my personal favorites is putting excess glue on a sponge that will contain the mess while allowing the child to meet their “glue needs”.
These and many other invaluable solutions are brilliantly illustrated in the footage that follows. I can honestly say that I am one of those moms that dreads all the mess, and am really grateful to have come upon such great solutions. Let us know what you found most helpful!
Please SHARE This With Family and Friends 🙂
The Easiest Way To Remove Dark Under Eye Circles For Good With Only One Ingredient!
Dark under eye circles are a beauty issue for many women and men. The unsightly blemishes are commonly seen as a sign of fatigue and lack of sleep but there are a number of other possible causes. They may first appear in childhood and this could point to them being inherited.
Dark circles have also been attributed to allergies and nasal congestion which dilates certain blood vessels around the eyes and causes them to darken. Other possibilities include stress, anemia, oversleeping, eczema, crying, too much salt in ones diet, aging, and excessive drinking, smoking, or sun exposure.
In addition, they may also be a symptom of a more serious condition, such as liver disease or hypothyroidism. Many products and treatments have been touted as effective at making dark under eye circles go away. However, most of them are ineffective and don’t really do anything and some may even damage the fragile skin under our eyes.
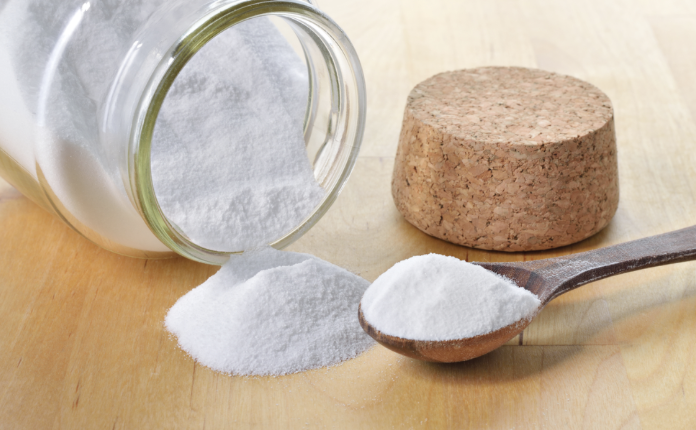
If you want to try an affordable, simple, all natural way to eliminate dark circles then try this at home remedy. All you need is baking soda, hot water or tea, and a few cotton pads. Take a glass of either tea or hot water and mix in well one teaspoon of baking soda.
Then soak two cotton pads in the solution and gently place them under your eyes for a total of 15 minutes. After you remove the pads wash your face and finish up with an application of moisturizer. Baking soda has been used in a number of at home beauty and personal care treatments.
It also works well to both clean and help fade scars caused by acne. The recipe and directions for an exfoliating baking soda acne scrub are as follows. Combine one teaspoon of baking soda and a drop of water on a plate and mix it up well.
You do not want to add too much water so slowly add one drop at a time, adding more if needed, until it has the consistency of a paste and not a runny liquid. Gently massage the mixture onto your face and let it sit for a couple of minutes or until it hardens, then wash your face well.
Over time this solution should fade any scars as it gently cleans your pores and skin. It can be applied nightly before bed and many people have reported that this is helpful and works! Baking soda works well at cleaning because it is effective at regulating pH since it’s not overly acidic or too alkaline, rather it falls right in the middle.
Thus, when it interacts with things that are either acidic or alkaline it naturally reacts to neutralize them. This is what makes baking soda so great at combating acidic odors that make our fridges smell. It also works well to maintain balanced, neutral pH levels and when it’s added to water and applied to things it serves to make stuff even more clean.
Best of all it’s extremely affordable, natural, and it doesn’t harm the environment like most of the ingredients that are found in beauty products do. Try one of these applications tonight before bed and see the results for yourself!
For more information on removing dark under eye circles Watch the video below
Please Share This Story With Family and Friends 🙂
Her Hair Seems Normal At First But It Is Hiding A Crazy Secret!
People love to try out different hair colors, as an expression or their creativity and desire to see themselves in different ways. The video below will show you the end result of using a “home remedy” for changing hair color, without the expense and damage of using harsh chemicals, and being left with a color that you have to live with for ages.
Believe it or not using a mixture of Kool-Aid drink mix powder and hair conditioner you will be able to achieve the really cool look that hides under your natural hair color. Or, if you care to be more flamboyant with your look, you can dip the ends in the mixture or apply it all over. Whatever your choice may be, no worries, because the color will only last for a few days.
It is advisable to use plastic gloves to prevent staining on your hands, and wrap yourself in an old towel to avoid staining your clothes. Mix the Kool-Aid packages in a bowl; be sure to use only the traditional version, because the unsweetened or artificially sweetened kinds will cause your hair to be sticky and the chemicals may burn your eyes.
Just a few tips for Kool-Aid colors: Cherry makes the hair a deeper red; Tropical punch results in a brighter red; Mixing strawberry and grape will give you a purplish red and experimenting with different combinations will give you a more rainbow effect. Now comes the conditioner.
Adding a few drops of conditioner and some water is key to aiding the Kool-Aid to be absorbed into the hair more evenly. The conditioner also changes the texture of the Kool-Aid into a thicker solution, making it easier to apply.
Make sure the combination of the Kool-Aid, water and conditioner are mixed to be completely smooth before applying; any lumpiness will prevent effective coloration. Now comes the fun part of using a brush to apply your mixture! If you want to dye your whole head, start at the roots and work your way down and under until all of your hair has been treated.
If you only want your tips dip them in the different colors. To get the incredible look you are about to view in the footage below, pin up the top layer of your hair and just apply your colors to the under part of your hair.
Your hair should be damp and sticky during the process, otherwise the powder will just wash out of your hair. Wrap your hair in sandwich wrap, securing it with tape, and sleep with it to get the best results. After awakening remove the plastic wrap.
Make sure to rinse your hair completely with lukewarm water ONLY. If you use shampoo all the color will wash out!! Secondly, you can apply conditioner, and then rinse again. Comb out your hair and wait to dry.
Let us know what look you go for and how the color comes out. I, myself am going to go for the look in the following video…you can go for the surprise effect while maintaining your natural look for work.
Whether your hair is short or long, I think the surprise color is getting the best of both worlds!
Please SHARE This Story With Family and Friends