
Do You Hate Mosquitos? This Easy Trick Will Stop Them From Ruining Your Entire Year!
Mosquitoes are nasty and highly irritating bugs that can ruin an otherwise perfect time. The way they buzz and swarm around, waiting to land on someones warm skin to bite, is enough to drive anyone insane.
The pesky blood suckers are carriers of a number of diseases that they can transmit straight into your body when they bite. In fact, every year almost 700 million people world-wide end up contracting a mosquito borne illness, resulting in over a million deaths. This scary fact makes them the number one killers of humans.
While it’s best to avoid them all together, that is basically impossible. People commonly use bug zappers, horrible smelling chemical repellents, and mosquito nets to try and combat the pests.
Fortunately, there is an easier and highly effective way to keep surroundings mosquito-free, and this video shows how to make a trap to catch the suckers. It takes just seconds to make, uses old soda bottles, and you can make a bunch of them for less than a couple of bucks.
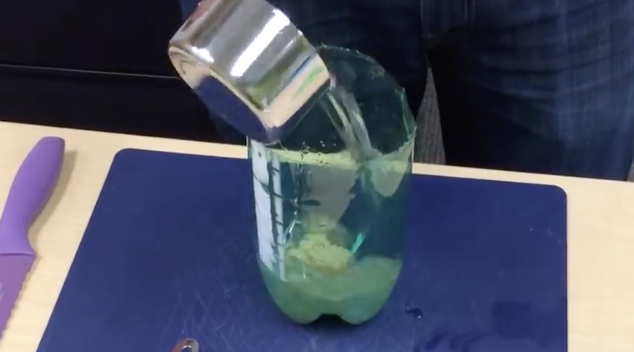
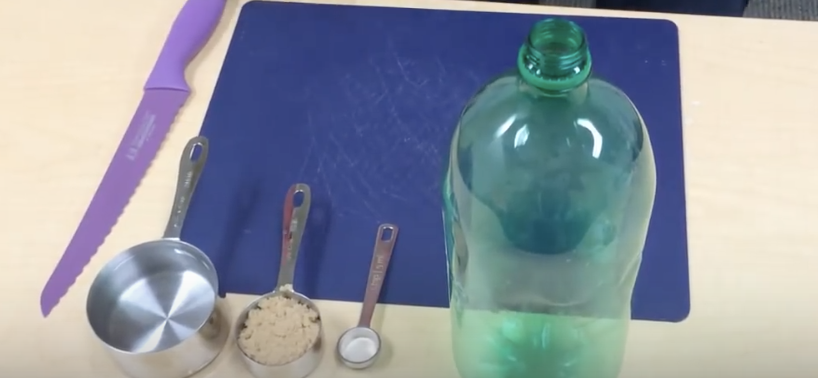
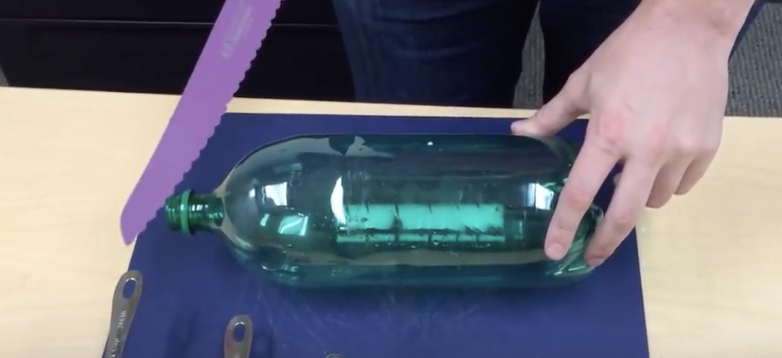
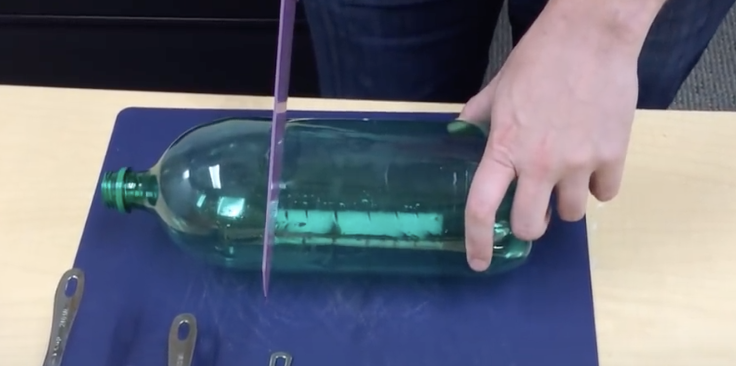
Take a 2 liter soda bottle and carefully cut a third of the top part off it. Use a serrated knife to do this, it will cut through the plastic quicker and smoother and won’t slip around as much as other knives tend to do on plastic. Place a ¼ cup of brown sugar, one cup of warm water, and ¼ teaspoon of yeast in the bottom two thirds portion of the cut soda bottle.
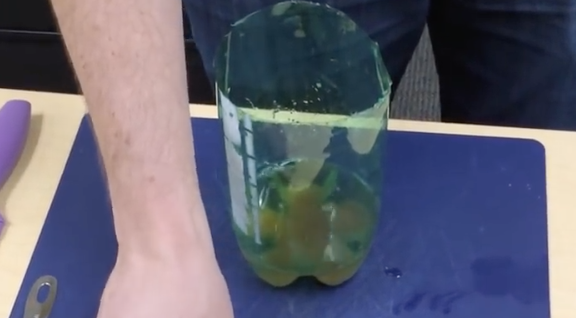
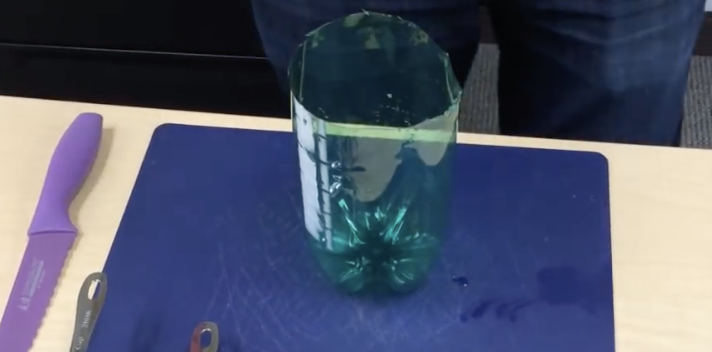
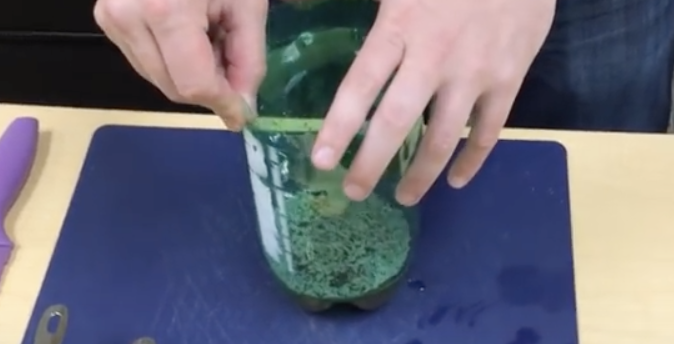
Place the top of the soda bottle upside down into the bottom half of the bottle. Make sure that the cap is off and that it fits tight and snug all around the sides. Then place the soda bottle trap outside near where you plan on sitting and let it do its magic. The mosquitoes will be attracted to the brown sugar and yeast mixture and won’t be able to resist the sweet, sticky aroma it puts off.
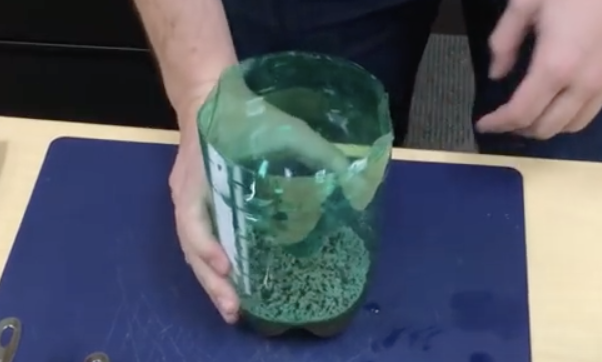
When they fly down inside the bottle they become trapped inside and cannot escape. The result leaves you with a comfortable, relaxing, mosquito-free atmosphere to enjoy and kick back in. Check it out, the video is definitely worth a one minute view!
Please Share This Trick With Family and Friends
Before You Put On Sandals Get Your Feet Ready With This Simple Trick Using Two Items In Your Kitchen
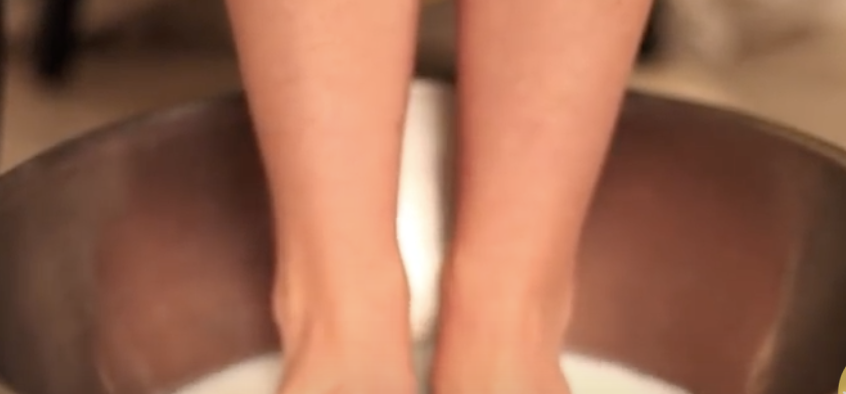
Summertime means sandal season is upon us. Whether it’s open toed shoes, flip flops, or sandals, they all make us stay cool and help our feet breathe in the heat and humidity. It often feels so good and relaxing to finally free our toes from the cramped sneakers and boots that have been covering our feet for months.
However, lots of us don’t really pay attention to our feet until we have to show them in public. If your feet are not yet sandal ready, or maybe just need a little pampering to get them into tip top condition, then you have to try this nourishing foot soak that will leave your toes looking amazing.
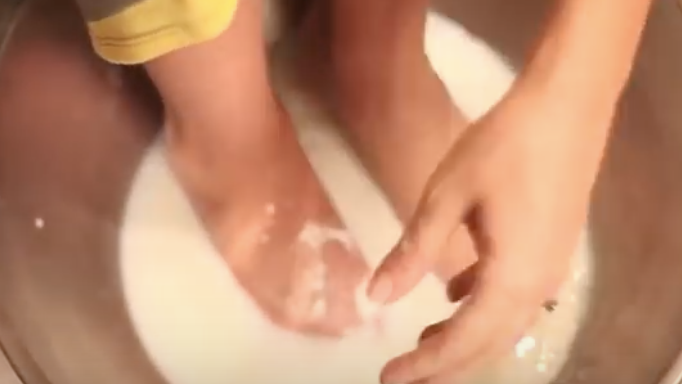
YouTuber Tabitha Blue from Kitchenwise shows us how to make a quick and easy foot soak that uses two simple and all natural ingredients that you likely already have on hand in the kitchen; milk and baking soda. If not, you can pick them up at the store for under $5 total and still have plenty left over for other things or more foot soaks down the line. It only takes about ten minutes total of your time and will leave your feet soft, glowing, and rejuvenated.
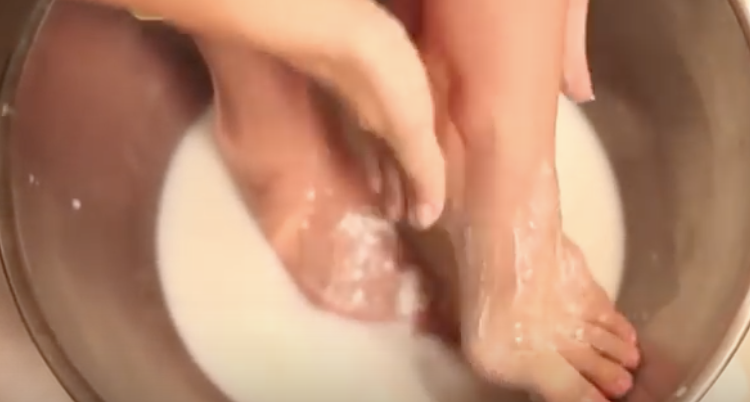
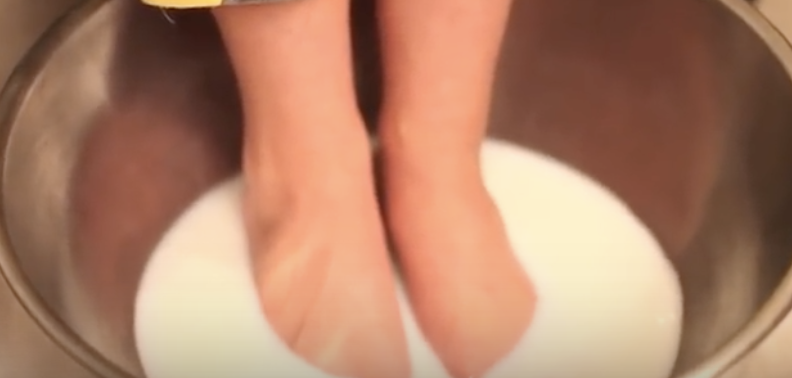
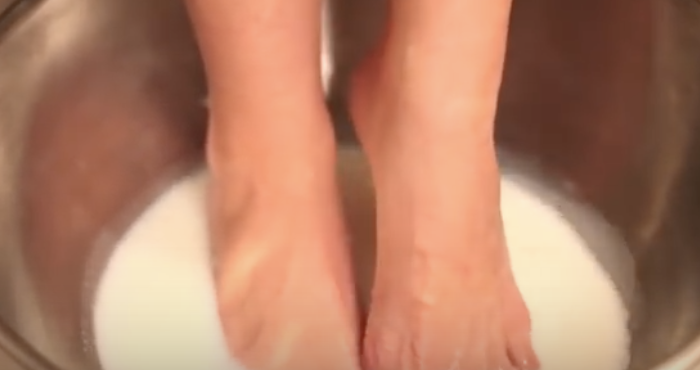
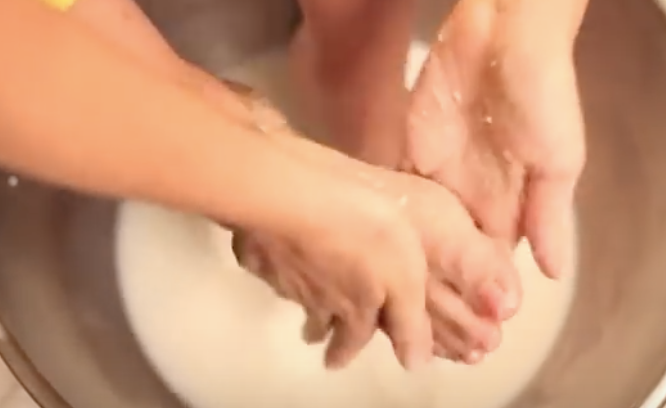
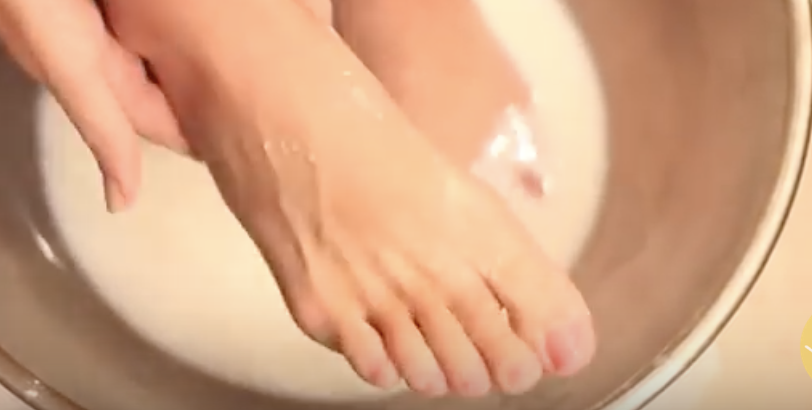
Warm up 2-4 cups of milk and pour it into a bowl or container that’s large enough to fit both your feet in comfortably. Once you have soaked your toes for about five minutes grab the baking soda and lightly sprinkle some over them in your foot bath. Work the baking soda around by gently massaging and scrubbing it onto the feet for about a minute or two.
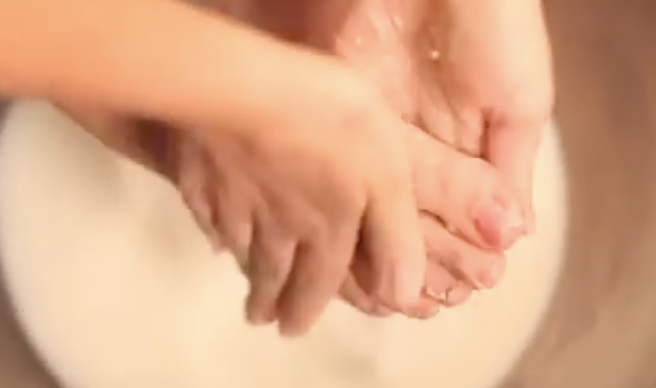
Pay attention to rougher areas or where the skin is thicker, usually heels and the bottoms of feet. Don’t forget to scrub the tops of feet too and around the upper ankle areas that are most visible when you wear sandals. After you’re done scrubbing, keep soaking your feet and sit back and relax for another five minutes.
In case you’re wondering how milk and baking soda work to beautify your feet, read on. Milk naturally contains lactic acid within it, which is often used to soften skin. This helps to prepare any rough patches for removal of the dead skin cells on them. Baking soda is naturally abrasive, so by rubbing it on milk softened feet, you can effectively remove rough patches.
That’s how milk and baking soda work so well together to soften and remove hardened areas of skin, such as tough calluses. If you haven’t tried it yet, give it a shot! Healthy, well cared for, sandal-ready feet will make you feel confident and prepared to take on whatever summer has to offer.
Please Share This Tip With Family and Friends
A Ring Got Stuck On His Swollen Finger. But He Removes It With This Unexpected Simple Trick!

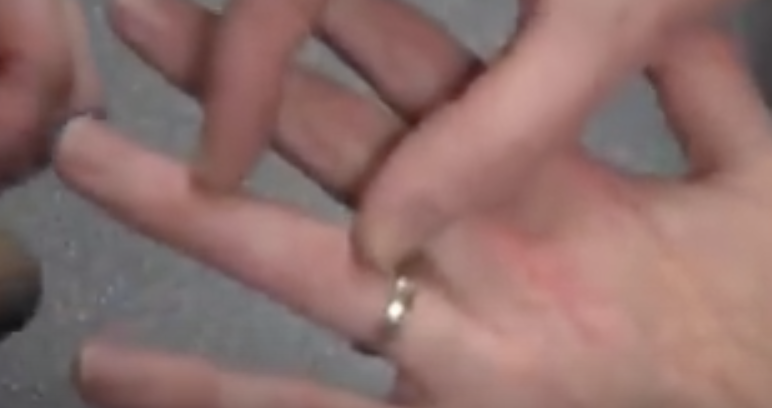
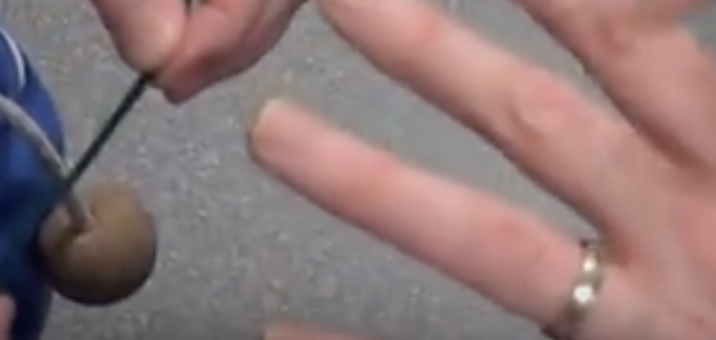
Have you ever tried to remove a ring from a finger that has swollen, or tried one on that turned out to be too small? Trying to get it to come off without damaging the ring (or your finger!) can be quite frustrating, and can invoke more than a little panic. Fortunately, after watching this video, you will be able to remove any ring from any finger in no time!

Although this trick is especially useful in the hospital setting, where rings are consistently cut off due to swelling, it is equally useful anywhere rings and fingers are found. Using no more than a thin elastic strap and something pointy, a ring that would otherwise have to be cut can be saved.
For many of us, a ring represents a long term commitment and the immense love that goes with it. Having a trick up your sleeve that will allow you to save such a priceless piece of someone’s life may prove useful beyond measure. If you know any other useful tricks, let us know in the comments below.
Please Share This Trick With Family and Friends
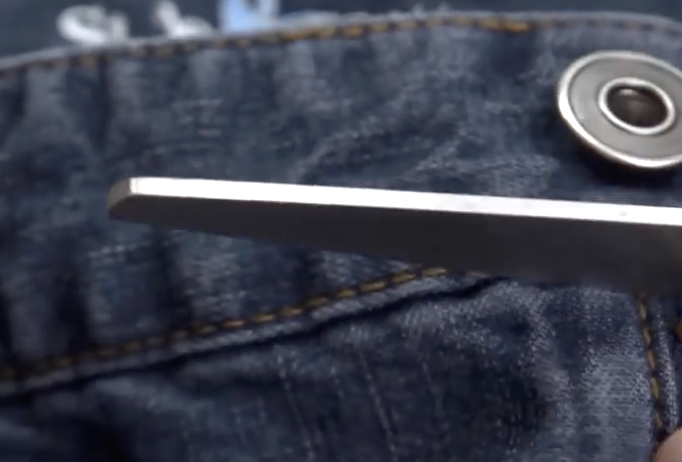
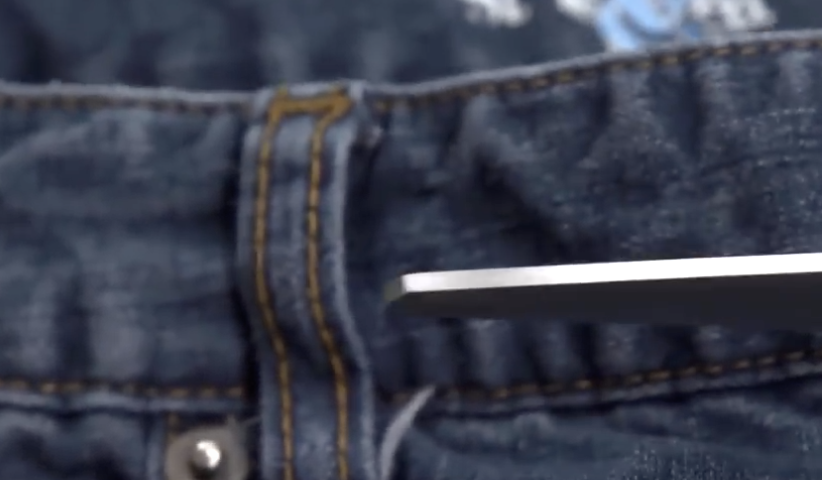
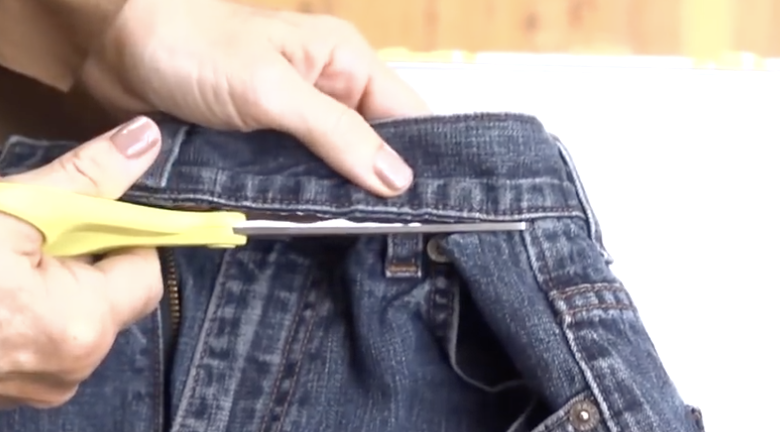
She Cuts The Waistband Off A Used Pair Of Jeans When She Reveals The Final Result It’s Priceless!
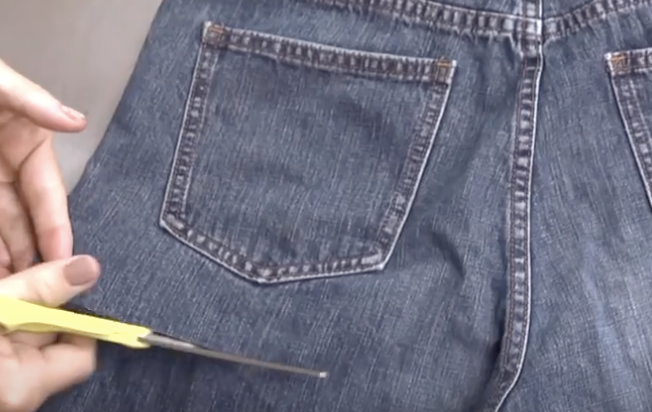
Jeans can be extremely durable and last a long time if they are made well and with quality fabric. When they no longer fit or go out of style we usually donate or throw them away. Instead of doing either of those things, get creative and re-use your old denim by turning unwanted jeans into wonderfully durable garden aprons. The method shown in this video, published by YouTube channel Chow, is fast, easy, and best of all, doesn’t require any sewing. All you need is a pair of old jeans, a pair of scissors, and a minute or two of time to spare.
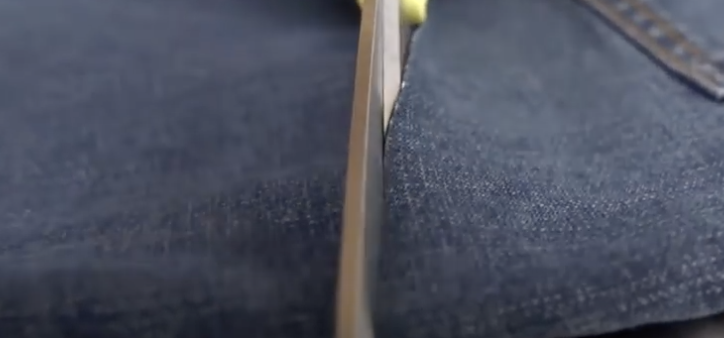
To make your own garden apron follow the instructions on the video and read on. Start by cutting the legs off the jeans about an inch below the back pockets. Then flip them over so the front faces up towards you. Starting at the zipper, cut along the seam right below the waistband until you reach the side seam on both sides. Continue to cut down each of the side seams and then you’re finished.
The front portion can be discarded and when it’s time to wear your new apron simply put it on around your waist and securely button it in place like a regular pair of pants. You can button it in the back so that the back pockets are in front, or off to one side so that one pocket is in front and the other is in back. For maximum apron coverage make 2 jean aprons and wear one on each side, like how the video shows it.
When you’re in the garden the extra pockets on the apron will definitely come in handy. They easily store shears, tools, seeds and more in a convenient and easy to reach place. Since denim is so strong and durable it makes for a great apron that can take a beating and still hold up for multiple uses. Plus, if it ever gets too dirty or worn out you can throw it away without feeling guilty or wasteful!
Please SHARE With Family and Friends
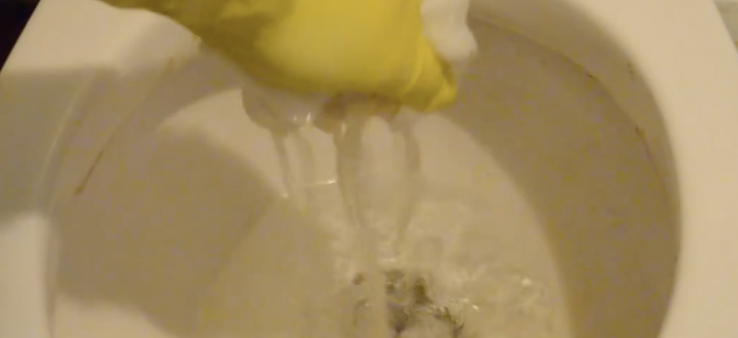
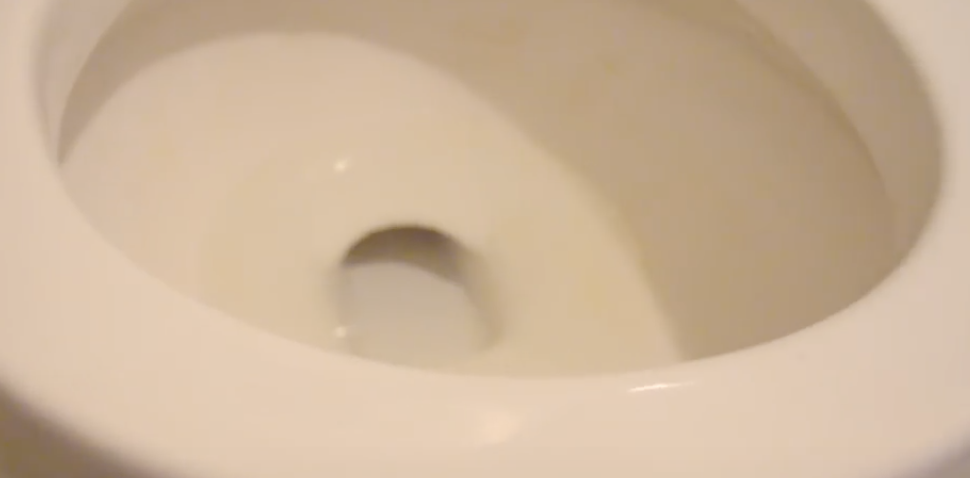
He Pours A Bottle Of Vinegar Into The Toilet. The Reason Is Totally Brilliant!
Hard stains on bathroom surfaces are caused by hard water and can be very hard to remove. The ugly spots and stains are caused by water that contains large amounts of minerals, such as limestone, calcium, and magnesium. These metals and minerals are naturally occurring, most often in areas with low water tables and mountainous regions, and water that contains them is perfectly safe to use and drink. The biggest downside to it is the unsightly mineral deposits and stubborn stains it leaves behind, which over time gradually build up on stuff. Many people struggle to remove these stains and often think that they need a strong chemical cleaner to effectively get rid of them.
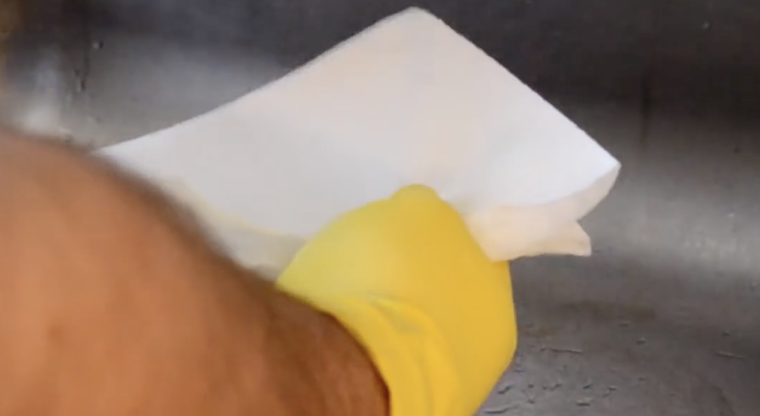
Instead, there is a very simple way to go about cleaning hard stains off of a toilette. You don’t need harsh, pricey chemical cleaners or tons of muscle power to brighten up the commode. So go ahead and grab yourself a roll of paper towels, a bottle of distilled white vinegar, and a pair of rubber gloves.
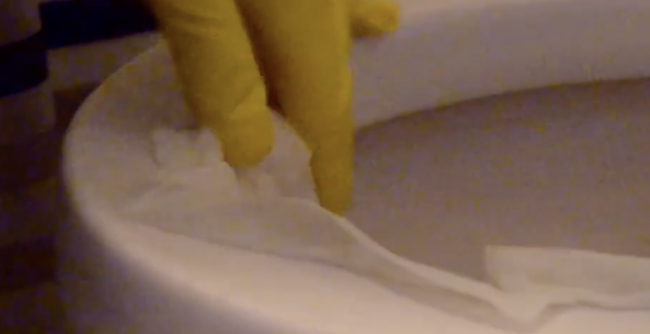
What to do is simple and will take less than 5 minutes. Pour some vinegar onto squares of paper towels so they are thoroughly soaked. Fold them up and place them all around the rim of the toilet, making sure to cover all the stains. Stick them to the inside bowl as well as close to the water line as you can without them touching the water. Then, fill the bowl with vinegar until it is above the stains.
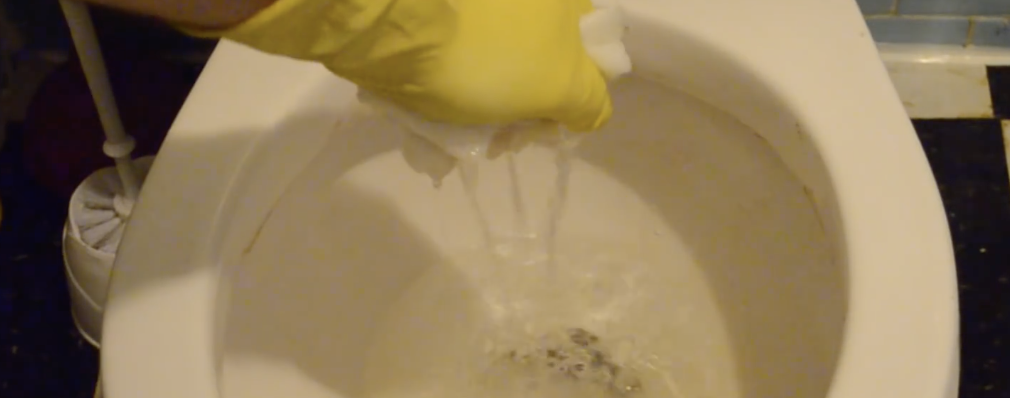
Let this all sit for a few hours while the vinegar works its magic. Remove the paper towels from the rim and bowl and scrub away any remaining stains. Make certain to fish out any paper towels from the water and do not flush them because they easily clog septic systems due to their thickness and absorbency. That’s it!
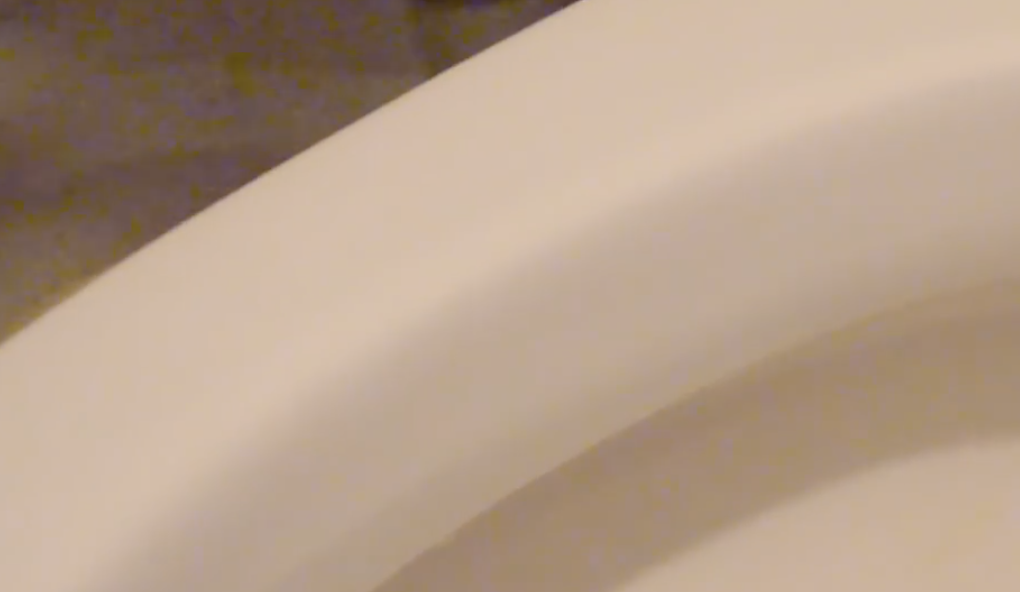
This may be the fastest, easiest, and most natural way to clean a stained toilette that requires minimal effort or exertion on your part. Try it yourself the next time you clean house!
Please SHARE This Tip With Family and Friends
He Sprinkles Salt Into This Bowl Of Ice Then Places A Can Of Soda In It. The Reason Is Brilliant

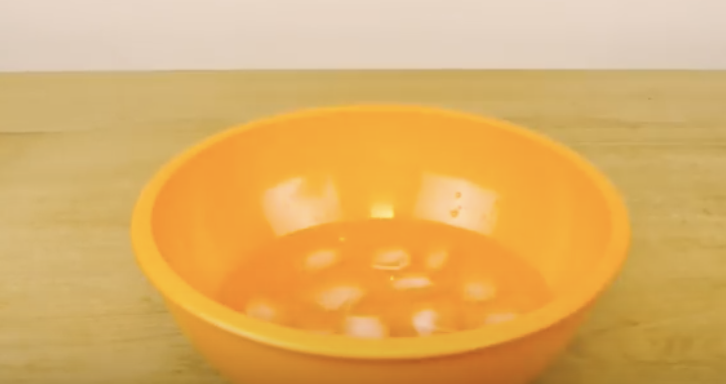
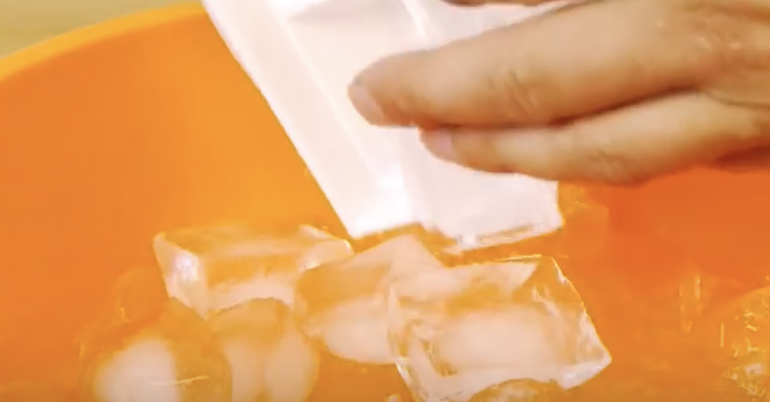
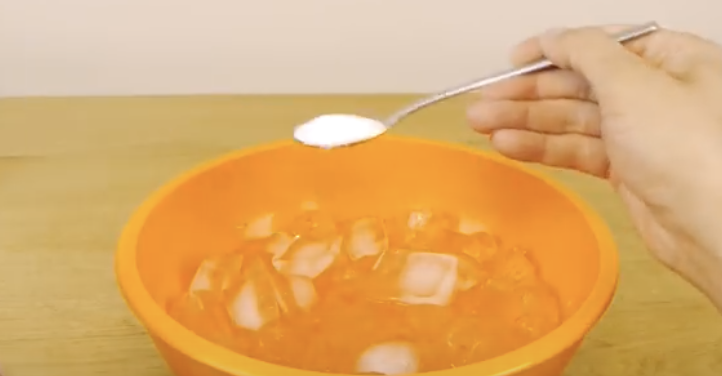
Nothing is as refreshing as an ice cold beverage on a hot summer day. And nothing is as disgusting as chugging a can of warm soda or beer that you thought was cold. Well, chugging a hot can of something would be worse, but you get the point. This summer, if you find yourself stuck with warm cans or bottles that you want to drink sooner rather than later, try this trick from DaveHax. He shows us how to quickly bring a beverage’s temperature down from warm to cool by using 4 things that are in most everyone’s kitchen. All you need is a bowl, ice, water and salt, plus a warm beverage.
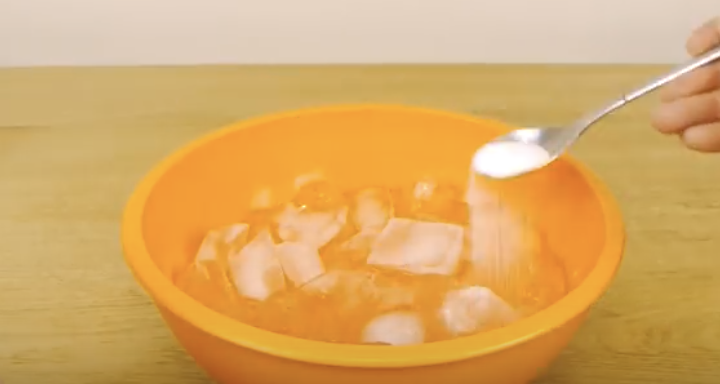
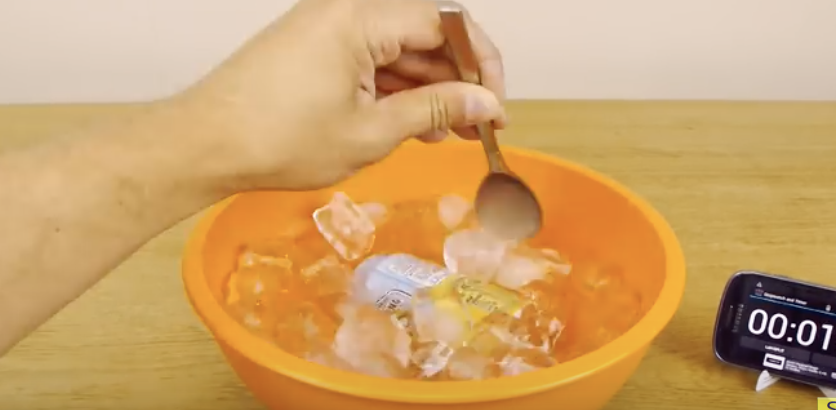
Put some water in a bowl then add about 1-2 tray fulls of ice to it. Sprinkle on a couple of tablespoons of regular old salt and mix it all up. Now place a can or two in the bowl, stir after one minute, and after 2 minutes the can will be cold. Take the can out of the bowl, open, drink, and enjoy!
DaveHax explained the science behind this bevy hack by attributing it to the second law of thermodynamics, which states that 2 substances with different temperatures reach thermal equilibrium over time. He said that the salt causes the ice to melt faster but it needs to draw heat energy from somewhere, wherever it is possible and present, to do so. Here it was from the warm can.
Thus, the can rapidly cooled down as the salt melted the ice even faster than it normally would have. The 2 different temperature things, the lemonade can and the ice, transferred their heat and cold to one another as they went towards thermal equilibrium, with the salt added to speed it up.
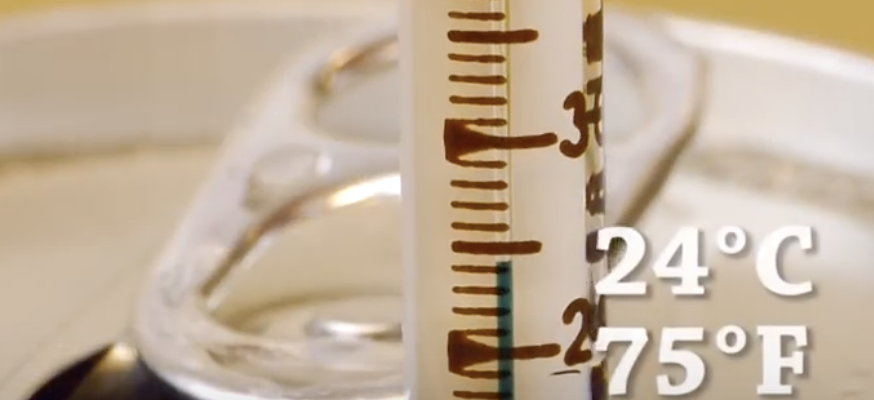
The temperature change was measured and shown to us in the video to prove the point. The lemonade started at a room temperature of 75 degrees Fahrenheit/24 degrees Celsius. After it chilled the can temperature measured 41F/5C, which means it dropped down a total of 34F/19C in just 2 minutes.
This method works great with soda, beer, juices and any other drinks that come in a can or bottle. It works wonders for all those people out there who hate waiting over half an hour or more for a drink to cool down in the fridge, or those like myself, who are just impatient. Now you can quench your thirst in minutes with a delicious ice cold beverage and skip the painful wait!
Please SHARE This Trick With Family and Friends


