
This Guy Started Rubbing Toothpaste All Over His Headlights. When He’s Done I’m Grabbing A Tube!
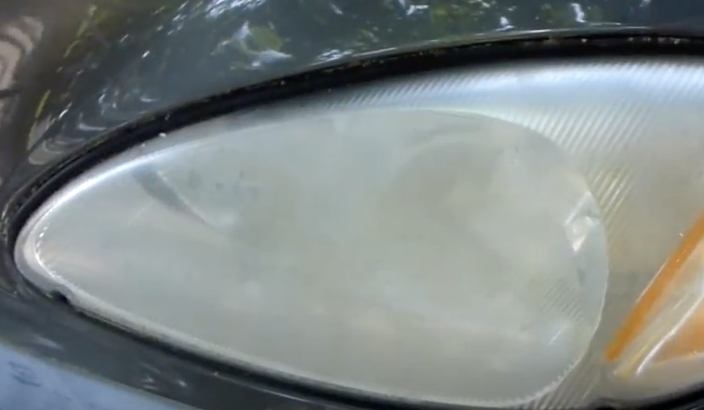
Headlights are an essential part of any vehicle for obvious reasons. The cleaner they are the better you can see and be seen by other drivers. If the lights are hazy and dirty, which they inevitably become over time, then the light output from the bulbs get diffused. This makes them seem dimmer, weaker and less effective.
The light beam ends up covering a reduced area and poses a safety hazard, which is the last thing you want because driving is already dangerous enough. If you noticed that your vehicle’s headlights have this issue then try this quick and easy method to clean the plastic covering. All it takes is toothpaste, a bottle of warm water, paper towels, and a smidgen of wax.
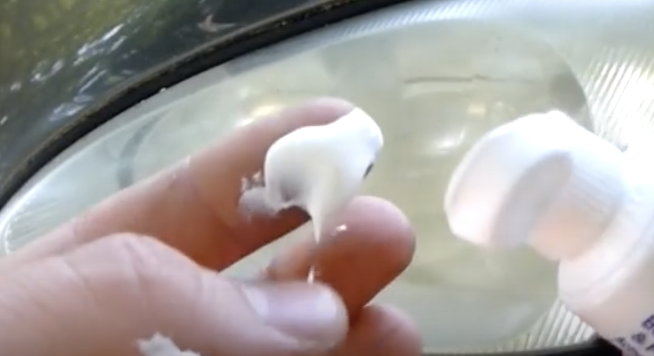
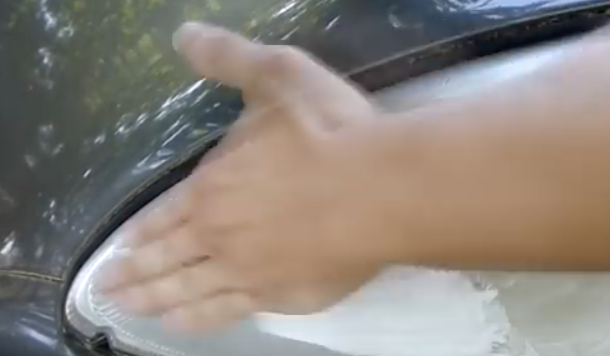
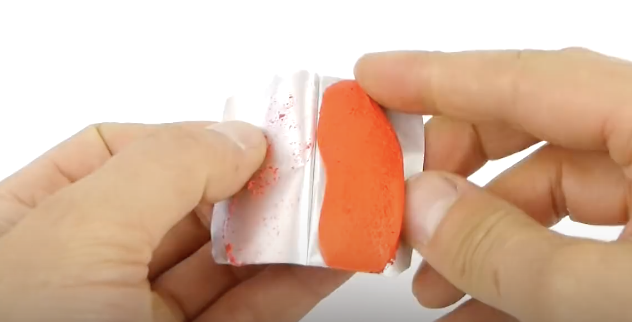
This quick fix works if your headlights are yellowing on the outside, pitted, and not smooth. However, if the headlight is smooth on the outside it won’t work. You will need to use a toothpaste with a gritty texture to it, like ones with baking soda and peroxide or a whitening version.
Do not use gel formulas, only pastes work, and if you need more grit try adding baking soda to it. Start by rubbing on a good amount of toothpaste onto the light and you can use a toothbrush to keep your hands clean. Work it in really well and soon the paste should start to turn yellow, with dirt and grime begging to come off onto the brush.
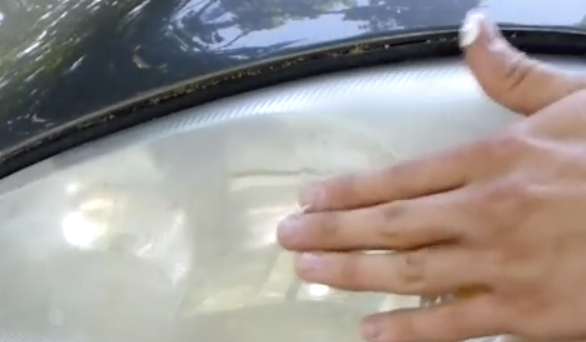
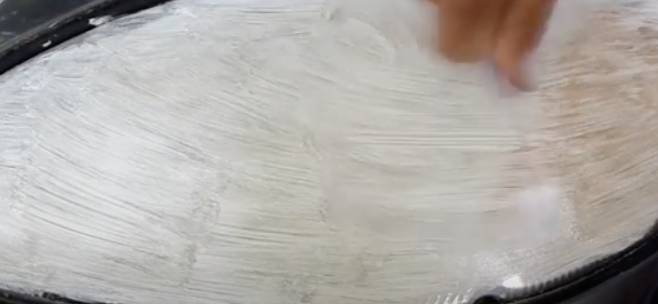
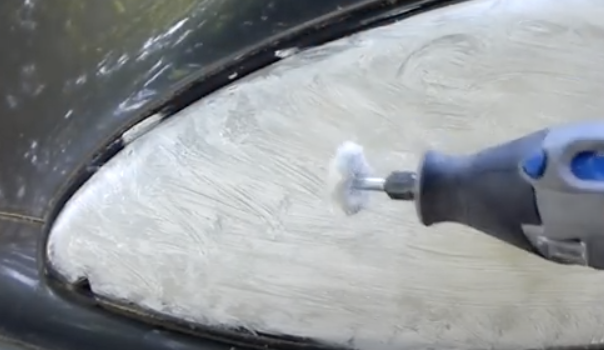
Then grab a spray bottle filled with warm water, spray the light, and rub it off with a paper towel. Apply a fair amount of pressure while buffing it away and when almost done get a clean paper towel and remove the last of the residue. Finish it off by applying a dollop of wax to it, wait for it to dry, then buff it off.

The older and more yellow the light the longer you will need to rub the toothpaste into it and if the light is still hazy, or you feel that it needs to be cleaner, apply more toothpaste again to try and get it cleaner. Adding wax at the end forms a protective layer over the now clean light and keeps it from becoming yellow again so soon.
The best part about this hack is that it cost maybe a dollar, not even if you have a tube on hand that’s the right kind then it’ll only cost a few cents. Store bought headlight restoration kits sell from anywhere between $15-25 so this is the cheapest way to clean them by far. Hopefully this trick will work for you and restore your car’s headlights to their former clear and shiny glory! Be safe and pass the video on to keep others informed.
Please Share This Trick With Family and Friends
This Woman Places 12 Jolly Ranchers In Each Bottle Of Vodka. When She’s Done YUM!

Vodka is the number one distilled beverage in the world according to consumption and sale rates. The popular hard alcohol of choice is incredibly versatile and often used in mixed drinks since it pairs well with almost everything, although many also prefer to sip it plain or shoot it down.!
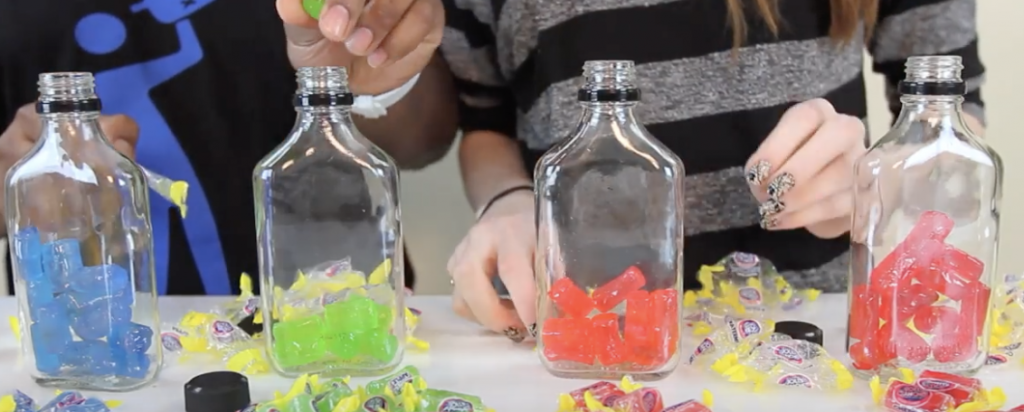
The thousands of commercially available vodka brands offer many unique flavorings in addition to the plain unflavored type that include smoked salmon, bacon, sriracha, tobacco, fresh cut grass, and even electricity (huh?). You can even make your own flavored vodka right at home using just Jolly Ranchers and turn one bottle of plain vodka into 5 different flavors!
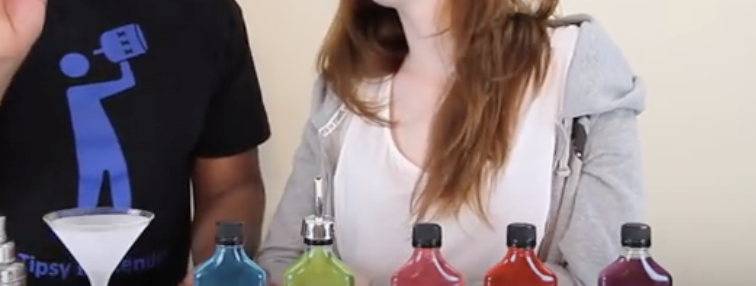
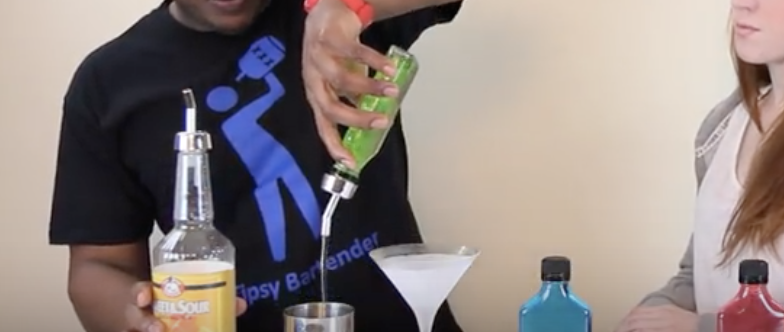
This tutorial is for those with a more traditional palette. YouTube’s Tipsy Bartender shows us how to make grape, cherry, watermelon, sour apple, and blue raspberry flavored vodkas using a bag of Jolly Rancher hard candies.
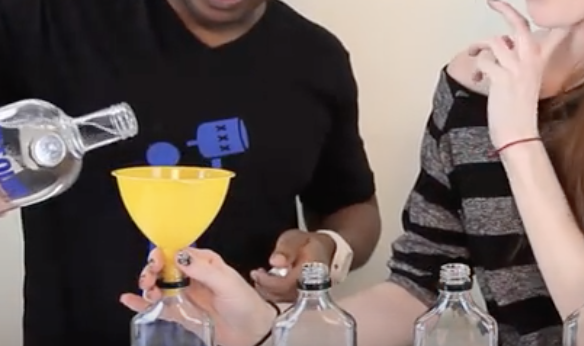
You will need 5 small bottles, ranging in size from 250-375 milliliters (mL), and approximately 12 Jolly Ranchers of each flavor. Depending on taste preferences and bottle size, you can try experimenting with more or less candies to adjust the sweetness and flavor factor. Unwrap the hard candies and place 12 of each flavor into a separate bottle.
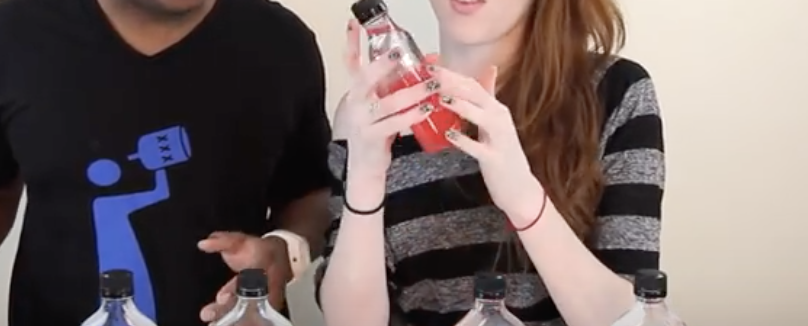
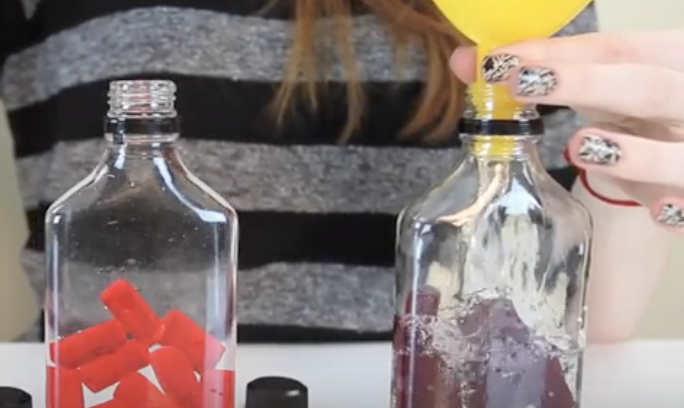
Pour unflavored vodka into the bottles and to make the transfer easier and less messy use a funnel. Replace the cap and refrigerate the Jolly Rancher bottles for at least 24 hours. When you take them out the bottles should be brightly colored and the candies fully dissolved.
For a drink idea that uses the yummy new concoctions, the Tipsy Bartender showed us how to make a Jolly Rancher sour apple martini. In a cocktail shaker combine 2 ounces of green sour apple vodka with 1 ounce of sweet and sour, shake it up, pour into a martini glass, and top if off with a few cherries for a garnish. The cocktail not only looks pretty, but it also smells good and tastes delicious!
Please Share This With Family and Friends
Woman Starts Cutting Into Her Old Leggings. When She’s Done Its Absolutely Stunning!
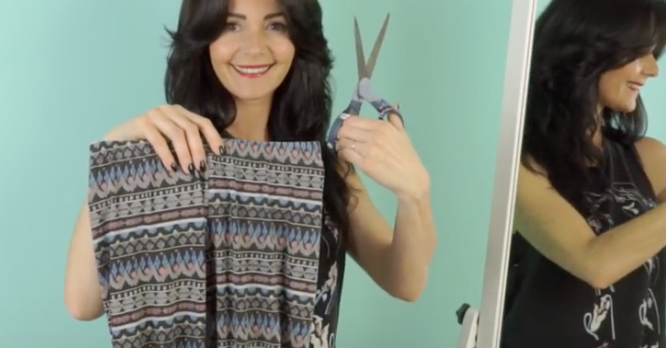
Do you have an old, tired pair of leggings taking up closet space? Instead of donating or tossing them out try getting creative and give them a style upgrade. With just a pair of scissors you can transform your leggings into a cute new crop top shirt. This DIY tutorial on the Handimania YouTube channel shows how to easily do it and it’s impossible to mess this one up. There is no sewing necessary and you can do this in under a minute so be sure to check it out and try it later. Plus, who doesn’t want a shirt that’s basically free, which looks great on, and that you can say you made!
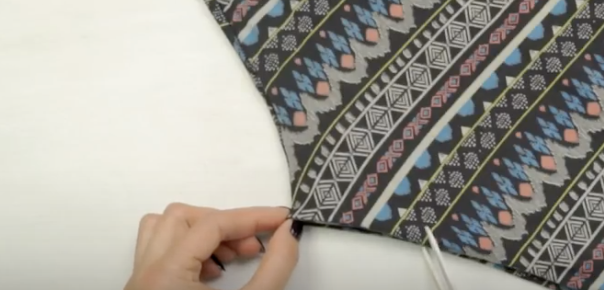
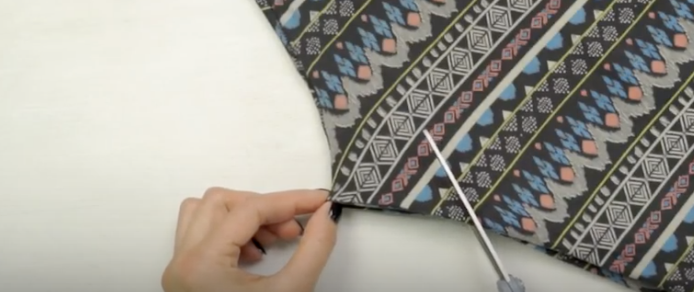
Start off by laying out the leggings on a flat surface and fold them in half the long way, so that one leg overlaps the other and rests directly atop it. Smooth the fabric as evenly as you possibly can and then grab a pair of scissors.
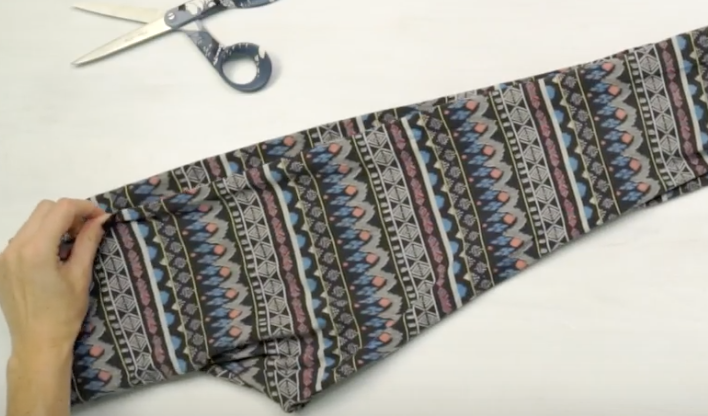
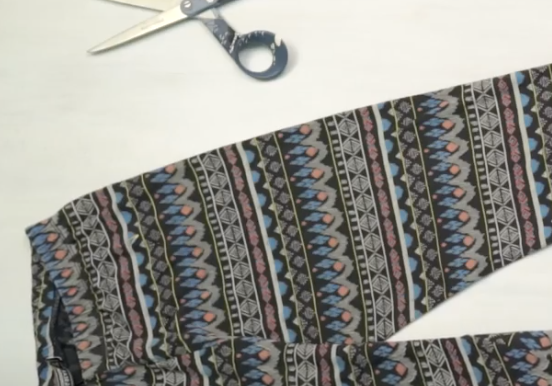
Pinch the seams at where they meet in the crotch area and pull the fabric tight with one hand. With the other hand begin to cut, starting from about an inch or so below where you are pinching. Cut out a half-circle shape, which will become the neckline for the top, and it can be further adjusted to get the desired fit you’re looking for. The legs are now sleeves and the waistline is now the bottom part of the shirt.
This fashion trick is the perfect way to up-cycle and reuse leggings that no longer fit or ones you love but wore too much. It actually looks great too and you only need to make one cut, so there is no reason why you shouldn’t try this today!
Please Share This Trick With Family and Friends 🙂
This Guy Taped Tennis Balls In The Shoe Closet. The Reason Is Genius.
It can be a pain in the butt when you have to hang things up or secure items into place. Most adhesives, like tapes and glues, are hard to work with and end up getting all over the place. Plus, they often leave behind a sticky residue that can ruin nice furniture and walls. Not to mention how ugly and unpolished they end up looking.
Instead of using the less than ideal sticky options you are used to seeing, try Sugru. It’s a new product that is billed as a glue that you can mold and work into shape. After a short time it sets and ends up drying into a flexible, strong rubber. YouTuber DaveHax created a short video that illustrates all the different ways to use Sugru and this stuff looks like a do-it-yourselfer’s dream.
The first thing he did was use it to repair things, such as a frayed cable. All he needed to do was wrap some Sugru around the broke part, wait a couple of hours, and that’s it. The cable was salvaged and stronger than ever, thus eliminating the need to buy a pricey replacement. Then he demonstrated how Sugru can easily fix holes in shoes by simply smearing it into the rips.

Once it sets the shoes won’t keep tearing and are even waterproof. Other cool uses for Sugru include customizing keys by wrapping some around the top part, and color coat individual ones, to easily tell them apart. You can even place the rubber-glue on smooth surfaces, like porcelain, and make convenient toothbrush holders.
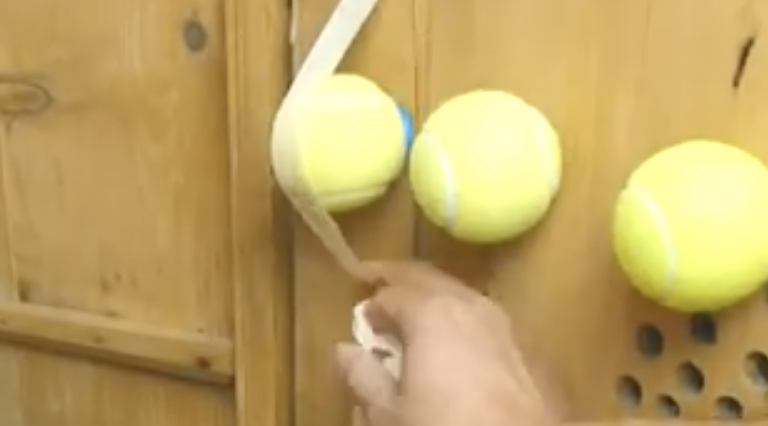
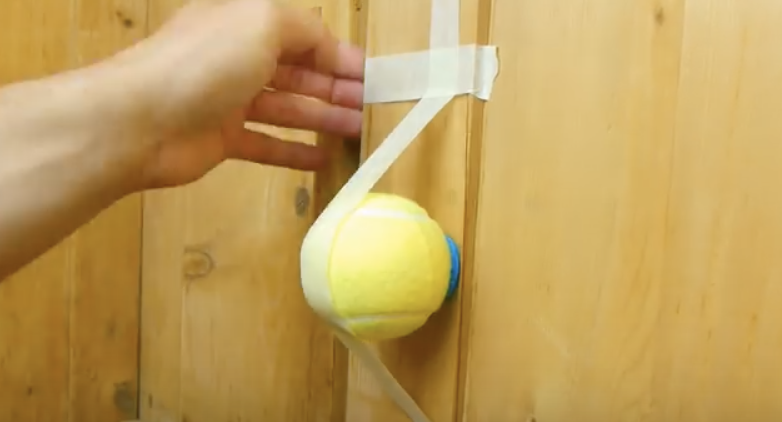
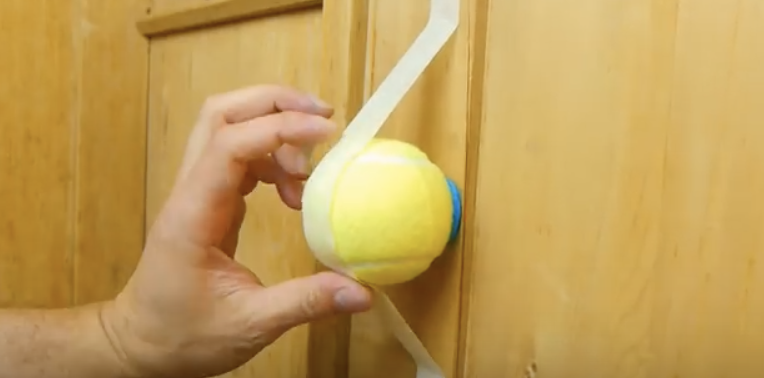
Then there was the tennis ball trick that turned out to be a clever way to store shoes. Just stick some Sugru onto a tennis ball and attach it to some on the inside of a cabinet door. Place some tape over the glued ball to hold it in place while it sets, then remove it the next day. Now you can hang up shoes on the inside of the closet door and make use of space you were unable to before! I love this idea and have to try this.
Please Share With Family and Friends
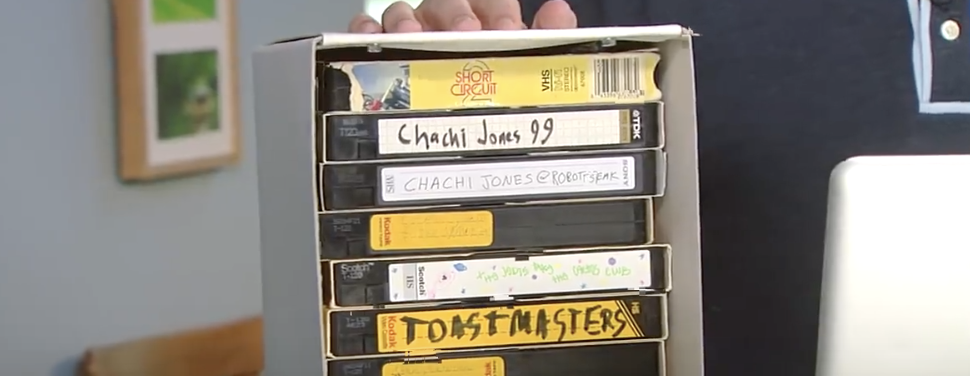
Have You Ever Thought About Transferring Your Old VHS Tapes To Your Computer? This Is How It’s Done.

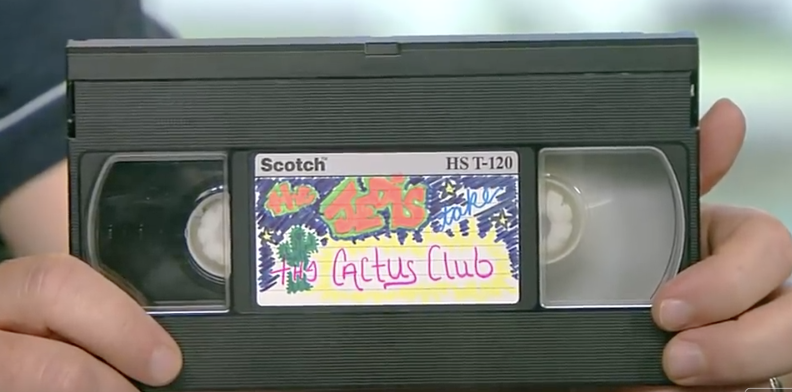
Technology is constantly being improved and advanced, which has led to a number of once new and innovative products being rendered obsolete. VHS players are a perfect example, as the previously popular and must have items are now a thing of the past. As a result, many people’s collections of VHS tapes go unused, sit in boxes, and take up space around the house. If you want to preserve the homemade videos and memories they contain then transferring the tapes onto a computer is the ideal way to go. By saving them in a new, updated format you can easily share them with others, edit the content, and watch videos without having to break out the old VHS player.

In this quick how-to video CNET senior editor, Donald Bell, walks us through the process of transferring VHS tapes to a computer. He makes clear the point that this is for archiving home video footage only and not copyrighted TV shows or movies. It is illegal to duplicate and/or distribute those programs and doing so violates their copyrighted content and can get you in a lot of unnecessary trouble.
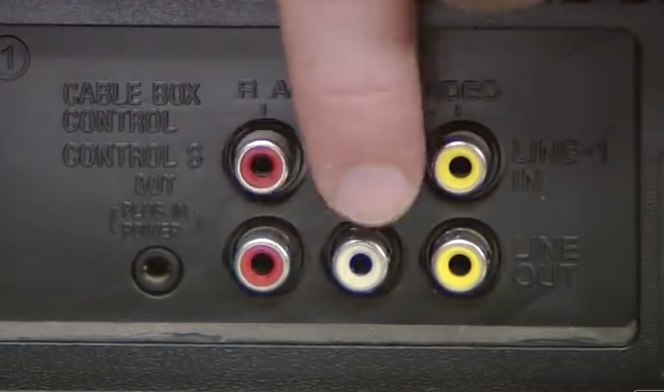
To do this transfer you need a VCR player with audio and video output, VHS tape(s), a computer with room on the hard drive, and a compatible adapter to connect the computer and VCR. An hour of video will take up approximately 750 megabytes of storage on your computer’s hard drive, so if you prefer to save space on your computer use an external hard drive. Also, the adapter must be compatible with the type of computer you’re using, a PC or Mac, or it just won’t work.
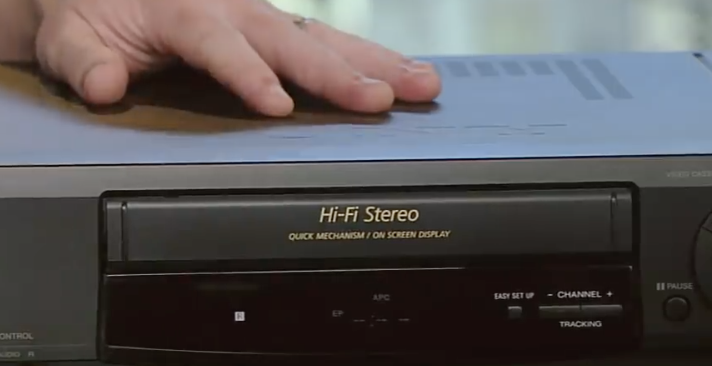
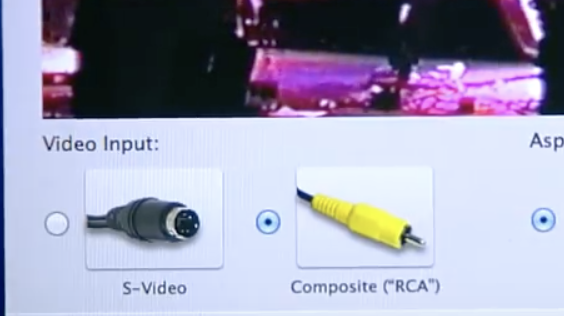
First, plug in the adapter’s color coded ends to their matching connections on the backside of the player. The yellow connection is for video, white is for mono audio, and white/red is for stereo audio. Install the software that’s included with the adapter and follow the steps it takes you through until you’re able to see and hear the video, which shows that you are properly connected.
At this point you may name the file and start the transfer. Press the record button and hit play on the VCR to record in real time, which means you have to wait for the whole thing to play through, and press stop recording when you’re done. Now you can edit out any unwanted portions from either the beginning or the end of the video.
Finally, it shows you a file path to the location of the file you just created, plus options to watch, upload or further edit the video. Now you can burn the videos onto DVDs or transfer them to other computers and throw out the bulky VHS tapes or put them in storage for good!
Please Share This Tip With Family and Friends
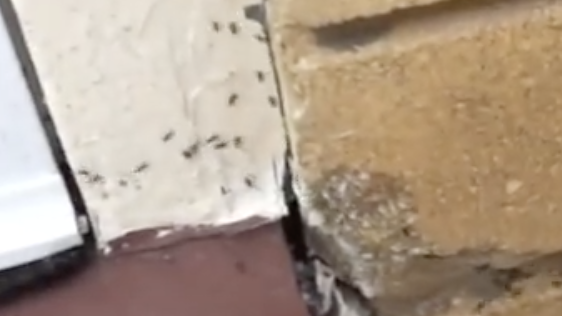
Do You Have An Ant Problem? Get Rid Of Them For Good This Year Naturally With This Simple Trick.
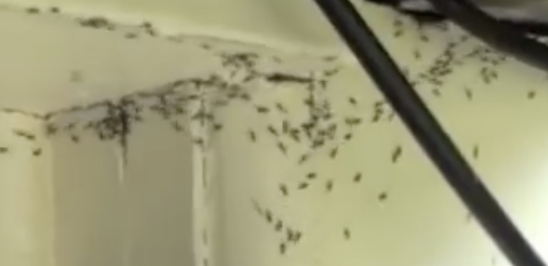
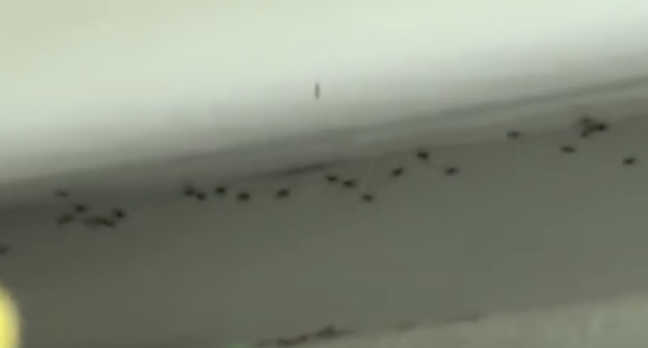
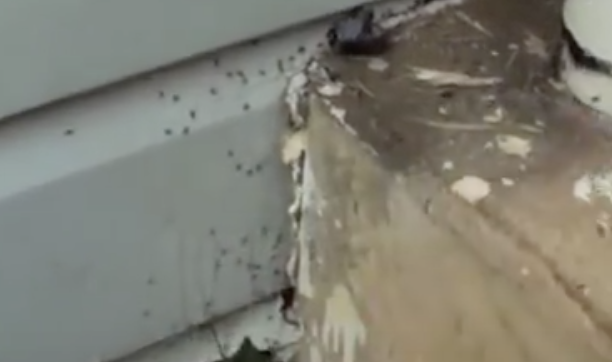
Ants can be found all over the world, but one place nobody ever wants to see them is inside the house. Even if you see one lone ant, chances are that hundreds more are lurking nearby. If you do happen to have an infestation or need to get rid of a few pesky ants, definitely try this simple and all natural solution.
It’s much safer than using harsh, toxic, chemical based insecticides like Raid, and just as effective. Best of all it’s cheap to make, so stir up a batch and restore your home to an ant-free setting.
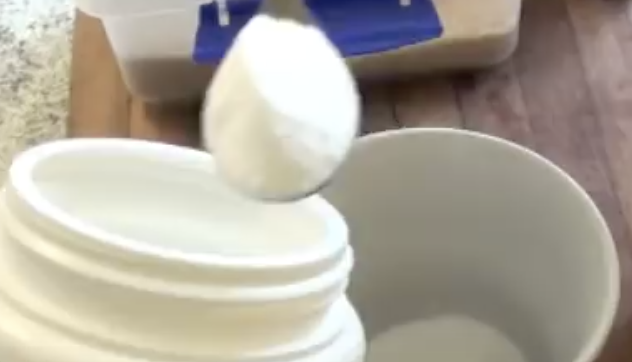
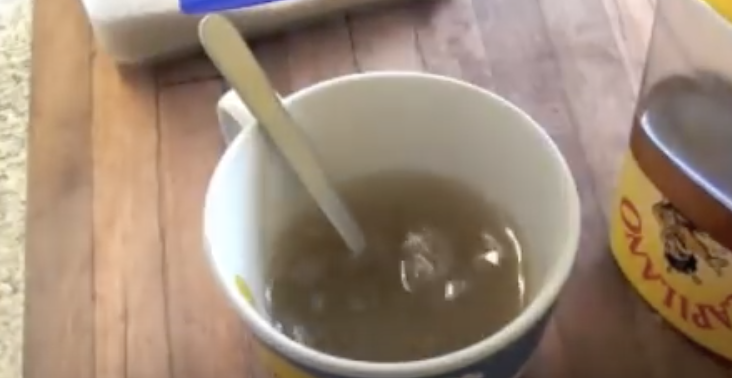
This ant control solution requires hot water, borax, sugar, honey, and a spray bottle. First, boil up some water. In a cup combine 6 teaspoons of sugar with 6-8 teaspoons of Borax. Pour in some boiling water and stir until it is completely dissolved.
Then add some honey to the cup, and more hot water if you need to, and stir it all together. Once it has cooled, pour the mixture into the spray bottle and go find some ants to get rid of.
Only use this spray outside the house, it is safe to use on plants as well. Spray the mix on and around ant trails and focus on cracks and places where they may be entering the house. Allow the solution to pool in high problem ant traffic areas and spray around the foundation.
Do NOT let pets or animals near it because they can get very sick if they lick or ingest it. You can take a small plastic bottle cap or similar object and pour some of the solution into it, then place it somewhere that animals can’t reach. To be extra safe, block access to the mixture even further, by placing a pot or cover over it.
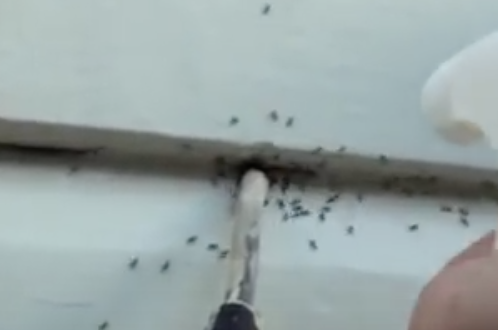
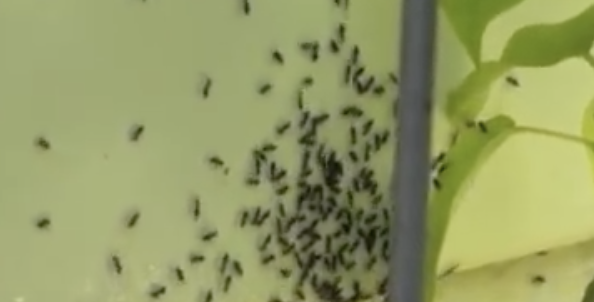
The ants will be attracted to the sugar and honey, then they will tell their fellow ants about it and lead them to the sugar source. Once they ingest it, the borax builds up a gas inside of them which causes their death.
It’s a great way to get rid of carpenter ants that may be causing a lot of damage to the house, deck areas, and stored lumber or wood piles. The comments in the video say that it works well and since it can be made for around fifty cents, you may as well try it!
Please Share This Tip With Family and Friends


