
Apples Begin To Brown Right Away. This Brilliant Trick Will Keep Them Fresh For More Than 24 Hours
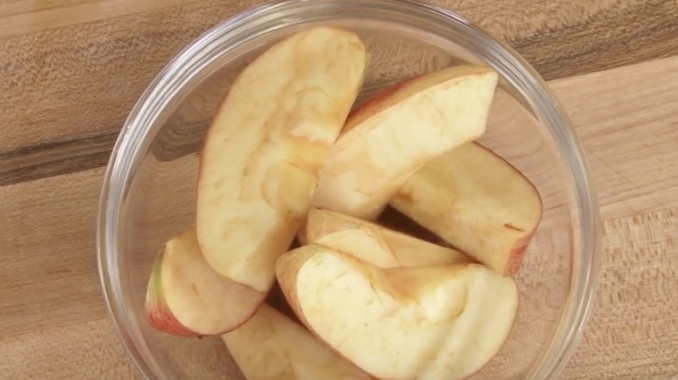
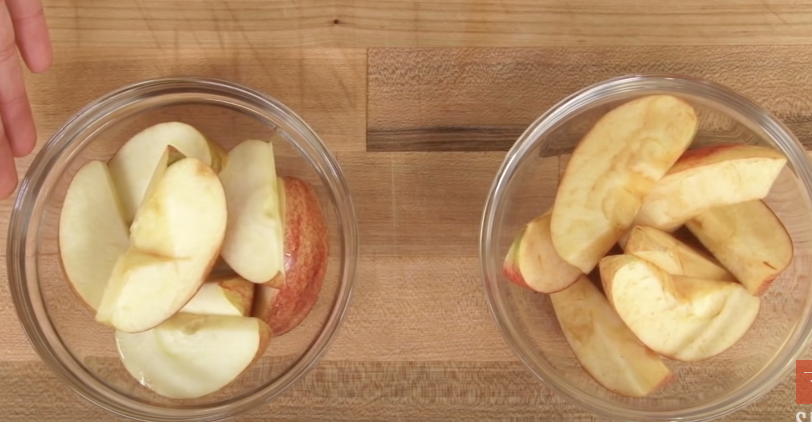
Have you ever toiled over a fruit salad just to have it turn brown before you have even finished making it? Fruit browning can ruin the presentation and texture of any dish that contains susceptible fruits. Many people use lemon to keep the fruit from browning and to keep it fresh and crispy for longer. The downside is that lemon changes the flavor of the dish, which can sometimes be good, but other times can have a negative impact on the flavor. Watch this video to find out a trick that will let you keep your fruit fresh for even longer, without negatively impacting the flavor!
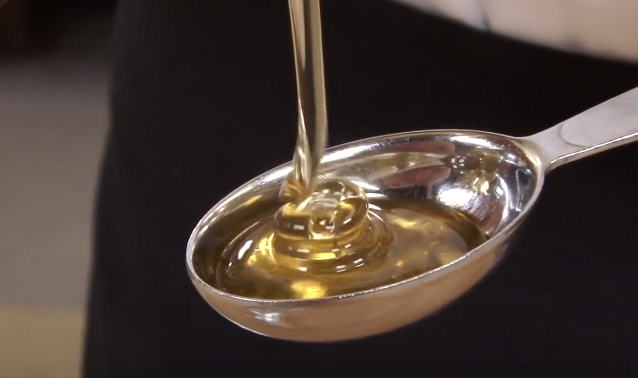
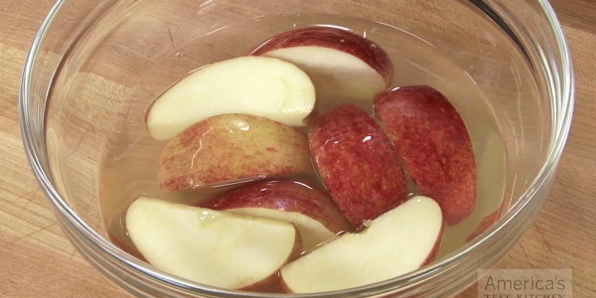
So what is the secret? One of Nature’s most magical substances, honey! The honey that is eaten by humans is made by honey bees from the nectar of various flowers. Due to its chemical properties, it can be stored for an incredibly long time without going bad, if stored properly. There are examples of honey being preserved for centuries, and it was even used as a preservative in ancient Egypt.
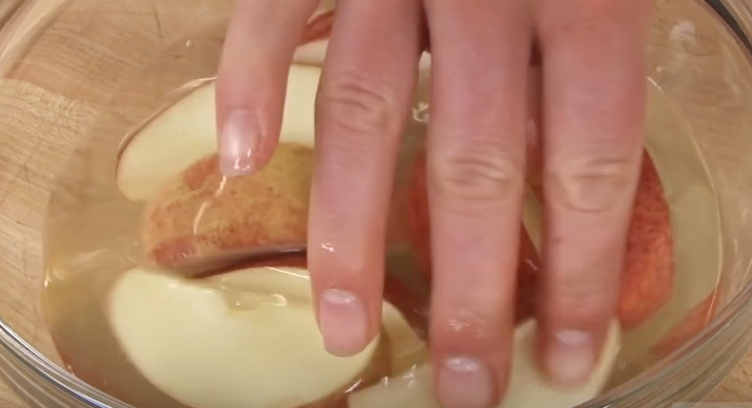
Browning happens because of an enzyme called polyphenol oxidase, and the honey contains a compound that counteracts the enzyme and stops the browning. The most common fruits that are susceptible to browning include apples and pears, but the problem is not limited to fruit. Potatoes and parsnips are also prone to browning, and this trick works on them as well!
Have you found this trick to work on any other fruits or vegetables?
Please Share This Tip With Family and Friends
She Paints Orange Eyeshadow Over Her Tattoo On Her Foot. When She’s Done It’s Awesome!
Tattoos are becoming increasingly common and can be found on people’s bodies all across the world. It was only a few decades ago that the body art used to be frowned upon and was somewhat taboo. However, it has now been accepted by the mainstream and embraced by many in society. Tattoos are here to stay and if you have one, two, ten, or 100, you may find this video helpful. It goes over an easy and effective way in which you can cover up a tattoo at home using inexpensive and widely available makeup items.
The video is featured on YouTube channel Nibbles Official and the Australian host named Michelle starts it off by explaining that the tutorial is for those times and events which call for tattoos to be covered up. Not every workplace, office, or even family is open and accepting of tattoos and thus a lot of people need to conceal their body art. Of course, some people may want to cover it for other reasons, and this method is how it can be done.
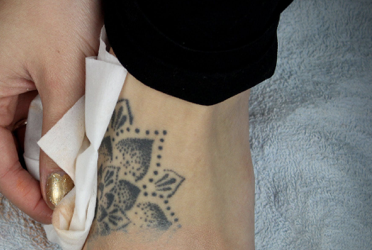
First, prepare the area you want to cover up by shaving it, if you can, and then smooth on some moisturizer or a similar type of face primer. Take a foundation brush and apply a dab of liquid foundation to the area. Next, determine whether your skin tone is more orange or pink, and then apply that color lipstick or matte eye-shadow over the tattoo. Michelle recommends eye shadow because it works better since it does not smear like lipstick tends to.
She also stresses that you should dab the pink or orange makeup onto your skin, don’t wipe it on, and this step takes a lot of makeup. Once it’s covered take a can of hairspray and spray over the entire area, allow it to dry, and then apply a second layer of makeup directly over it. Coat with hairspray again and wait for it to fully dry. At that point you can take concealer that matches your skin tone and dab it on with a sponge applicator over the eye-shadow or lipstick area, then spray it with another coat of hairspray.
When that coating has dried completely you can begin to dab on more concealer and this time you may apply it directly onto your skin. Work in such a way that blends the concealer outwards and around the tattoo, so that the edges of the makeup you applied don’t stick out so obviously.
After, take a matching skin tone powdered makeup and dab it over the entire area, blending well as you go. Finish up by further blending any areas that need it. If you want you can use another coat of hairspray to ensure the makeup stays in place. This is recommended for areas that might get disturbed or rubbed a lot, such as near hems, cuffs, or necklines.
That is the entire lesson taught in the video and if you’re interested in learning more details be sure to check it out. It may seem like a lot of work, but when it’s all said and done you can rest assured knowing that your body art is securely concealed!
Please Share This Tattoo Hack With Family and Friends 🙂
She Places A Bunch Of Marbles In A Bowl Then Bakes Them In The Oven. When She’s Done It’s STUNNING!
Marbles are neat little balls of different colors and sizes that can be used for just about anything you can imagine. Some people collect marbles and are always on the hunt for rare pieces, designs, and colors. Even if you don’t collect them, it’s more than likely that you played with them when you were younger, and there are a bunch of games centered around the cool looking spheres.
While some marbles are made out of clay, metal, or plastic, they most commonly come in glass form. If you have a bunch of them at home collecting dust, dig them out and give them a new life with this neat “fried marbles” craft project.
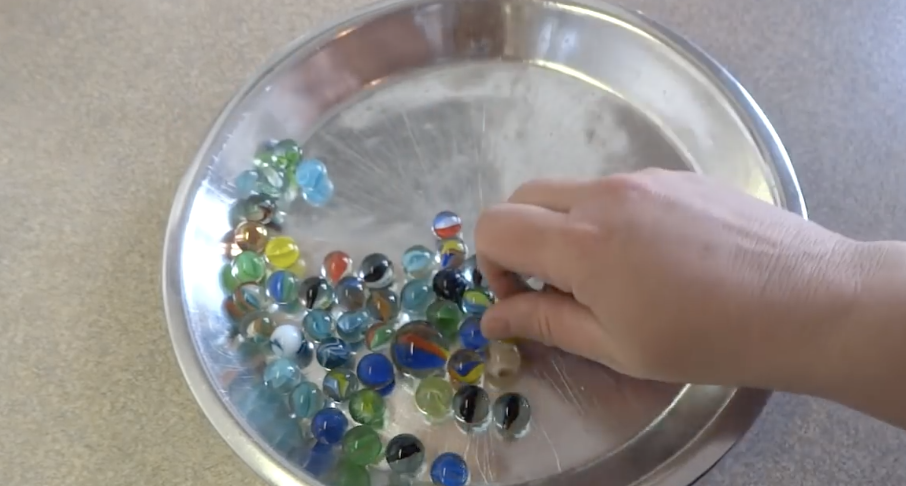
The “fried marbles” are actually oven baked, and when you follow the steps outlined below and in the video you will end up with beautiful, crackled, unique looking marbles. To start, all you need is some glass marbles. Any size or color will work but the plain, clear, glass ones seem to work best.
Place them in a pie pan, or any other similar type of oven safe container, and pop them into the oven that has been heated to 500 degrees Fahrenheit. Bake the marbles for about 20 minutes and while they are heating take a large bowl and fill it with cold water.
Place a few ice cubes into the water because you want it to be as ice cold as possible. Take the marbles out and carefully pour them into the ice water. They should immediately crackle and shatter on the inside and end up looking like the ones in the video. A few of them may crack and break in the oven or when you place them in the cold water and you can just toss those out.
The neat effect is caused by the glass suddenly cooling from an extremely hot temperature to ice cold. That’s what makes the insides of the marble shatter and gives them the distinct, pretty, and unique look that reflects and refracts light much more beautifully than plain old marbles ever could.
You can use these little gems to decorate around the house, place them in a fish tank, use them in arts and crafts projects, or make jewelry out of them (the YouTube video has links for that). Also, while the woman in the video notes that in all of the times she has done this she’s never had any of the marbles explode, there is always the possibility it could happen.
To be extra safe, wear safety glasses, and if you are doing this project with children don’t let them handle anything hot and supervise them closely. This is definitely a cool project to do with kids on a rainy day, or any day, and you can even inject a science lesson into it that they will most certainly remember.
Please Share This Fun DIY Project With Family and Friends 🙂
Apparently If You Place An Ice Cube In This Spot On Your Neck 1x a Day For A Month THIS Happens To Your Body!
For as long as humans have existed on earth they have been searching relentlessly for the fountain of youth. The world has been explored all over, and its resources examined, for some secret, all-powerful, life enhancing elixir that could make humans ageless and endlessly healthy.
Today there are several areas of medicine and science devoted exclusively to studying and searching for the right combination of chemicals and plant extracts that can enhance beauty, all while halting or reversing the effects of aging and curing us of any and all ills.
Companies flood the market touting the latest and greatest breakthroughs and sell all sorts of creams, serums, crystals, magnets, and so on, to consumers who eagerly snap them up. Most of these things promise the world but don’t work as hoped.
Perhaps the answer lies not in the modern, complex products being sold to us, but rather in simple, ancient practices developed centuries ago. If you go the latter route, you inevitably discover that there is an easier, more affordable, and all natural way to heal and refresh your body.
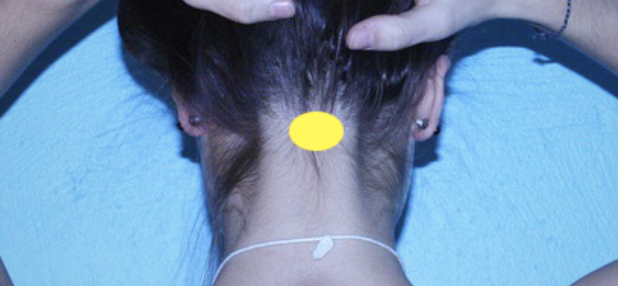
All that it requires is an ice cube and time. Start by laying out and relaxing on your tummy. Place an ice cube at the base of your skull on your neck (see the point on the neck shown in the video), and allow it to rest there for 20 minutes. Do this every day in the morning on an empty stomach, then again before you go to sleep in the evening.
This alternative method dates back to ancient Chinese medicine and pressure points. The point it centers around is where your head and neck meet at the base of your skull, which is known as the Feng Fu. Many people report feeling younger, more energized, and full of life after doing this everyday.
It has been said that this technique can provide a variety of health oriented benefits to your body, as well as boost your mood and mental health. The potential health benefits include improved digestion and sleep, reduced thyroid issues and PMS symptoms, relief from common colds, alleviated pain from headaches or toothaches, and overall reduced risks associated with lung and cardiovascular diseases.
This simple practice may just be the best route to go when trying to stay healthy and clean. It’s a great way to both start off, and unwind, after a long stressful day.
Please Share With Family and Friends
He Pushes A Nail Through A Candle And Rests It On 2 Cups. When He Lights It An Unexpected Surprise!
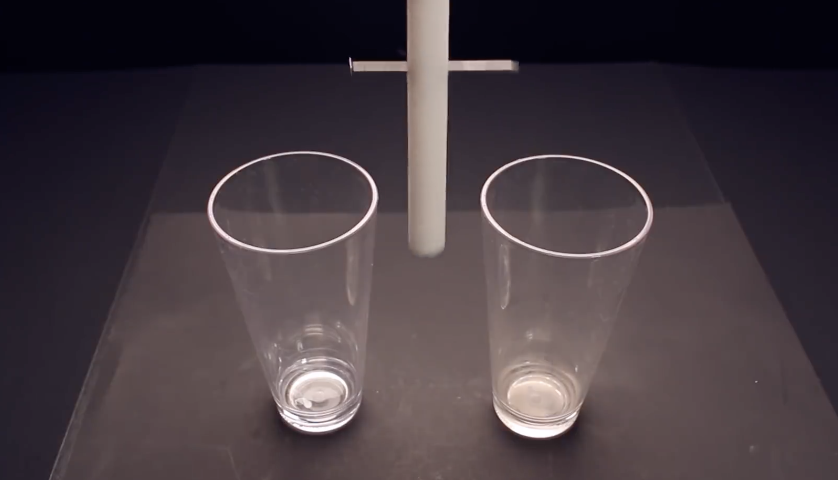
There is something about fire that grabs our attention and imagination. Humans have been transfixed by dancing orange and blue flames ever since the dawn of our time here on Earth. Nothing quite rivals the awesomeness of the strange and wonderful things that people have conjured up involving fire, whether it’s fire breathing or fire walking.
There are lots of other neat and amazing things you can do with fire, and this video will show you how to go about doing some of them. The video shows you exactly what you need to perform 10 different tricks that are guaranteed to both mystify and impress people. They are part magic, part science, and totally awesome.
In terms of ease of performance, the levels range from incredibly easy to more advanced, so there is something for everyone. Performing any one of these tricks will definitely leave a lasting impression on an audience and spark an opportunity for some great conversation.
Personally, my favorite is number 10 when you get to see what happens when steel wool is set alight. It looks so pretty and wild all at once, but it makes me wonder if it smells horrible. I’m definitely going to try a few of these tonight. Check out the video and see which one you like best.
Also, before you attempt to try any of these at home, make sure you use extreme caution at all times. Do not let children try these and supervise kids around fire and open flames. It’s always a good idea to have a fire extinguisher nearby, or a hose and water at the ready, because the last thing you want to end up happening is your house burning down.
And while the saying “don’t play with fire” is good advice, these tricks can easily be done safely if you exercise appropriate caution and supervise the flame at all times. Have some fun and only do this under supervision! Enjoy these awesome fire tricks!
Please Share These Fire Tricks With Family and Friends 🙂
She Puts A Headband On Her Head And Folds Her Hair In. When She Removes It In Morning It’s Stunning
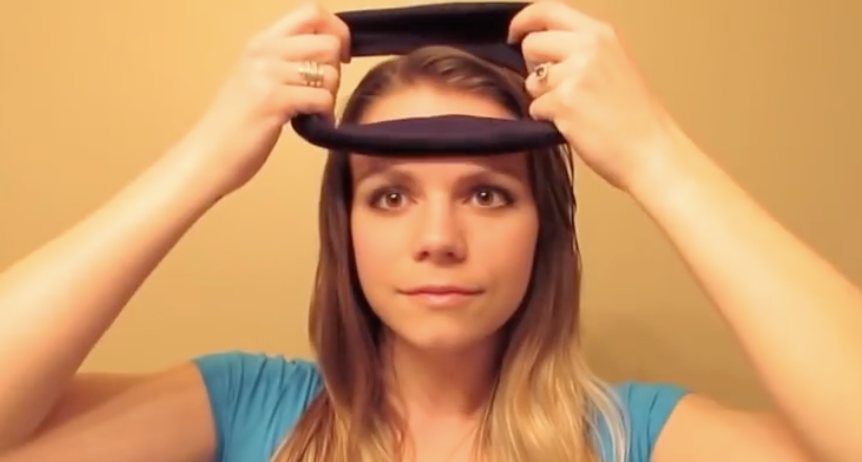
image via – youtube.com
Women have spent years using hot rollers, regular rollers, curling irons, blow-dry brushes…all in the pursuit of pretty manageable curls. The girl in the following video shows us how to avoid all these heat damaging techniques.
She demonstrates a clever way to create lovely curls on her straight hair, but this also works for curly, kinky and frizzy hair. The bonus is that without the horrible damage that heat does to our hair, you can achieve beautiful shiny, bouncy curls, while you are sleeping!
Using a regular stretchy headband, watch this demonstration that gives you perfect romantic-looking, sexy curls. You will see her put it around her head, 60’s hippy style, and dampen it with a little sea spray. She then winds her hair around it section by section. Wait until you see what this straight hair looks like in the morning when she removes the headband.
I, who have naturally curly hair that has a mind of it’s own, and some frizz, tried this technique. I got the same results! When you remove the headband, style it with your fingers, and finish with the cream or hairspray of your choice. The curls hold for a couple of days until your next wash! Sleeping on this is completely comfortable, but if you want a quicker result, you can achieve this look in an hour, if you have curly hair.
I’ve done this a few times and once I’ve started the twisting through the headband I don’t even have to look in the mirror. I just watched some TV and actually found the process relaxing. Let us know if you will try this.
Please SHARE this Amazing Technique For Beautiful Curls Without Damaging Heat with your Family and Friends


