
She Starts Cutting a Pie Crust Using a Pizza Slicer. But When She’s Done YUM!
Apple pie fries are a fun and delicious take on dessert that everyone will love to chow down on. The ‘fusion’ food blends together the shape of fried potato sticks and their finger-food friendly functionality with the sweet, yummy taste of all-American apple pie. The pie fries are topped with salt, aka sparkling sugar, and served with a side of ketchup, aka warm gooey caramel sauce!
Even if you’re not a baker you can manage to pull this recipe off, it’s quick, easy, and much more convenient than making a traditional apple pie from scratch. They will make your house smell amazing and come out the oven all crispy, warm, crunchy, and sugary sweet. Is your mouth watering yet?!
Here’s what you need and how to make them:
Ingredients:
1 can of apple pie filling – 2 pie crusts (Pillsbury were used in the video) – 1 egg (for egg wash) – ¼ cup sugar – 1 teaspoon cinnamon – ¼ teaspoon of nutmeg – sparkling sugar (coarse, large grained sugar)
Directions:
Set the oven to 350 degrees Fahrenheit. While that’s heating up, place the can of apple pie filling in a food processor and pulse or blend it until smooth or the chunks are tiny. Lightly dust a flat surface with flour and lay out one of the pie crusts. Evenly spread the apple pie filling over the entire crust and then place the remaining pie crust right on top of it.
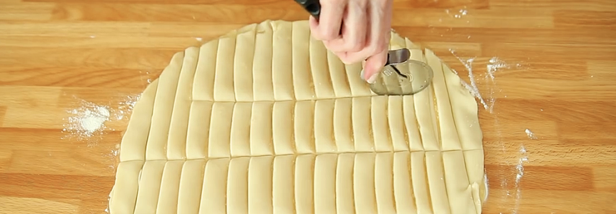
Use a pizza cutter to slice a series of vertical lines down the crust, then run a few horizontal cuts across it to make fry shapes. Refer to the video for a better idea on how to space the lines and exactly how large to make the fries. Cover a baking sheet with parchment paper and use a spatula to transfer the fries onto it.
In a bowl mix together ¼ cup of sugar, 1 teaspoon of cinnamon, and ¼ teaspoon of nutmeg. Make an egg wash by mixing one egg with a dash of water, brush it over the fries, and then sprinkle the sugar mixture over them. Lightly sprinkle them with a little bit of sparkling sugar before baking for 15-20 minutes at 350 degrees. Remove and allow them to cool before serving.
These taste great on their own but are definitely kicked up a notch when served with whipped cream, caramel, chopped nuts, or whatever toppings and dipping sauces you like!
Please Share This Recipe With Family and Friends 🙂
If You Have Dry and Cracked Feet THIS Simple Foot Hack Will Get Rid Of It For Good!
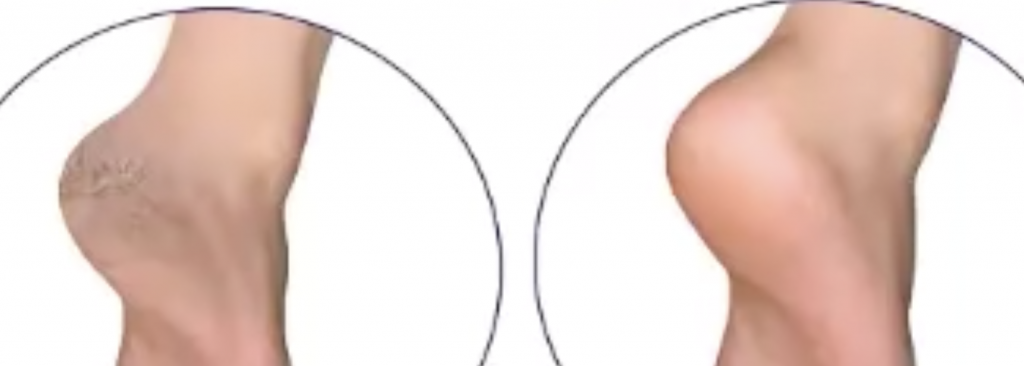
Dry, rough or cracked heels, is a common problem most people face at one time or another. With summer here, we become more conscious of it as our feet are exposed in sandals. The reason our feet suffer from intense dryness is that there are no oil glands in them, making sweat glands their sole source of moisture, as they bear the weight of our entire body each day!

As sweat glands alone usually aren’t enough to keep our feet comfortably moisturized, it is necessary to avoid things that cause excessive dryness. Finding home remedies that will replace moisture, needed to avoid uncomfortable cracked heels, is provided in the video you are about to watch below.
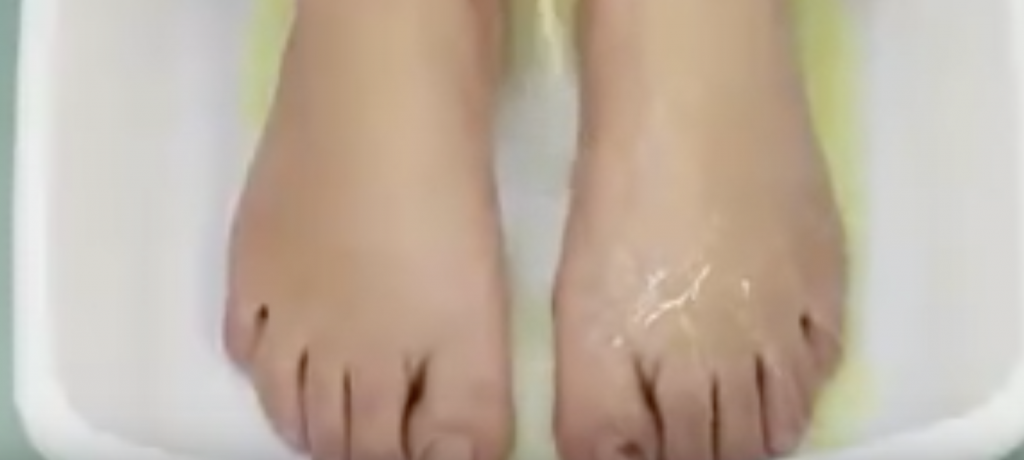
Cold weather, drying soaps, aging, low humidity, overly hot and prolonged showers and sun exposure are the usual suspects that contribute to dry feet, according to “Foot Vitals.” Their recommendations for home remedies include a 10-minute lemon juice foot bath, because the acid helps to dissolve dead skin; a homemade cream of olive oil mixed with lavender essential oil or lemon help to soothe and heel.

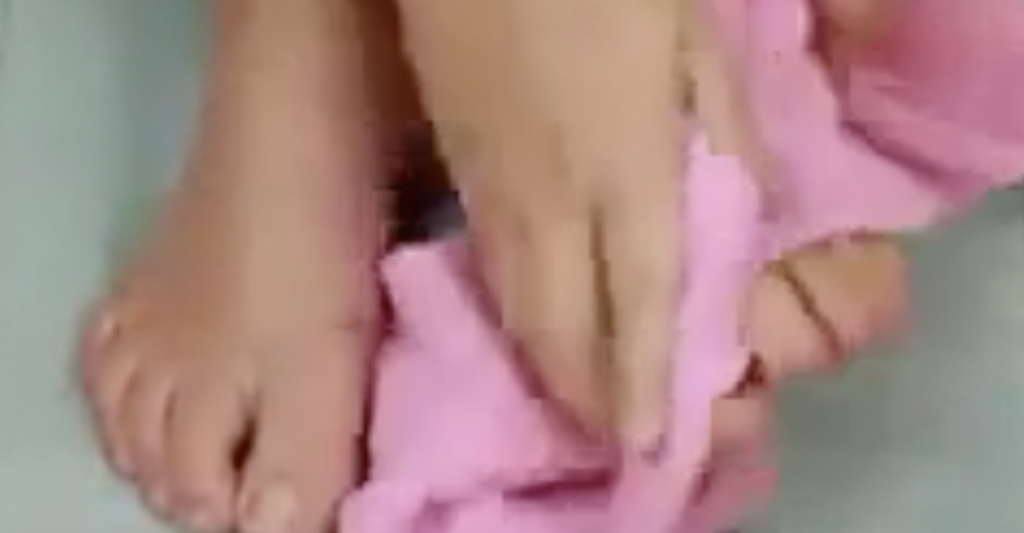
“Livestrong” recommends Vaseline spread over your entire feet and covered with cotton socks overnight for a great healing effect over time, as well as an exfoliating scrub with equal parts of olive oil and brown sugar for 10-15 minutes. Sesame Oil, Honey and Milk as well as some other great solutions are illustrated in the VIDEO below. It offers some easy-to-follow remedies to resolve troublesome cracked heels.
Please SHARE This With Your Family and Friends
He Cuts an X His Peaches As Soon As He Gets Home. But When He’s Done YUM!
Summer is the best time of year to eat fresh fruits and vegetables because it’s when the majority of them are in season. It’s also when we tend to crave them the most, especially sweet juicy peaches. When it gets hot and humid outside nothing tastes better than a ripe peach or two. They just hit the spot and are the perfect, most refreshing, light and healthy food to snack on.
While there are all sorts of different varieties of peaches readily available at the grocery store, freshly picked and locally grown options can be easily found at farmer’s markets and roadside stands. They often have the absolute tastiest fruits at bargain prices which have been picked right of the tree only hours before you buy them. If you come across any, pick up a bunch to enjoy both right away and later on in the year.
With this clever storage method, you can preserve fresh peaches and have them on hand all year round. The frozen fruits are perfect for blending into smoothies or yogurt and can be used to make baked goods or simply eaten on their own! So gather up a bushel of ripe peaches and prepare them for storage with the following list of items:
Large pot filled with boiling water
Bowl filled with ice water
Knife
Cookie sheet
Plastic wrap
Freezer-safe storage containers
The accompanying video from the Better Homes and Gardens channel covers everything you need to know about freezing fresh peaches so check it out for more information and read on below for instructions:
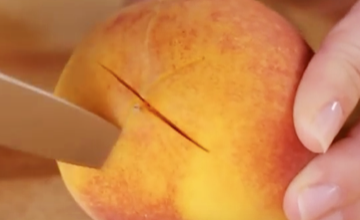
Bring a large pot of water to a boil and get the ice bath ready. Take a knife and on the bottom end of each peach slice a shallow X. Marking it like this is key because it allows for the fruit to expand when it’s cooking and it lets out pressure, so the peach won’t split open randomly or get mushy.
Place a few of the cut peaches into the boiling water at a time and remove them promptly after about 30 seconds. Transfer them immediately into the ice water and remove the skins once they’ve cooled down enough. Next, take out the pits, slice the peaches into evenly-sized pieces, place them on the baking sheet so they’re not touching, and cover it completely with plastic wrap.
Pop the baking sheet in the freezer for the night and the next day take it out. Transfer the frozen peach slices to freezer-safe containers and then stick them back in the freezer. Whenever you’re in need of a peach, you’ll have fresh ripe ones on hand that are ready to be enjoyed!
Please Share This With Family and Friends
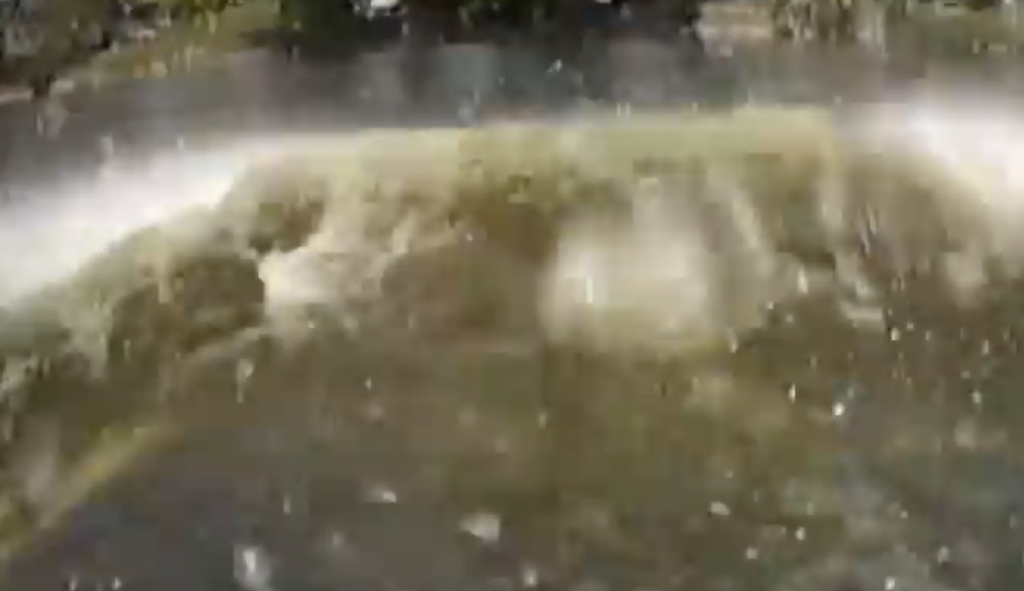
If Your Car Is Underwater and Sinking Quickly You Need To Do THIS If You Want To Live!
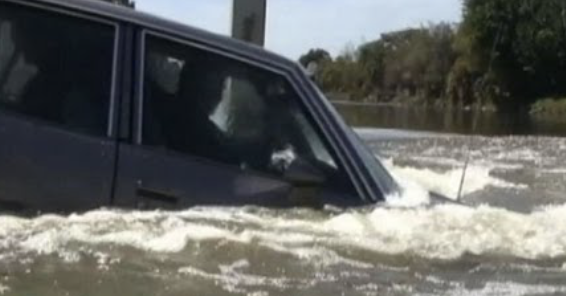
Imagine driving along down the road when suddenly a deer pops out of nowhere. Instinctively you swerve to avoid hitting it and in the process you lose control of the car and end up in a lake. Immediately the car starts to sink and it quickly begins to fill up with water! What do you do?
If you were inside of a sinking vehicle, would you know what to do? Many people have no idea what their best course of action would be in such a situation. They’ve probably never even thought about it before because the chances of that ever happening seem so remote.
In the United States alone it’s estimated that upwards of 400 people drown every year in cars that become trapped in water. While it may be rare, the possibility of it happening to anyone, anywhere, at anytime remains. As the saying goes, an ounce of prevention is worth a pound of cure.

If you know what to do and how to escape a sinking car, you’ll be much better prepared and more likely to survive the event. Most people panic and freeze when caught up in a flooded car because they don’t know what to do. Some try to call 911 for help, but by the time it arrives it’ll be too late and that type of reaction is more likely to get you killed than saved. Every single second matters and from the moment you hit the water the clock starts ticking.

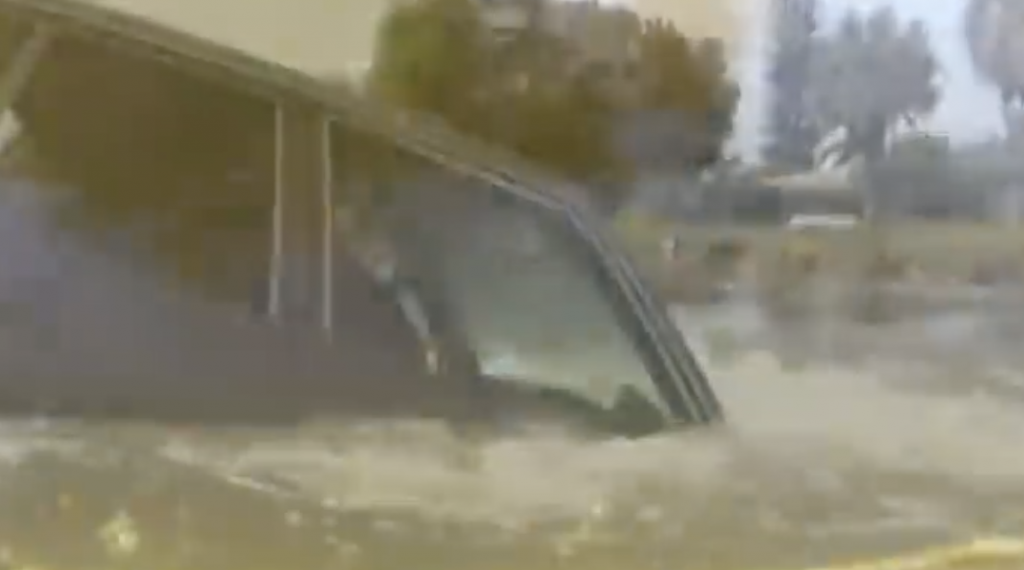
The main thing you want to do is get out of the car as quickly as you possibly can. The first thing you should do is roll the window down while taking off your seat belt. It’s vital to roll down the window because the water can cause a car’s computerized electronic system to malfunction or short out.

If you go under trapped in a car with rolled up windows and closed doors, getting out becomes all but impossible. Unless you have a special tool designed to break the car window, nothing short of superhuman strength will be able to smash through the pressurized glass.
Once the window is down and your seat belt is off, get out of the car as quickly as you can because oftentimes you have less than one minute to react and get out. If you are a passenger in the back seat of a car with windows that don’t roll all the way down, you’ll have to go out the front window. If there are young children in the back seat they need help from an adult and should be taken out of their seats and passed through the front window, after it has been rolled down and the adults seat belt unbuckled.
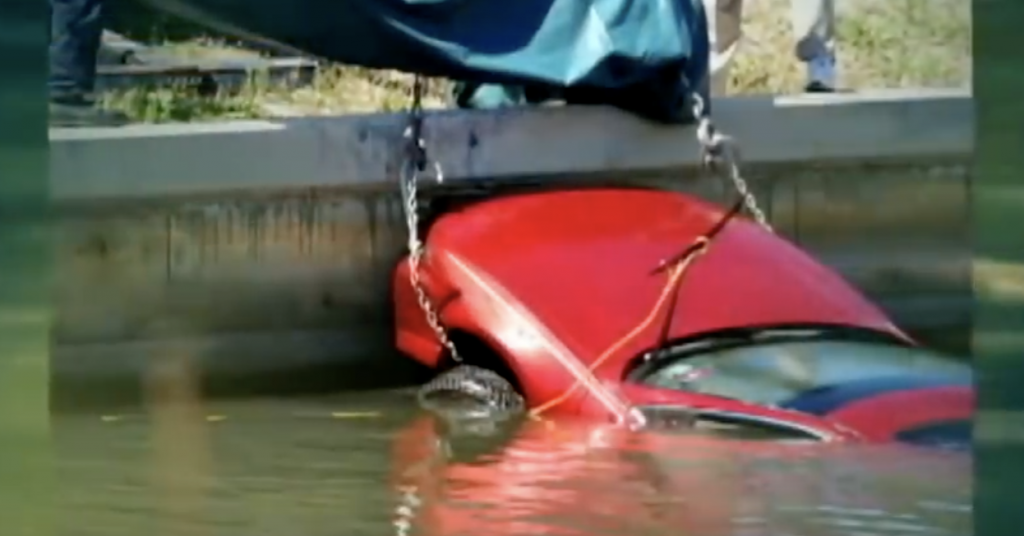
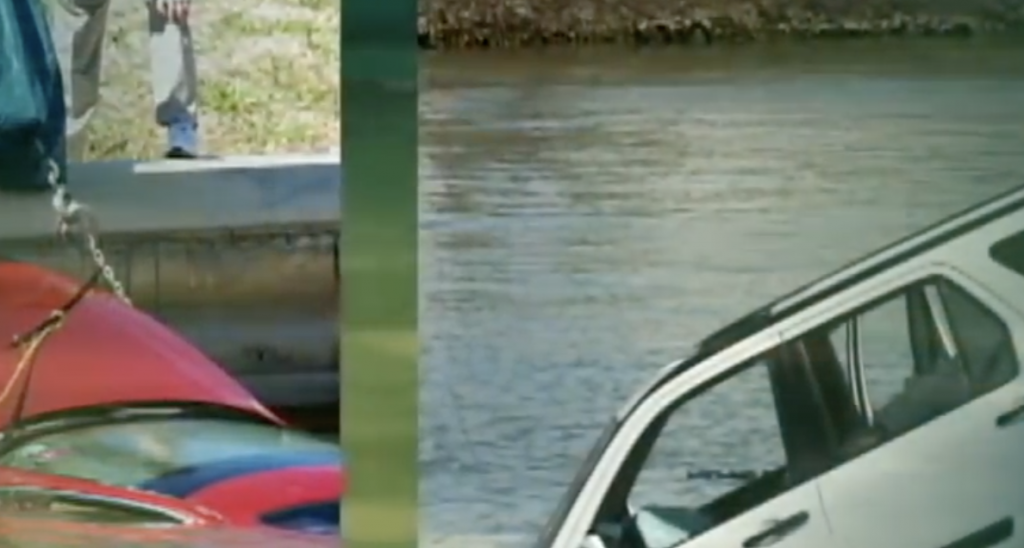
Be sure to watch the accompanying ABC News clip that shows you exactly how to react and escape from a sinking car. They run through several different scenarios, including getting out from the front seat driver’s perspective, as a rear passenger, and helping kids out. Share this article and clip with friends and family because the information it contains may end up saving your life one day, or that of someone you love.

Please Share This With Family and Friends
She Begins Hot Glueing Marbles To a Ball Made of Foam. But When She’s Done It’s STUNNING
If you’re looking for a quick and easy way to make your lawn or garden pop, then you have to check out these beautiful homemade gazing balls. They shimmer and sparkle when they catch the sunlight and add an extra-special touch to the landscape. They’re fun and easy to make, but the best part about them is that they’re super affordable and won’t cost you more than a few dollars. In comparison, store bought versions can be very pricey and the less expensive ones are usually dull, plain, cheaply made, and not too exciting to look at!
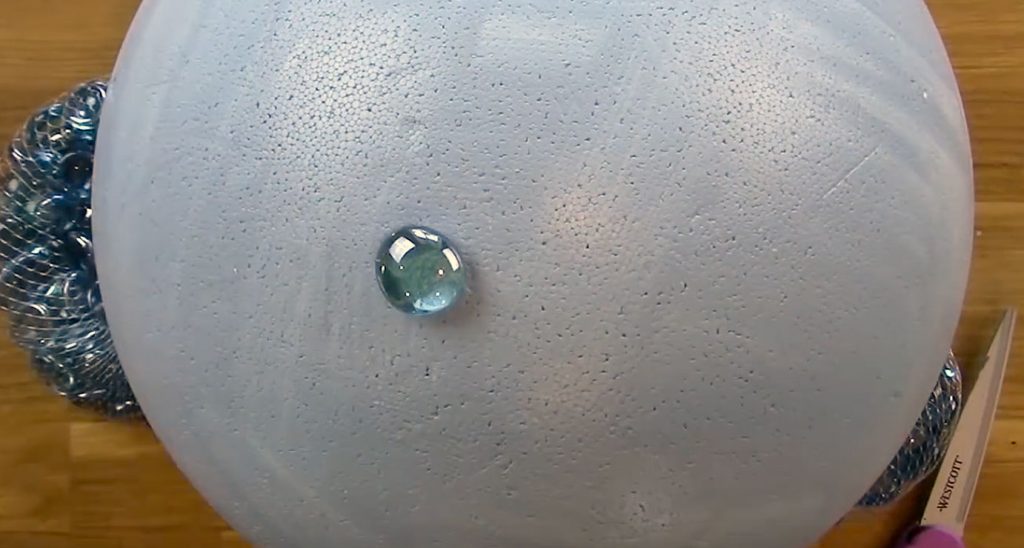
This craft project is also something that kids will enjoy making and it allows them to really get creative. You can make different sized balls in any color or combination and you can customize them to your exact standards. All you really need are Smoothfoam balls and flat glass marbles that most dollar stores carry in stock.
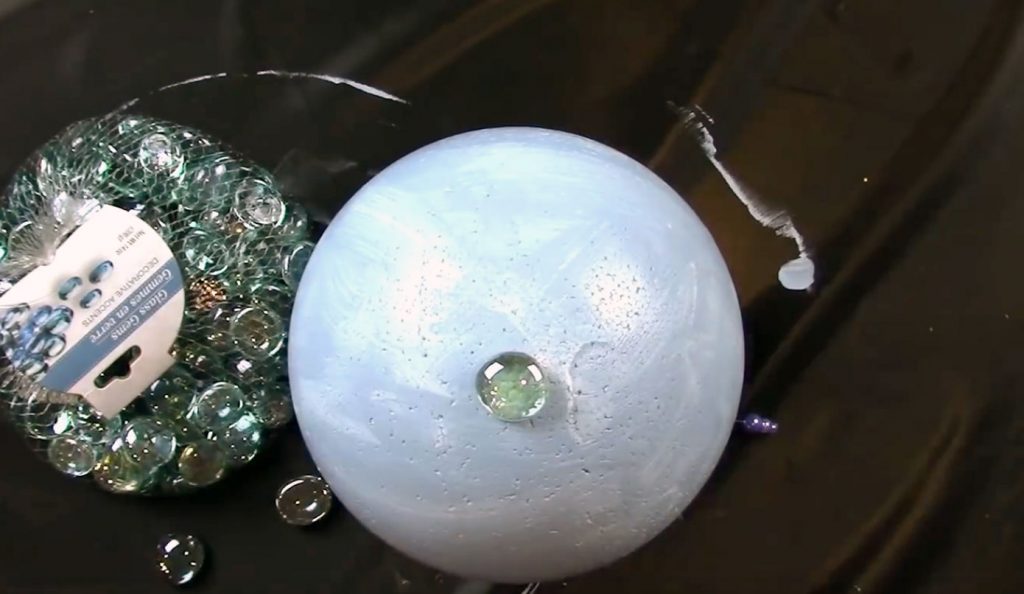
Craft extraordinaire Jennifer Priest, who runs her own blog named Hydrangea Hippo, shows us how to make them in the accompanying video. She conveniently included a list of all the supplies that she used and links to them as well. The materials you will need include Smoothfoam balls, flat glass marbles, a hot glue gun, acrylic paint, and a foam brush.
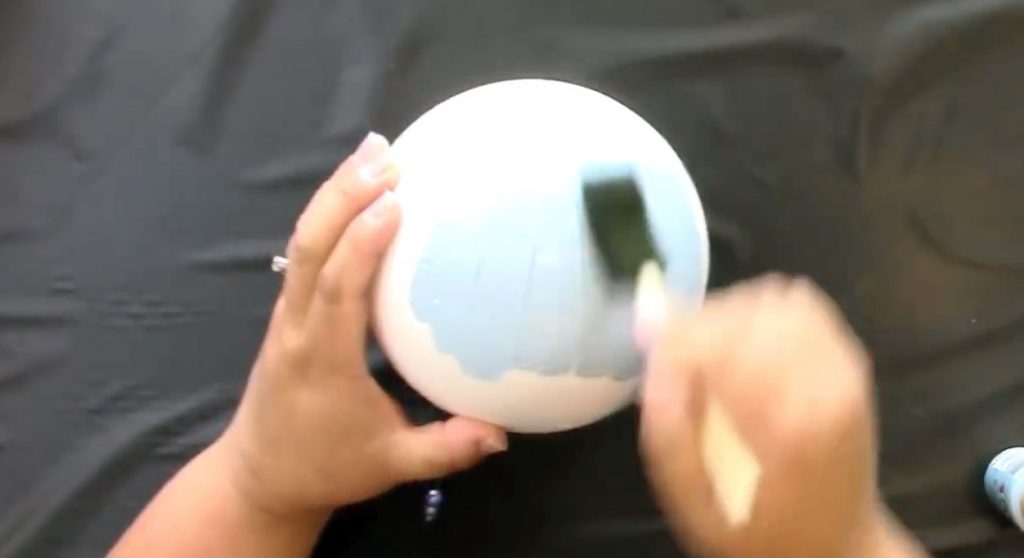
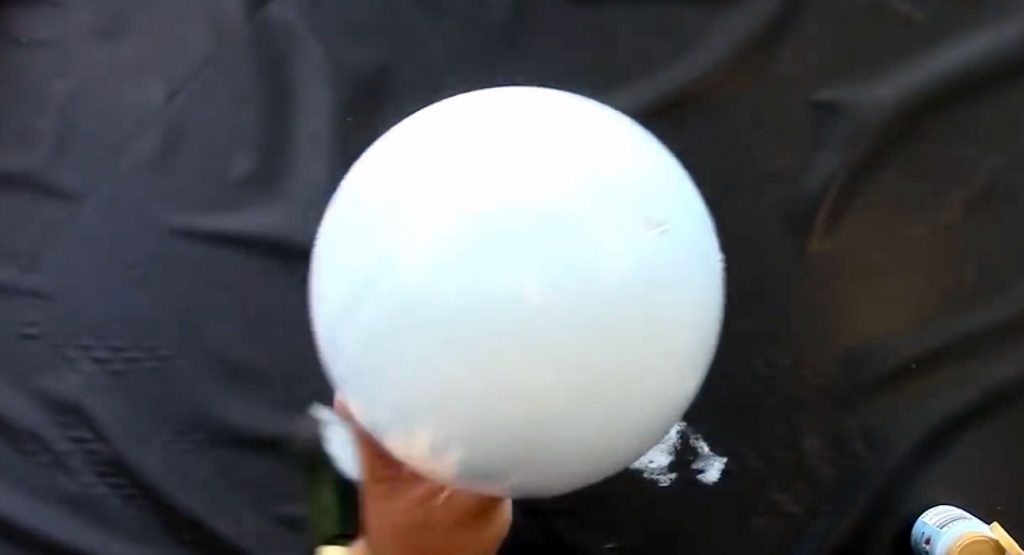
It’s important that you use Smoothfoam balls and not Styrofoam ones because Styrofoam will absorb all the paint you put on it and melts very easily. You’ll also want to use something that you can stick into the foam ball to hold on to, like a chopstick or long pin, that way you can paint the entire ball without making a mess and getting your hands all dirty.
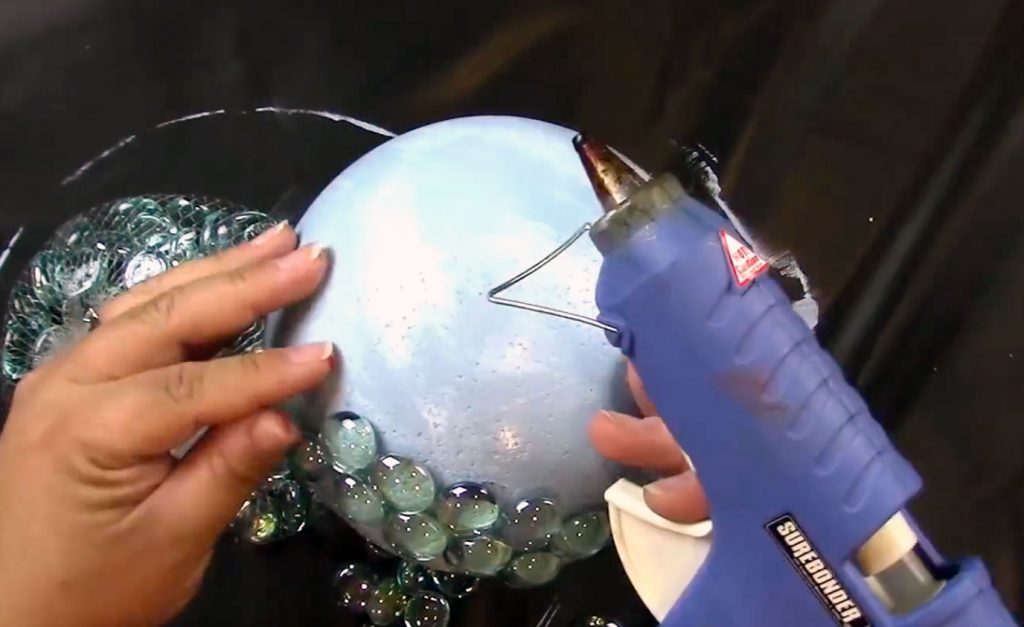
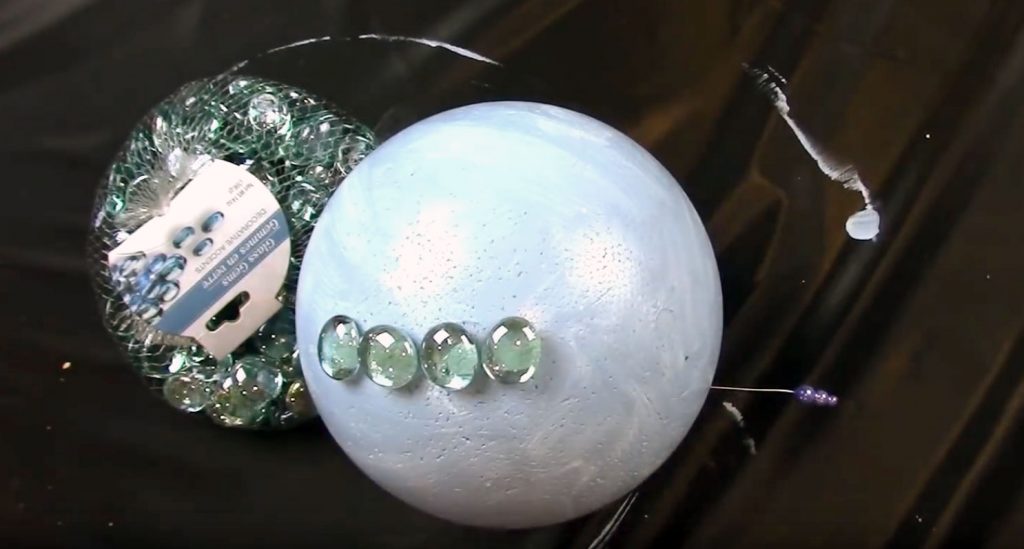
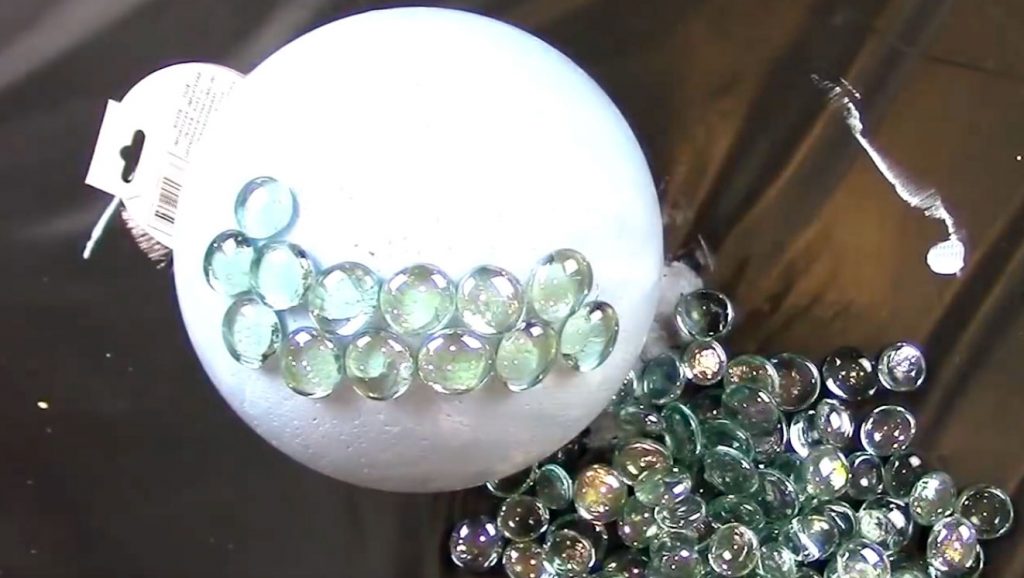
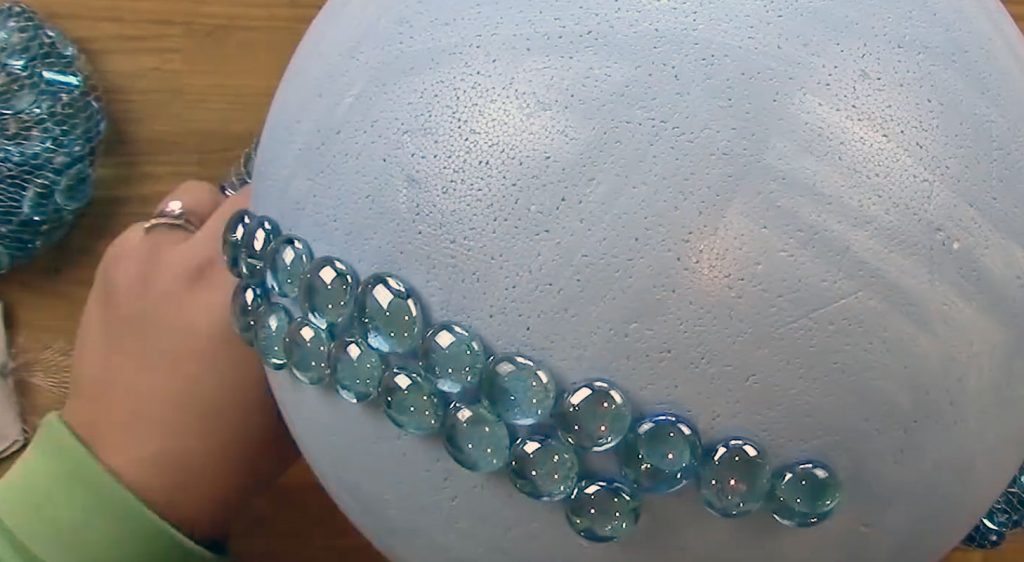
Start out by painting the foam balls and then set them aside to dry. Once the paint has completely dried fire up your glue gun and apply a dab of glue to the smooth side of each marble. Stick them onto the ball smooth and glued side down and as close to one another as you can until the entire thing is coated in marbles.
Now you can place the ball in the garden, flower beds or pots, on a pedestal or stand, or wherever else you desire. They can be hung as well, just stick a small screw hook into the side and it’s ready to be strung up. The decorating uses for these go beyond lawn and garden and they make beautiful additions to party or wedding décor as well.
These gazing balls turned out looking anything but cheap and you’d never guess they were made with simple items from the dollar store. They would make a lovely and thoughtful Mother’s Day gift and with everything starting to really bloom, now is the time to make them!
Please Share This With Family and Friends 🙂
Stop This From Happening To Your Dog’s Paws This Spring and Summer Using This 5 Second Trick!

I’m sure you’ve had the experience of walking out your front door barefoot on flagstone or blacktop on a warm day, and your feet feeling a burning sensation within seconds. The air can feel quite comfortable, in the high 70’s to 80 degrees Fahrenheit, yet the sun-drenched pavement is scorching to the bottoms of our feet. We run inside to get sandals or flip-flops before walking out on hot cement again!

The pads of a dog’s paws offer some protection against the heat of pavement, but very often that natural protection is not enough. In the video you are about to watch below, the man uses an instrument to show us the actual heat of blacktop and even non-blacktop surfaces on a sunny day that is only 80 degrees outside. You will be shocked to see the difference in degrees between the air and the surfaces your dog’s paws will be forced to endure!
According to “Pet Sitters”, 120 degree Fahrenheit surfaces (common on an 85 degree day) will be painful for dogs, but won’t permanently damage their paws. However surfaces at 140 degrees will cause permanent damage within one minute, and at 150 degrees dog’s paws will immediately burn and blister! In warmer climates like Florida, such daily hot surfaces are to be expected, and can occur in summertime all around the country.

The thermometer carried by the man in the video to measure surface temperatures, isn’t something most people carry, so taking precautions suggested by “Moon Valley Canine Training” will help to ensure that your pup’s paws are protected.

They suggest placing the back of your hand on the pavement for 5 seconds; if that hurts then the surface is unsafe for your dog. “Dog shoes”, disposable dog booties or socks are available if you have to take them onto dangerously hot surfaces. Walking them in the morning, staying on grassy surfaces, and moisturizing your pup’s paws will also help.

Please SHARE This With Your Family and Friends


