This Guy Takes A Reflective Sun Shade And Puts It On A Piece Of His Shoe For a Genius Reason!
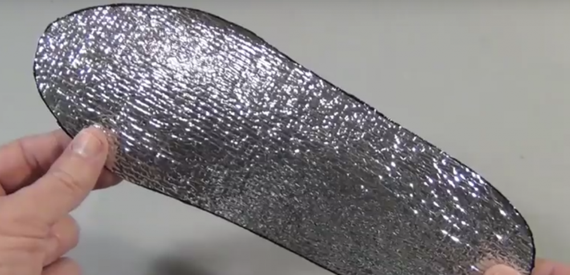
image via – youtube.com
Even though a lot of the United States winter is over, chilly days are still here, and there will no doubt be plenty of really cold days ahead. The one thing that will always make you suffer from the cold, regardless of how well protected the rest of your body is, are cold feet!
I buy warm winter boots, and those “smart socks” that are supposed to really insure warmth. If I’m outside for a prolonged period of time, I’ve even tried foot warmers that last for a while. However, I always end up with that awful feeling of my toes going numb, and then there is no getting rid of the chill.
The foot warmers require replacement, since they only work once, so when I saw this amazing heat insulating trick online I had to try it. In the video you are about to watch below, the IntenseAngler YouTube channel shows you how to make your own insulating shoe insert, that can be used over and over…and it actually works fantastically!
All you need to pick up is one of those reflective sun shields that people use on their car windows. He shows you how to cut the material for your winter shoes or boots; this material not only insulates from the cold but reflects body heat back to your feet.
The result is an amazing remedy for freezing cold feet and toes!
Please SHARE this with family and friends
Apparently I have Been Putting Band Aids On Completely Wrong For My Whole Life. I Had No Clue.
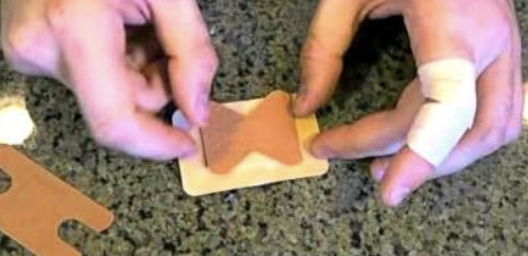
image via – youtube.com
What I love about the Crazy Russian Hacker, other than his accent and hilarious attitude, is that he finds solutions for things that are actually useful for most everyone. He targets those little annoyances or problems that always are a bother, and he solves the problem.
There is nothing worse than getting a cut in an awkward place, like the end of your finger that really needs band-aid protection. As you have probably all experienced, certain parts of the body, like this, just doesn’t hold a band-aid; they keep falling off.
Band-aids are made in all shapes and sizes that you would think would cover such issues, but as the Crazy Russian illustrates for us in the video below, people come in different shapes and sizes which sometimes requires a “custom made Band-aid”. Kids and adults, men and women…all have different size needs that this hack provides.
Watch the following footage as he shows us which shape Band-aid works best for customizing your needs, to get maximum coverage and flexibility. He has really come up with a great hack for those “hard to cover areas”.
Let us know if you ever tried this technique!
Please SHARE this useful hack with your friends and family
She Starts Cutting Off The Top Of This Salt Shaker. But When She’s Done It’s Surprisingly Brilliant!
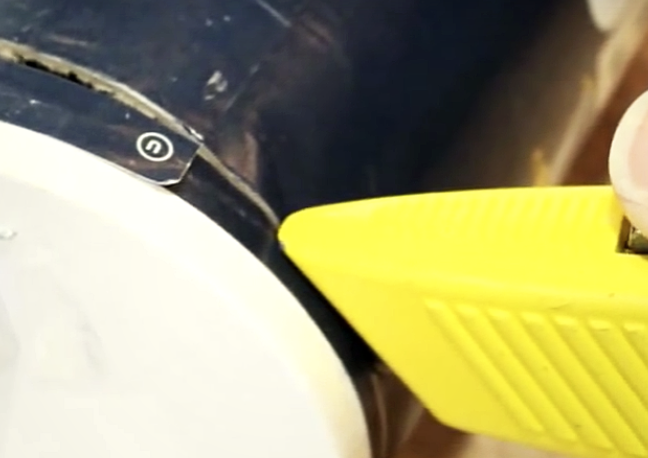
image via – youtube.com
The mason jar phenomenon has taken a firm hold in society and the handy glass jars are no longer only used for their original intended purpose, canning food. These days people use them for just about anything and everything one can imagine. Odds are you have a few in your own home and if not they are quite inexpensive and widely available at many stores.
Beyond storing foods and other items, they also make handy drinking glasses, neat soap dispensers, candle holders, lanterns, and more. Here is an additional way to get the most use out of any spare mason jars you may have sitting around. In this short video YouTube channel ThriftyFun shows how to make a simple and convenient easy pour top for a mason jar.
All you need is a salt container with a pour spout, a knife, and a mason jar with a ring that fits onto it. Start by carefully cutting the top off of the salt container. Flip it upside down and place the top of the mason jar on it, then trace around the rim opening with a pencil. Cut the traced circle out and then place it on top of the jar as you would with a lid.
Screw it on securely with the jar ring and check to make sure that it fits, trimming it if necessary. That’s all it takes and now you can fill up the jar with whatever you want. When it comes time to pour stuff out the modified top makes it much easier to measure and control, it won’t dump out all over the place. This works great for dry, messy, powdery things such as glitter and beads or other small craft items.
It also comes in handy in the kitchen and is perfect for storing seasonings, rice, sugar, flour, and of course salt!
Please SHARE This With Family and Friends
She Grabs Wool and Starts Making Strange Knots. But When She’s Done It’s An Unexpected Surprise!
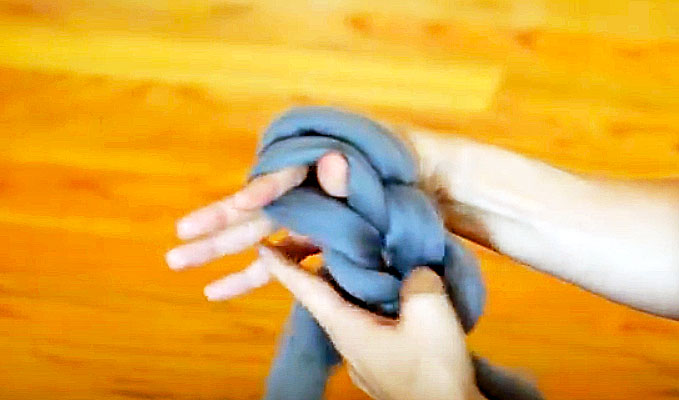
image via – youtube.com
Winter might be over, but it doesn’t mean we still don’t want to bundle up and get super cozy. Also, if you make one now it will be ready for next years Winter. Where you expect windows, doorways, attics, and other such areas of houses and buildings can allow a lot of heat to escape, and it gets replaced by much colder air.
One area in particular that’s often overlooked is floors. If you have hardwood or solid flooring in your home then you know just how freezing they can get. The easiest solution to eliminate cold floors is to throw a rug down, but that can get very expensive very fast.
Nice, thick, quality made rugs are usually quite pricey and if you need several of them they’ll cost you a lot. Instead of searching all over for a rug that fits your budget and style, try making one that’s affordable and exactly what you want.
It’s not as hard or impossible as you may think to weave together a rug. With this tutorial from Expression Fiber Arts you can create a beautiful, thick, durable crochet rug that will keep your toes warm on all those upcoming chilly nights.
The rug shown in the video is made from gray merino wool roving that has been crocheted together by hand without using any tools. Wool roving is a thick bundle of raw fibers that have been lined up neatly and made ready for further use, they usually get spun into yarn.
This project took a total of 7.5 pounds of roving to complete, so keep that in mind if you plan on making the same one or a larger rug. If you use a pricier type of wool, like merino, it will be a lot more expensive than if you use less costly materials, such as cotton or bamboo.
To make the rug it’s best to refer to the video tutorial. The woman showing you how to do it, Chandi, has a bunch of helpful pro-tips and hits on a lot of details that a brief overview would lack. This is one of those projects that’s easier to do, and turns out best, when you have a visual guide showing you exactly what to do every step of the way.
If you already know how to crochet then you’ll easily pick up the process. If you’re not familiar with crocheting, don’t worry! This is something you can definitely do and the video thoroughly explains and guides you through it from start to finish.
The pace is slow enough so that you can better see exactly what to do, and that makes it very easy to follow and replicate. When it’s all over you’ll end up making a beautiful, thick rug that will last a lifetime and keep your feet warm all winter long. Check it out and give it a try!
Please Share This With Family and Friends 🙂
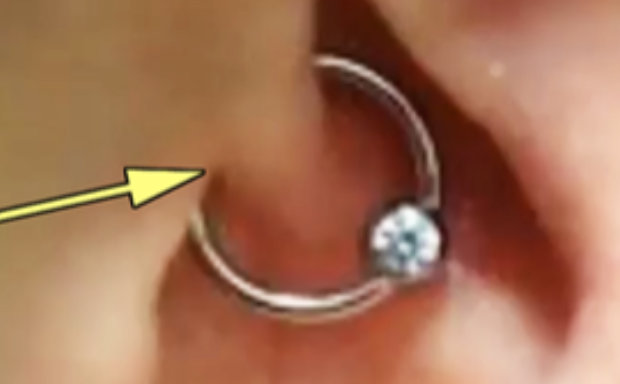
If You Spot Somebody With This Ear Piercing It Means THIS!
People the world over are constantly searching for alternative and natural ways to help treat their health conditions and disorders. They don’t want to have to rely on modern options that usually involve harsh, pricey pharmaceuticals, which often have even worse side effects than the issue they treat.
Many people end up turning to homeopathic remedies in an effort to naturally help balance and heal their bodies. One of the easiest and most effective treatment methods is auricular acupuncture. It’s an all-natural way to help alleviate the painful effects of chronic headaches and people have found that by getting a specific type of ear piercing they dramatically relieved the discomfort associated with their migraines.
The treatment is similar to reflexology, which is the stimulation of a reflex point to relieve and help regulate abnormalities between different body parts. However, with auricular acupuncture different parts of the ear are stimulated either manually, by pressing finger tips on certain points, or by using needles.
One of the main acupuncture points on the ear is located exactly where the daith piercing is done. Daith piercings have been around for thousands of years and yet it wasn’t until the 1990s (when they were in fashion) that they finally were given a name.
The piercing is done on the little piece of cartilage that folds nearest to the ear canal. The ring ends up running through a pressure point commonly targeted by acupuncturists and thus mimics the effects of acupuncture, which is what leads to migraine relief for so many people!
When this area is pierced the surrounding blood vessels and nerves are stimulated, causing them to release endorphins and other chemicals our bodies produce that help regulate pain. Many people have initially chosen to get a daith piercing in order to specifically target their chronic headache pain.
They report that that after getting it done they experienced much less frequent or intense migraines. The piercing is relatively easy to get done and is widely available. A straight needle is passed through the fold of cartilage and then a ring is inserted.
Depending on where you go it costs on average anywhere between $50-100. If you’re one of the millions of Americans who suffer from debilitating migraines, you could potentially gain a lot of relief by getting a daith piercing.
Look into it and pass this along to others to help them find comfort and better health in their own lives!
Please Share This With Family and Friends
A Nurse Wraps A Blanket Around This Newborn Baby. THIS Is Something Every Parent Should See!

image via – youtube.com
Everyone knows that newborns are one of life’s most joyful miracles. The cute, adorable, tiny little babies that are new to the world are quite fragile and need a lot of tender love and care. When parents bring home a baby for the first time they are often faced with many new challenges and hurdles in all areas of their lives.
One of the biggest hurdles is learning how to take care of the baby properly. Everything you do with a child has to be done with care and their health and safety in mind. The way a baby is held, the way they sleep, how, when, and what they eat all need to be carefully considered and kept track of.
Many books, companies, and individuals offer advice and classes or programs that teach new parents and those expecting how to take care of a baby. While those can be helpful and offer some insight into what to expect, in terms of a newborn you can only truly learn by doing.
When it comes down to it, hands on care and trial and error are all part of the newborn baby experience and it’s the best way to figure out what works best for you and your baby. One of the most difficult areas that parents often bring up is the babies sleep patterns.
Whether it is that the child has problems falling asleep, staying asleep, or wakes them up at all hours, there seems to always be something at issue in this area. One way in which parents can help a newborn get better sleep is by swaddling them. Swaddling is when you wrap up a baby snugly and comfortably in a cozy, warm baby blanket or two.
Doing this makes the baby feel like it’s back in its mother’s womb, all safe and secure, and thus helps them feel more at ease. A baby that is comfortable and at ease is much more likely to be able to fall asleep, stay asleep, and sleep better all around. And so will you.
The accompanying video shows you how to double swaddle a baby and includes how to make a hoodie for them as well. The more covered the better, especially the head area. You will need two baby blankets for this technique and watch the video to best see how all of the folds and wrapping are done.
It’s easy to mimic and after a few tries you’ll have it down pat, like a baby wrapping pro. Also, there are some key things you want to avoid when swaddling a baby. Do not wrap the child too tightly.
According to babycenter.com this can sometimes lead to hip dysplasia and to avoid the problem always make sure the bottom of the blanket is wrapped loosely enough so that the baby has room to wiggle around. You should always monitor any swaddled babies to make sure they don’t roll onto their stomach, which could lead to suffocation.
As a general rule, always place a baby on its back to sleep and keep a close eye on them just in case they happen to roll over.
Please Share This With Family and Friends


