If You Put These 2 Ingredients In Your Ear You Can Get Rid Of Ear Wax and Ear Infections For Good!
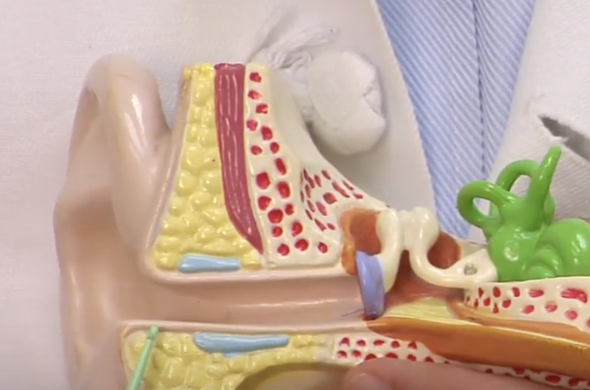
image via – youtube.com
Whenever the topic of either earwax or ear cleaning is brought up, you likely think to yourself something along the lines of “eww, gross!” People often view earwax as a sign of bodily uncleanliness because it sounds and looks gross. It’s natural to automatically assume that earwax is nasty and view it in such a negative light, after all it’s a bodily fluid that comes out of our ears, there is absolutely nothing appealing about it whatsoever.
That’s also why people tend to stick all sorts of cleaning solutions, Q-tips, and even automatic ear cleaner gadgets in their ears, in vain attempts to remove the offensive substance. If you’re guilty of doing any of the aforementioned things, you should definitely re-think your ear-care routine and learn why that is bad for your health.
Whenever you stick anything into your ears you are simply making them dirtier and increasing the odds of developing an ear infection, or potentially something even worse. Every year there are countless numbers of people who injure and damage their inner ears because they stick Q-tips way too far and forcibly into them.
Yet the fact remains that the most common way, by far, in which people go about cleaning their ears is with Q-tips. Doing this is the wrong way to clean them, it’s ineffective and just pushes the wax further into the ear canal thereby increasing the potential for build up and blockage. Whatever you do, don’t use Q-tips to try and clean your ears.
Instead, gently wash the outside area with a washcloth and then use a solution of white vinegar and rubbing alcohol to help dissolve the wax gently and naturally. Here’s exactly how you should do it. First, in a small bowl mix together equal parts distilled white vinegar and rubbing alcohol.
Soak a cotton ball in the liquid and then tilt your head so that the ear you want to clean faces upwards. Gently squeeze the cotton ball to release a few drops into the ear opening and wait 4-5 minutes. Now you can straighten your head and dab up the remaining liquid as it drips out with a tissue.
That’s all it takes, you don’t have to poke anything up your ear or spend a bunch of money. The bad reputation that earwax has developed is based on nothing but false information and it’s totally without merit. The yellowish waxy substance is naturally produced by our bodies and is beneficial to our health in several important ways.
It helps to protect our inner ears from all sorts of nasty stuff like infections, dust, dirt, bacteria, and other germs that would otherwise enter into them. The wax also forms a protective barrier on the surface of the very delicate skin in our ear canals which prevents it from becoming irritated when water gets inside.
Plus, it moisturizes and keeps that skin from becoming dry, flaky, and itchy.Ear wax is produced by the teeny tiny hair follicles that line the ear canal. It normally makes its way out of the opening of the ear naturally and on its own, but sometimes wax can build up and cause blockage problems.
If you feel that there is a blockage due to wax build up in your ear, you can try the aforementioned remedy or go see a doctor if the issue is potentially more serious.
Please see the video for more information on the topic:
Please Share This With Your Family and Friends
Their Kids Grew Out Of Their Cribs But Instead Of Throwing Them Out They Transformed Them Into THIS

image via – shutterstock.com
When we have our first child, we find out just how expensive things are that are critical for a baby’s safety, comfort and stimulation. Amongst the most expensive things, are those engineered to keep children safe; car seats, strollers and CRIBS are definitely up there. These expensive items can be passed down to other children, but are ultimately time-limited.
Cribs can be really beautiful pieces of our kid’s necessities, that we hate to let go of. The video that you are about to watch below has put together 28 incredibly creative and esthetically appealing ways to repurpose your baby’s crib. Brought to you by BEAUTIFUL DIY, you will get to see a compilation of how some people chose to reinvent the crib!
Honestly, I had to watch this footage twice, as it was such a delight to see reinvention at it’s best. Our children’s cribs hold many of the most treasured memories that we have, so it makes sense that holding on to them in a new form would be a choice many would make, if given the opportunity.
It is a wonderful way to keep those memories alive. Let us know which redesign stood out for you.
Please SHARE This With Family and Friends 🙂
If You Wash Your Face With Baking Soda and Coconut Oil 3x/Week For A Month THIS Happens To Your Face!
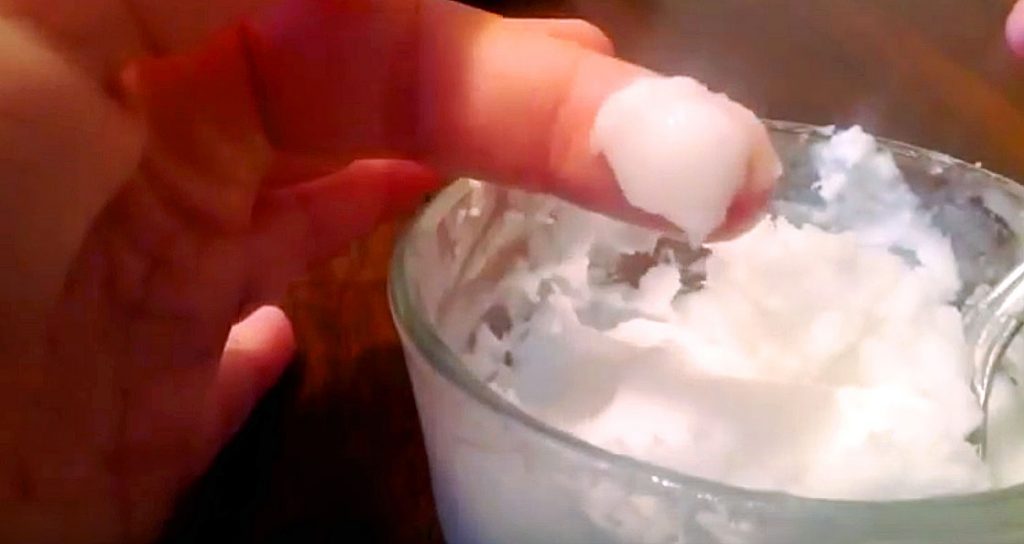
image via – youtube.com
Washing your face daily is essential to maintaining clear healthy skin and a glowing complexion. Equally important is what you use to wash your face with. Some facial cleansers are incredibly harsh and can end up harming the delicate skin on our faces, while others are weak and ineffective.
If you’ve ever read the list of ingredients on the packaging of face wash, then you know they’re chock full of chemicals and things you’re likely unfamiliar with and can’t pronounce. Sometimes less is more, and when it comes to our faces, the simpler the better.
All natural, non-toxic, simply derived face wash can provide all the cleansing power your skin needs without aggravating or over-drying it. This homemade concoction has just two ingredients and you can mix it up tonight at home. In a small bowl combine coconut oil and baking soda and make sure to break up any lumps in the soda before adding in the coconut oil.
There are no set amounts to this recipe and you can adjust it to your skin type and needs. People with sensitive skin should use a ratio of two parts coconut oil to one part baking soda, 2:1. Those who wish to exfoliate their skin should use equal parts of each ingredient, 1:1. Mix it together well and then massage it gently onto your face in circular motions. You can leave it on for a couple of minutes as you would a facial mask, or you can wash it off immediately using warm water.
After using this you’ll notice your skin is smooth, calm, and polished. The combination of baking soda and coconut oil is effective at treating and fading acne scars, redness, and breakouts. It also works well at exfoliating rough, dry skin, leaving it moisturized and clean. If you’re wondering how this simple scrub works, here’s a breakdown.
Coconut oil is a natural antibacterial agent and helps to unclog pores by fighting against and ridding it of germs. Baking soda works well at cleaning our skin because it’s effective at regulating pH since it’s not overly acidic or too alkaline, rather it falls right in the middle. When it interacts with things in our pores or on our skin that are either acidic or alkaline it naturally reacts to neutralize them and leaves us with neutral, balanced skin.
Perhaps the best things about this recipe is that both ingredients are extremely affordable, natural, and they don’t harm the environment like most of the ingredients found in beauty products do.
Try it out tonight before bed and see the results for yourself!
Please Share This Skin Care Tip With Your Family and Friends 🙂
The Woman Puts An Empty Cup Over A Square Of Butter But The Reason Is GENIUS!
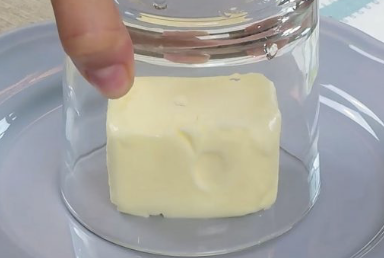
image via – facebook.com
Have you ever started to whip up a recipe and then suddenly noticed it calls for softened butter, but all you have is cold, rock-hard sticks in the refrigerator? It’s too late to take them out so they can soften up to room temperature and you can’t microwave the sticks because they’ll melt. What do you do?
Most of us caught in this position have either stopped baking altogether or resorted to slicing the sticks up into small pads. The idea behind that method is the butter will soften faster in smaller chunks because they give it more surface area. Or maybe your mother simply taught you it and passed the age old trick down.
While this last ditch effort does work, it’s not the best or the fastest way to soften butter to the desired consistency that works for baking and recipes. Instead, you should employ the technique covered in this video short where he goes over how to soften hard butter sticks in a clean and easy way that takes just 2 minutes. Simply take a piece of cold, hard butter and set it on a plate.
Grab a glass, fill it with hot water, and allow it to stand for at least one minute or a little longer. Pour the water out, dry the glass completely, and place it upside down over the butter. After about a minute or two the butter will have softened and now it’s ready for cooking and baking.
Hopefully this tip will come in handy the next time you find yourself facing this all too common baking conundrum, so please pass it on and spread the love!
Please Share This With Family and Friends 🙂
Her Daughter Had A Fever That Wouldn’t Go Away. But After She Put THIS In Her Sock And The Fever Broke!
image via – youtube.com
Onions may bring tears to your eyes but the slight, brief pain they cause is easily outweighed by the fact that they can also help fight against sickness and disease. The common bulbous vegetables are grown all over the globe and have been used in many different ways by various cultures.
Other than being edible and added to dishes to increase flavor, some people pickle and store them while others use half of one to clean BBQ grills, and some people even place them in socks at night to help their body heal. You read that last part correct; onions can help fight colds, fevers, and flu-like symptoms.
One mother found out about the healing properties of onions and decided to give them a try when her young daughter came down with a nasty fever. The little girl named Riley had been sick and was suffering from body aches, a headache, sore throat, and she’d developed a fever of 104 degrees.
Her mother was worried and desperately wanted to bring her baby’s fever down and make her feel better, but she didn’t want to go to the hospital just yet. That’s when her mother recommended that she try putting onions in Riley’s socks, which she promptly did.
The next day her daughter woke up and told her that she felt much better, her fever was gone and she was soon back to normal. The onions in her socks are what her mother credits for her sudden turn around and once you know the reasons why you’ll be trying this yourself!
The practice of placing onions on people’s feet can be traced back to ancient Chinese medicine. The Chinese determined that there are thousands of nerve endings on the bottom of feet which act like access points to internal organs and are closely linked with our nervous systems.
When a cut onion is placed on the underside of the foot it kills germs and bacteria because onions naturally have strong anti-bacterial and anti-viral properties. The phosphoric acid, the stuff that’s responsible for making you cry, enters into the bloodstream and helps purify the blood all over your body.
In turn, you become healthier and your improved body is better prepared to fight off infections and inflammation.
Many people have tried this alternative method and claim that it has worked wonders for them.
The positive response is encouraging, and with no apparent negative side effects, it seems like the onion theory could be beneficial to many people out there. Here is how you can try it at home:
Take an onion, red or white- they both work, and cut it into flat slices so they can be easily applied to the bottom of your feet. Pull on a pair of socks over the onions to keep them in place overnight and lay back and fall asleep. When you wake up remove the socks and discard the onions.
It’s that simple. As you dream the onion will seep in through your skin and work to purify blood and absorb toxins. If you’re worried about having a stinky smelling room or feet after this, don’t be. The onion’s natural properties also help purify the air in a room and since it kills bacteria it eliminates the main factor that causes foul smelling feet and gets rid of foot odor.
Putting onions in your socks at night may be just the right thing your body needs. It’s cheap, all natural, and can be done in the comfort of your own home. Give it a try and see if it works. Pass this information with loved ones, they may find it extremely useful and benefit from it as well!
Watch the video below for more a more in depth description:
Please Share This Life Hack With Your Family and Friends
Apparently This Is The Strange Reason You Should Be Adding 2 Tbsp Of Coconut Oil To Your Coffee In The Morning!

image via – shutterstock.com
The video you are about to watch is for all you coffee drinkers who use their cup of Jo for alertness and energy every day. It is nothing I ever imagined would give coffee that extra “oomph” that would turn it into a “Super Drink”!
Adding coconut oil or coconut butter to your coffee, will allow you to drink one cup in the morning that will last you all day. Instead of having to go back for cup after cup to keep your energy level high, you will only require one cup. This has the added benefit of not keeping you up at night, or getting acid stomach.
Adding coconut oil or butter to your coffee will make you healthier and will boost your metabolism, allowing you to burn more fat all day. It has been used for many years by mountain climbers in Tibet, to help them burn fat and increase their energy for climbing.
The video you are about to watch shows you how to blend the coffee with 2 teaspoons of coconut butter; it can be made with two tablespoons of coconut oil as well.
Adding cinnamon also lends a hand to the fat-burning potential of this coffee, by helping to control the insulin response. The health benefits of coconut oil or butter occur because they contain medium-chain fatty acids, as opposed to long-chain fatty acids.
The body quickly uses these medium chain fatty acids for energy, which in turn boosts your metabolism. For added discussion of this “wonder drink” watch the footage below, where he illustrates the best way to blend this drink to a frothy delight.
Let us know if it worked for you! Enjoy and watch the video below for more information!
Please SHARE this with your family and friends 🙂


