At First It Was Odd When He Wrapped Duct Tape Around a Jar Lid But The Reason Is Unexpectedly GENIUS!
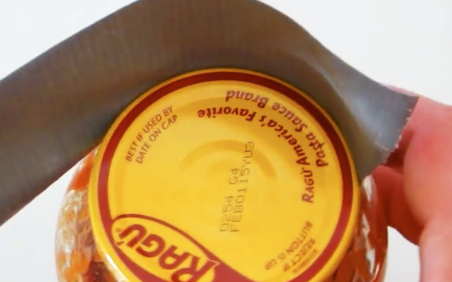
image via – youtube.com
It happens to everyone. There comes a time in life when you just cannot seem to open a jar. No matter how hard you try, it just won’t budge. The lid may be stuck or twisted on too tight, and so your hands just slip hopelessly and ineffectively around the top. While the experience isn’t really that jarring, it’s a real pain to have to deal with, especially when you really need that specific jar opened for a recipe or snack.
There are several different ways to get around a stuck lid. Some people bang on one end of the jar or slam it down on a counter top to try and loosen it. Another approach is to run the top under hot water for a short while. Many others, myself included, stick a butter knife under the lid edge to pry it open and break the vacuum seal.
Then there are those who use something, such as duct tape, to really grip the lid good with and that’s the method we are focused on here. This video shows you how to use a small strip of duct tape to quickly and easily open a stuck jar, without hurting yourself!
Simply tear off about a foot long strip of duct tape and place it on the lid so that it wraps around and covers the side of it. Press it firmly into place and then fold the first few inches or so down on the top of the lid. Take the remaining portion of tape and fold it in half, this will make it sturdier for the next step.
Hold the jar securely with one hand while simultaneously pulling the folded duct tape with the other hand. At this point, the lid should loosen and open up. Some jars may be very, very stuck and so your tape may break. If this happens just double the amount of tape you’re using, or triple it in the rare occasion that it becomes necessary.
Watch the video to see exactly how it is done and the next time you run into a stuck jar, break out the duct tape!
Please Share This Trick With Family and Friends 🙂
She Pours A Cup Of Eggs Into Her Waffle Maker! 3 Minutes Later My Mouth Won’t Stop Watering!

image via – youtube.com
Ok, so I’ll be honest, my waffle iron has been pushed to the back of my pots and pans cabinet, for some time now; I just really forgot about it until I came upon this amazing video that you are about to watch below. It’s time to dust off the old machine and start creating these waffle iron masterpieces! The best part about it, is pretty much every recipe covered is super easy to pull off and you don’t have to be a professional chef to pull these off!
If you have a waffle iron pull it out, and if you don’t I can guarantee that you will be getting one, after you see the incredible diversity of things that can be made. What’s so amazing is that each thing is so simple to do, the results are delectable, and cleanup happens in a snap. There is nothing better than a good breakfast, especially when the cleaning after you make your tasty breakfast is easy as ever.
Now, if you are a breakfast person, besides waffles, she shows you how to do omelets and more, right in the waffle iron. If you have a sweet tooth, as do I, you won’t believe how she does Brownies and Cinnamon rolls right in the iron! I tried making the brownies and all I can say is Yummmm! This weekend I will be testing out a bunch of these recipes and having my family and friends do some taste tests!
Let us know how yours turn out! Enjoy, Bon appetite!
Please SHARE This With Family and Friends
The 2 Incredible Benefits of Burning and Vaporizing Bay Leaves In Your House!
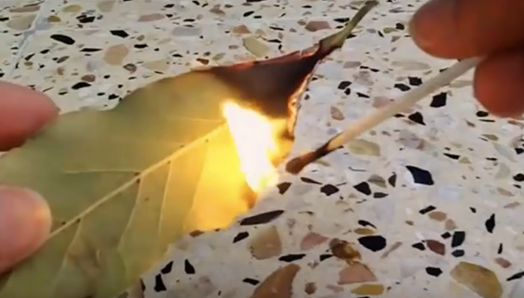
image via – youtube.com
Bay leaves are a common staple in many people’s spice collections. The dried green leaves are most commonly used in cooking and many people drop a leaf or two in the pot to simmer along with their food. The heat releases the flavor and adds to the dish, but there are other ways to harness the power and benefits of bay leaves.
One such way is by burning the aromatic herb in order to release the active compounds that are found within the leaves. These properties can help to fight against bacterial infections, detoxify our bodies, improve cardiac and respiratory health, and even slow down the effects of aging. Here’s more on what burning a bay leaf can do for you!
Ease Tension, Anxiety, and Fatigue to Help You Relax- Bay leaves contain compounds such as cineol, pinene, and elemicin that when burned produce a relaxing and energizing effect. These chemicals get released into the air and can be breathed in for the stimulating effects which have been described by many as feeling slightly psychedelic in nature. Here’s how to do it:
Take a dried bay leaf and light one end of it on fire over a metal tray, glass dish, or any other type of fire-proof container. Once it’s lit gently blow out any flames so that it smolders and place it safely on the container. The air will soon fill with smoke, don’t breathe this directly. Rather, aim to breathe in the vapors it produces indirectly, as if it were incense.
Once the leaf has burned itself out and the smoke clears you should be able to feel the calming effects. You will be more relaxed and at ease and your mind will be clearer. At the same time, you will feel more awake and less drowsy, so if you ever feel stressed try burning a bay leaf!
Helps to Clear Respiratory System- Bay leaves are a natural remedy that can help treat clogged, backed up respiratory passages and lungs. It acts naturally to help break up and remove the nasty mucus and phlegm that’s causing all the problems.
Instead of burning the leaves, soak fresh ones in clean water or pick up a small vial of bay leaf oil and use it in a humidifier to create a steamy vapor which you then breathe in. You can also simply boil the treated water on the stove top or rub the oil on your chest area to alleviate respiratory problems, allergies, and asthma.
Helps to Improve Cardiovascular Health- Bay leaves are rich in a caffeic acid which is a natural organic compound that helps strengthen and support the heart’s capillary walls. In addition, caffeic acid also works to eliminate low-density lipoprotein cholesterol (LDL), which is the bad type that no one wants in their cardiovascular system.
Rather than burning or inhaling treated steam, add the bay leaves to your cooking and you’ll take in all the heart healthy benefits by simply eating the delicious food you make!
Please SHARE This With Family and Friends
THIS ONE Secret Ingredient Will Transform Your Gross Yellow Pillow Stains Back To Looking White and Brand New!
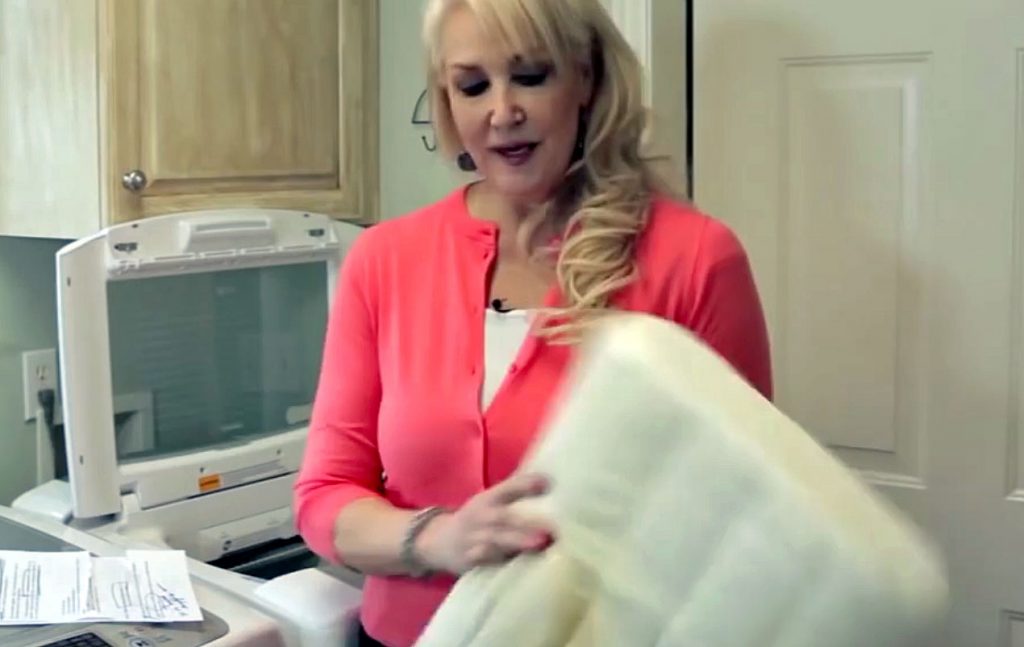
image via – facebook.com
Some DIY bloggers just really stand out; Jillee of ONEGOODTHINGBYJILLEE is one of the great ones, whose tips for cleaning various household items are a go-to, for anyone who really cares about taking care of their home. The life hack in her video below gets amazing results for ridding your pillows of yellow stains.
As Jillee discusses, yellow stains appear on everyone’s pillows; they are a result of sweating while sleeping. Most everyone sweats while they sleep, as the body attempts to regulate temperature. If you don’t want to have to toss your pillows after six months, this tutorial is for you.
To turn your pillows from dingy yellow to snow white, you will need the following ingredients:
– one cup of laundry detergent – one cup of powdered dish detergent – one cup of bleach – 1/2 cup of borax
Follow Jillee’s directions for mixing these with very HOT water, to yield the best results. At the end of the video she gives the best tips for successful drying of your pillows, that will result in fresh pillows, that are as good as new!
Please SHARE This With Family and Friends
Mom Puts Her Daughter’s Hair Into Three Ponytails. But The End Result Is a STUNNING Surprise!
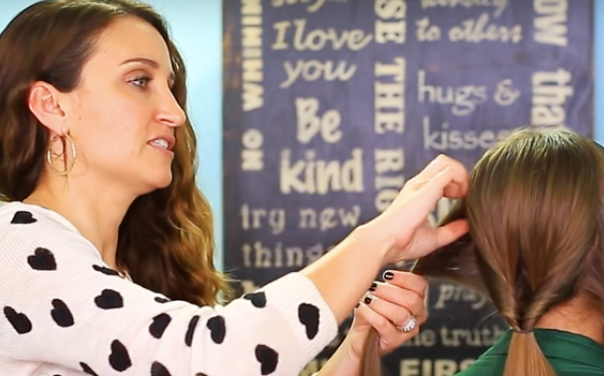
image via – youtube.com
Kamri, a sweet young teen and her mom, are YouTubers of the Cute Girl’s Hairstyles (CGH) channel. Rather than their videos being a vanity laden thing, they kind of bring me back to the good old days, of my mom doing my hair. It always felt relaxing…it was “our time”. The results weren’t quite as beautiful as these creations, which really are little works of art.
There is nothing fresher and more appealing than a stunning braid, and Kamri really appreciates her mom’s artistry; she wears the outcome with a bounce in her step and big smile on her face. The technique is done in a step-by-step fashion, making it easy to follow, if you would like to try this with your daughter or a friend.
Mom starts with separating Kamri’s beautiful long hair into 3 pony tails, and then shows you the few basic steps of twisting the hair that gets repeated over and over, until the grand finale…the “Triple-Flip Combo” braid, that will stun you after 5 minutes. Check out the video below and let us know if you will try it.
Let us know how yours comes out!
Please SHARE this with your friends and family
Police Are Warning People That Turning Off THIS Light In Your Home Could Be a Dangerous Risk!
image via – youtube.com
As a mom of two single young adult daughters, who live alone, their safety is always on my mind. They are fiercely independent, have learned some self-defense, and carry an alert device when they are out in the world. All that being said, they can never be too safe, and decreasing their vulnerability when they are home alone is very important.
The following video offers invaluable safety tips for women (and certainly can be used by men). Unfortunately we live in a world that has grown more dangerous on many fronts; being aware of potential dangers when you are at home, and remedying them so you can rest easy, is a huge plus.
The safety video offered by Officer Kandy Perry and the Fox 4 News team, is geared towards women, but truly can be used by anyone to keep from falling prey to home intruders. I was amazed at how many things that wouldn’t naturally occur to me, both signal and allow twisted individuals to invade your home.
She actually starts with a scenario in a parking lot, as you are going toward your car, with your purse in the cart. Not only can you lose your valuables, but important information that can lead a criminal to your home is now in their hands. Officer Perry goes from that scenario to an amazing safety trick as you drive into your garage, and then on into your home.
Listen for the tip on what lights on, off and in which sequence can go a long way towards preventing intruders.
Please SHARE This With Your Family and Friends


