Apparently If You Press This Point And Hold For 2 Minutes THIS Happens To Your Body!
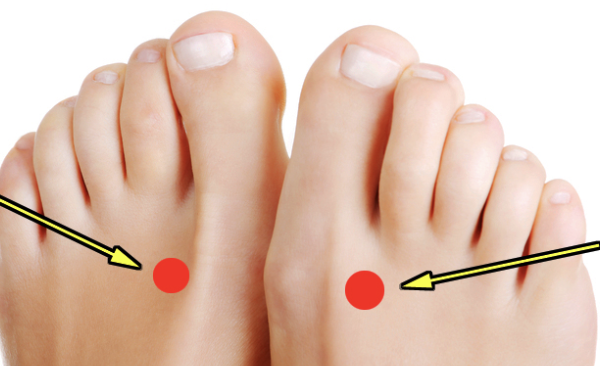
image via – shutterstock.com
All around the world people are constantly searching for natural and alternative ways to help treat their health conditions and disorders. They don’t want to have to rely on modern health options, which usually involve harsh and expensive pharmaceuticals, that often have even worse side effects than the actual issue itself. Many people end up turning to homeopathic remedies in an effort to naturally balance and help heal their bodies, as well as their minds.
One of the most popular and effective treatment methods comes from the ancient Chinese alternative medicine field of acupressure. The simple act of applying pressure to various points on our bodies does wonders to dissolve away aches, pains, tension, and the built up stresses hampering our bodies.
Acupressure works by stimulating the thousands of nerves in the hands and feet, thereby increasing blood flow. Human feet have over 15,000 nerves and they all connect to form a network that reaches different areas of the body, such as our main organs and glands.
Many have found that by using the simple techniques at home they could dramatically relieve pain and discomfort caused by common ailments. People have relieved headaches, digestion issues, sleep problems, back pain, and more by massaging points on the feet associated with the area in which the problem stems from.
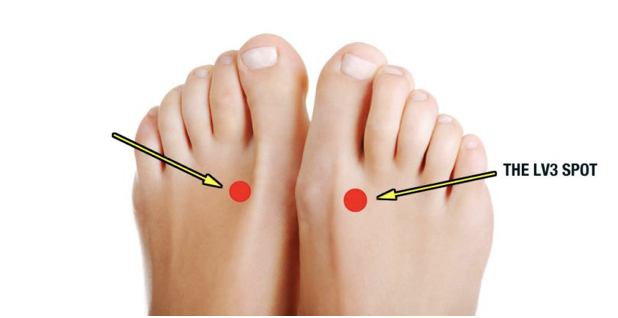
One such point is called the Great Rushing, which is located in between the big toe and the second toe. By pressing and applying pressure to this point for at least 2 minutes a day it helps to relieve nausea, abdominal pain, back pain, menstrual cramps, vomiting, headaches, insomnia and other sleep disorders. Refer to the video for more information about the many other benefits it can yield, and to see exactly where it’s located.
Another point that works wonders when massaged is the Three Yin Crossing point. To locate it you first must find the highest peak on your inner ankle bone. From that spot measure about four finger widths up your inner leg, and the point will be just behind the shin bone.
Once you have located it, press down with your thumb on the point for a total of 6 seconds, then release for 2 seconds, and repeat this for at least 5 minutes. After, switch feet, find the spot on your other leg, and repeat. If you find that this form of acupressure is helpful you can repeat it once more on each leg.
Also, if you feel any pain when you press down that means you are in the wrong spot and should stop immediately. It’s recommended that you do this massage at night and regularly to achieve optimal results. Studies have shown that the Three Yin Crossing point can effectively reduce pain and discomfort stemming from menstrual cramps.
It can also be used to alleviate bloating, gas, and digestion problems, as well as to help improve urological and pelvic disorders. In addition, the simple massage can help people a lot in dealing with stress and anxiety, chronic fatigue, and insomnia.
The treatments are incredibly simple, easy to do, convenient, and don’t cost a penny if done in the comfort of your home. If you’re hesitant or doubtful about whether or not acupressure could help you try thinking about it like this; you have nothing to lose and potentially lots to gain by giving yourself a foot massage. At the very least you’ll feel more at ease, relaxed, and comfortable.
Our legs and feet go through a lot of abuse daily and we often neglect them. So tonight kick off your shoes, peel off your socks, and give yourself a massage! Doing this right before you go to bed will help you to relax, fall asleep faster, and sleep better overall. Try it and let others know to help them find comfort and better health in their own lives!
Please Share This With Family and Friends
After You See How This Guy Wraps Presents You Will Never Do It The Same Way Again. It’s So Simple!
image via – youtube.com
I love receiving presents, but truly my favorite thing is giving gifts, and as we all know “presentation is everything!” So when I found this gift wrapping hack I was really excited; I’m pretty good at wrapping but I’m always happy to find a trick that works every time and doesn’t waste paper.
I take pride in my gift giving ability, and know how nice it is to receive something in a beautiful package. The man who demonstrates this Japanese trick for wrapping, in the video you are about to watch below, does an excellent job of showing you this foolproof method.
By watching his tutorial you will learn how to cut the right amount of paper to cover your gift, so you don’t waste paper, and follow this step-by-step technique by laying the box on a diagonal. You keep working in a triangular fashion, so that the corners never bulk up. The results are amazing and it’s fun to do!
Please SHARE this Wrapping Hack With Family and Friends 🙂
He Never Throws His Leftover Eggshells Into The Trash. But The Reason Is Unexpectedly GENIUS!
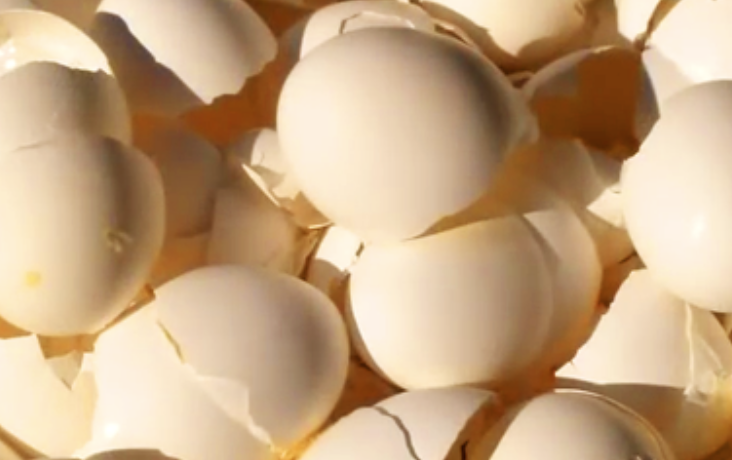
image via – youtube.com
Spring and Summer are finally here, and whether you actually do the gardening yourself, or just revel in the beauty of a healthy garden, this tip is for you! When you throw your egg shells into the the trash, you are wasting a potentially powerful tool for a healthy garden.
As you will hear in the short video you are about to watch, egg shells contain one of the richest sources of calcium. He will show you how to harness the 39.15% calcium found in egg shells so that it can be used not only to enrich your garden soil, but prevent blossom end rot.
Plants prone to this rot, such as tomatoes, end up being much more prolific when the calcium-rich egg shells are added to the soil. You will hear how the mineral fights the rot of blossoming plants in a most fascinating way. Now, you may be wondering if you just throw the eggshells into the soil, or is something more required?
Store your egg shells until you are ready to use them. To prevent any type of bacteria, he will tell you how to easily clean them, and then blend them into a fine powder that gets sprinkled into your garden soil. These simple steps will help to ensure a season of healthy blossoms like you’ve never experienced before.
This quick tutorial is a real find for everyone who loves a beautiful and healthy garden.
Please SHARE this great tip with family and friends 🙂
She Grabs Scissors And Starts Cutting 3 Worn Out Bath Towels Then Reveals An AWESOME Surprise!
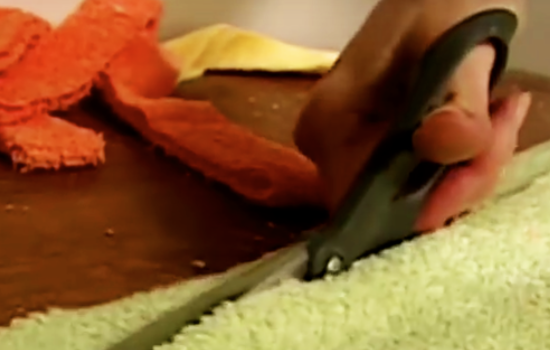
image via – youtube.com
There comes a time in life when old and worn out bathroom towels need to be replaced. They usually get kind of ratty looking, sometimes the edges fray, and they just don’t feel as comfy as they used to. Once towels have served their purpose most people toss them out or give them away to second hand stores.
Instead of doing either of those two things, put them to further good use and recycle them into a new spiral rug. This crafty project from the HGTV Handmade channel on YouTube is very easy to accomplish and shows you an environmentally friendly way to reuse any old bathroom towels you may have on hand.
All you need is 3 bath towels, a pair of scissors, sewing needle, and thread. In the video tutorial Linda Facci guides us through the steps and while she chose to make a rug out of green, yellow, and orange towels, any color and combination will work.
She first folds each towel in half and then cuts them up into one inch wide strips. A medium sized rug like the one she is making requires about 13 strips but you can add more or less to make a larger or smaller version of it.
Once all the towels have been cut, take three strips and sew their ends together. Then start braiding them into a cord all the way to the end, folding the raw edges of the strips as you go to make the braid appear neater looking.
Next, take three more towel strips and sew the ends of them onto the end of the piece you just braided. If you’re using different colors and want a more uniform look, try arranging the strips so they match what you just made.
Repeat this process until you have one long braided strip of towel. At this point you’re ready to make it into a rug. Take one end of the braided strip and start coiling it around in a circular fashion. Sew the very center part together and continue sewing all of the coils together as you move outwards and add new layers.
It doesn’t even matter if you’re not great at sewing because you won’t end up seeing the thread, just make sure you pass the needle through the layers so that they’ll end up staying well connected. Once you reach the very end of the braided piece sew the three ends of the strip both together and to the outermost coil as well. Flip it over and you’re done!
These up-cycled and colorful towel rugs are perfect for in the bathroom or anywhere in your house where you may want to protect floor or need it. They easily absorb a lot of water and moisture and can keep floors safe and dry when you step out of the shower or trudge in from outside.
Plus, if it gets all dirty and trampled on it won’t even matter since it’s recycled and virtually cost free. Try making one the next time you replace your bath towels and help cut down on waste!
Please Share This With Family and Friends
THIS Is The Unexpected Secret Meaning of That Black Diamond On Your Measuring Tape!
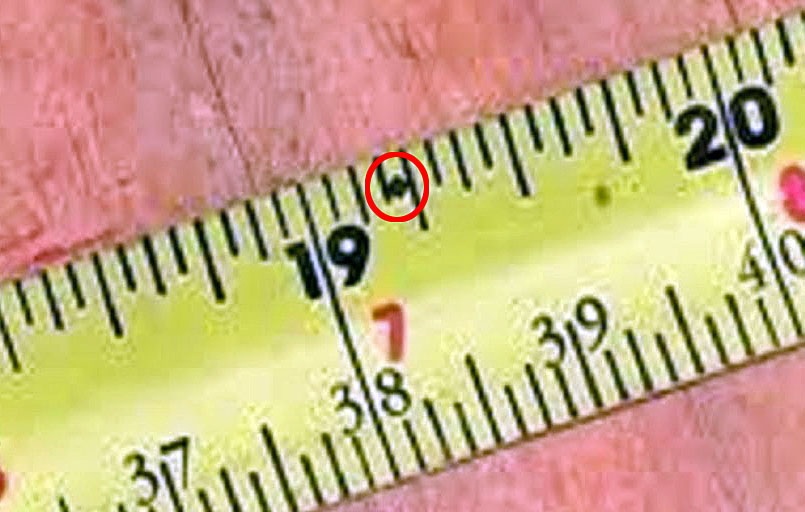
image via – youtube.com
There are all sorts of tools, gadgets, and other things that we use everyday without really thinking about. They’re easy to overlook and take for granted, but without them life would be a whole lot harder. While most of us assume that we know all that there is to know about the most common everyday household items we use, there are likely a few hidden tricks and secrets that you don’t even know about.
Anyone who likes to enjoy a nice glass of wine or champagne has probably noticed how there is an indent on the bottom of the bottle. It’s not there so producers can give you less wine, the dip is actually there to make the bottle stronger for high pressure beverages and stand evenly.
If you’ve ever bought a clothing item and found that it came with an extra swath of fabric, you likely assumed it was for patching up a small hole. While that could be a use for it, the real reason for the extra little piece is for washing before you wash the clothes. That way you can tell if it is colorfast or likely to shrink.
Those winter hats with pom poms on the top were not originally meant to be decorative as they are today. The Scandinavians originally used them in order to gather the seams in the hat back neatly, way before knitting winter hats became more common like it is today.
Every time you pop something in the microwave you pass by the black grading that covers the front window. All microwaves must have this important safety feature that’s called a Faraday shield. It protects you by preventing harmful electromagnetic fields from leaving the inside of the microwave while it is turned on.
Most homes have standard walls featuring six studs that are spaced sixteen inches apart. The black squares on measuring tapes are spaced sixteen inches apart in order to help you better find and mark the studs. In addition to the black squares, tape measures also feature black diamonds (sometimes they are triangles) which are spaced 19.2 inches apart and they are there for truss layouts of 8-foot sheet goods.
These are just a few of the many other interesting facts and features covered in the video about everyday household objects you may not know about. Be sure to check it out for more and maybe you’ll learn something new!
Watch the video below for more unknown uses and symbols you probably don’t know about:
Please SHARE This With Family and Friends
This Woman Pours Baking Soda Onto Her Entire Mattress The Reason Is The Best Life Hack Ever!
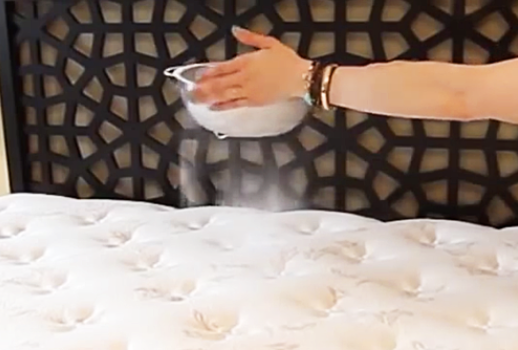
image via – youtube.com
On average, we spend around one third of our lives in bed and every single night we perspire out about ½ a pint of sweat. That’s a lot of sweat, especially considering that we replace our mattresses only after having slept on it for hundreds, if not thousands, of nights in a row.
On top of the sweat and dust that mattresses pick up there’s also dirt, food crumbs, other spills, blood, soil, and who knows what that accumulates on our beds. People rarely clean their mattress, if at all, and it’s clear to see why; they’re hard to clean! You can’t stick it in the washer and where would you even begin?
Thankfully Melissa Maker, of the YouTube channel Clean My Space, posted a video explaining how to clean and maintain a mattress so that it will stay fresh and comfortable for longer than ever. She covers a lot of insightful tricks and information, and here are a few of her best tips:
Vacuum Your Mattress- This removes a lot of the dead skin cells, dust, and other stuff that accumulates over time on your mattress. She recommends vacuuming every time that you rotate it and stresses that you use a clean upholstery attachment. If you don’t use a clean one, you run the risk of spreading even more dirt and crud onto your bed.
Deodorize Your Mattress- Make it smell fresh again with the odor neutralizing power of wonderfully affordable baking soda. All you have to do is sift some baking soda all over the top of the mattress and allow it to sit. After about 30 minutes vacuum it up with a clean upholstery attachment.
Stain Fighting- According to Melissa, stains come in 3 varieties which include protein, grease, and tannin. The protein type is the most common one you’re likely to encounter and blood, sweat, vomit, and urine all fall under this category.
The best way combat these types of stains is by cleaning them ASAP before they have time to really set in. Liquid stains should always be blotted up with a cool damp cloth. Never scrub or use warm/hot water because that sets it and will only make it worse.
DIY Cleaning Solutions- If you’re dealing with a fresh stain it can be treated with a mixture of equal parts salt, baking soda, and water. Mix this into a paste, apply it directly onto the stain, and brush it off 30 minutes later.
Then, using a cool damp cloth, wipe away any excess mixture that may still be on the mattress and allow it to fully dry. If that doesn’t work quite as well as you’d like, try this stronger cleaning mixture of 2 parts hydrogen peroxide combined with one part dish soap.
Place a very small amount of this solution on the stain and softly brush it in with a clean toothbrush. After about 5 minutes you can wipe it off with a cool damp cloth.
Keep Your Mattress Dry- In general, aim to keep all liquids off your bed. A key factor in both cleaning and maintaining a mattress is to always make sure that it’s completely dry before using or sleeping on it. If and when you need to clean it or it does get wet, use fans to help it dry faster.
If you fail to allow it completely dry you risk ending up with mold or other nasty things growing on it, so take the time to allow it to dry!
Flip Your Mattress- This should be done every season or at least twice a year. Also, rotate it around so that you are not always sleeping on one part of the mattress. Rotating helps the mattress stay even all around, especially if you and/or your partner tend to sleep on certain sides and do not weigh the same.
Now you know how to clean a mattress and hopefully you can put some of this information and these awesome tips to good use. Try them today and be rewarded with a better night’s sleep!
Let us know how the life hacks work for you! Enjoy!
Please Share This With Your Family and Friends

