This Woman Starts Cutting The Stems Of These Roses. When She’s Done Unexpectedly STUNNING!
I’ve seen tie-dyed roses many times, but had no idea I could make them myself. The video you are about to watch below, was made by Kathy the CRAFTY CHICA who always wanted these roses herself, and made it her business to put together an easy and fun-to-follow tutorial on how to create this kaleidoscope effect.
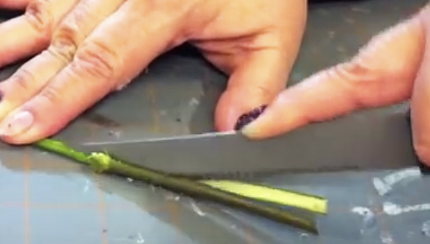
With just some white roses, a packet of dyes, scissors, a knife and some clear plastic cups, you will see how easy this is to do. Each plastic cup will have a different color dye in it. Kathy shows you how to prepare the roses for optimal absorption of the different colors.
The angle and length that you cut the stems is critical to obtaining the most vibrant outcome. Additionally you will get to see how the color gets established from hour to hour over a 24 hour period. The great thing about creating these really cool color gradients, is that you have control over the hues you want to establish.
This is just such a great DIY to create for your own pleasure, to bring to a party, or to do for different holiday adornments. This will be totally perfect for Mother’s Day this year! Have fun watching this and let us know if you will try creating your own.
Please SHARE this with family and friends 🙂
She Wraps A Hair Tie Around This Coffee Filter Then Places It In Water. When She’s Done WOW!
There is nothing like the gift of flowers, that is, except homemade flowers! Jamie Pettito is a YouTuber who has a channel called “Do it, Girl”. She specializes in the best homemade gifts that really say “I care about you”.
Although she was trying to save us money for the flower extravaganza of Mother’s Day, this coffee filter bouquet of flowers makes a beautiful gift any time of year! It’s especially nice in the winter time, when we can’t go out and pick flowers, and we don’t want to spend the money on an item which has such a short life.
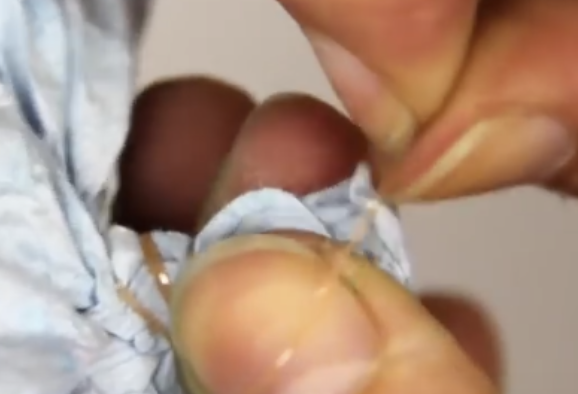
This easy-to-follow tutorial that you are about to watch below, allows you to give a gift with a personal touch, or just cheer up your own space with flowers that will give you pleasure every day. All that is required are some coffee filters, scissors, pipe cleaners, masking tape, rubber bands and basic glue.
She shows you how to make 2 different kinds of flowers. When you see the finished product, it will inspire you to try it yourself.
Please SHARE This With Your Family and Friends 🙂
This Woman Trims The Edge Of Her Pie With Pearls. The End Result Is An AMAZING Surprise!
It’s never a bad time to cook a pie! Pies can make an easy and delicious home made dessert…that is, if you have a great crust. Not only is the taste of the crust critical, but as we all know “presentation is everything!”
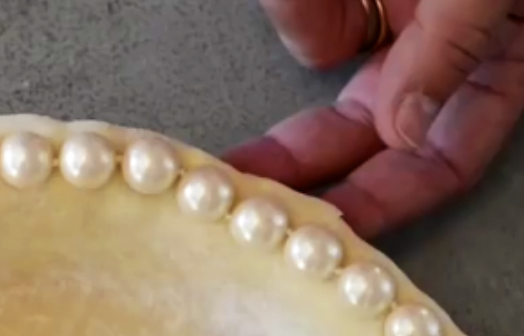
So if you have a great recipe, the next step is addressed in the footage you are about to watch, below. The video presented by YouTuber Libbie Summers is simply mesmerizing. She makes you want to make your own pie by showing us 20 different ways to crimp the edges. She turns pies into works of art.
Most of the designs are really simple to replicate, and a few are a little more elaborate for the more creative and adventurous among us. Using everyday items she shows us how to dress up our pies. I can guarantee that you will be as inspired as I was, after watching this.
Using a string of Pearls, a small measuring spoon, a fork, two pairs of thumbs, and a scissor, Summers has devised the easy-to-follow beautiful edges for your pie.
Sit back and enjoy this magical video.
Please SHARE This With Family and Friends 🙂
I Could Never Figure Out How To Get My Stove Grates Clean. Then I Learned THIS Strange Trick!
If you cook a lot of food and dinners up at home, your stove is bound to get dirty. It’s one of the hardest areas to clean in the kitchen and it’s extremely important to take care of it. Baked on crud that builds up on stove top burners can be a health and safety hazard and if you want the stove to last, you have to clean it thoroughly once in awhile.
The problem with that is it can be a real pain in the behind getting those black crusted grates looking like new again. Now you don’t have to scrub them endlessly and risk scratching the heck out of them, because DIY Super Mom tested out an easy way to clean them up. The method she covered in this video takes minimum effort and works wonders at removing built up grease, grime, and food from burners.
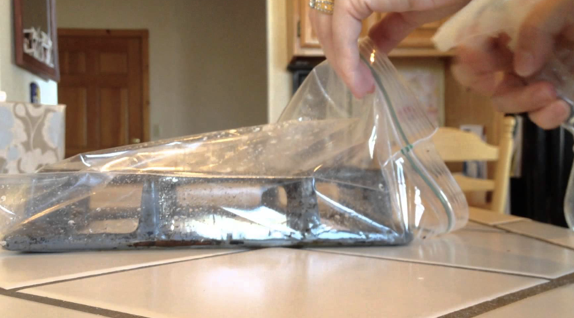
All you really need to clean them is ammonia and a large Ziploc plastic bag. Here’s how you can do it: First, pour some ammonia into a spray bottle and place the dirty burner into the bag. Spray some ammonia all over the burner while it’s in the bag, so that it’s completely coated, then seal it closed so that all of the nasty fumes are trapped and locked inside.
Gently shake the bag and turn it over a few times to agitate the liquid inside and to ensure that all of the cracks, corners, and crevices are soaked in it. Allow the bag to sit overnight while the ammonia works to loosen up and dislodge the baked on food.
Open up the bag the following day and remove the burner, placing it somewhere safe that you can scrub it, like in the kitchen sink. Put on a pair of rubber gloves and use a sponge to wipe off the rest of the black, icky crud. It should come off easily and since you don’t need to scrub hard or scour, it won’t scratch the grates.
The next time you notice your stove top is looking a little worse for wear, pop the grates in a bag and try this simple and effective cleaning trick. It’ll have your stove top burners looking clean and polished without the use of harsh, expensive cleaning supplies that stores sell.
Best of all, you won’t have to scrub until your arm feels like it’s falling off!
Please Share This With Family and Friends
She Places A Doily On Top Of This Balloon. When She’s Done a STUNNING Surprise!
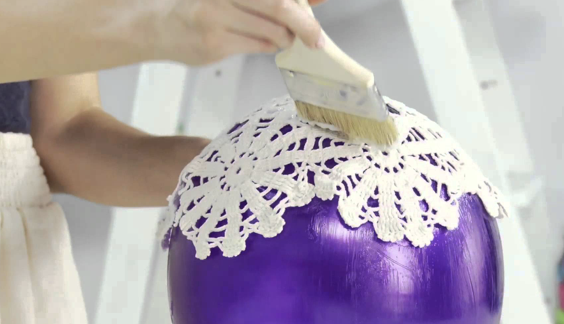
I remember my grandmother having doilies on the armrests of her chairs and couches back in the day. I must say that they always had an old-fashioned connotation in my mind. But as we see over and over, through the incredible creations that we are privy to on the internet, old things can be used in new ways.
The DIY video you are about to watch below, introduces a way to use doilies in a modern romantic way. Sarah, from Socraftastic, shows us how easy it is to make a lace -patterned lantern to create a beautiful ambiance in any room in your home.
Giving some romance to lighting can turn an ordinary room into something special. To construct this DOILY LANTERN you will need Doilies, a balloon, petroleum jelly, a mixture of Elmer’s glue, water and flour, and a light kit.
Watch how Sarah blows up the balloon, rubs the balloon with petroleum jelly, for initial adherence for covering the ballon with the doilies, and then see how she uses the glue mixture to paint on the doilies. When all is dry, she pops the balloon and inserts the light bulb and VOILA! With a flip of the switch you have a beautiful doily lantern.
Watch the tutorial to see this creation, that is nothing short of gorgeous.
Please Share This With Family and Friends 🙂
She Coils Her Hair Around This Regular Straw. When She’s Done An Unexpected Stunning Surprise!

Do you love curly hair, but lack the time and patience it takes to attain it? If you’re short on time in the morning and have flat or unruly hair, then you know how much of a pain it can be to try and style it into the perfect look. Most of the time people just throw their hair up in a bun or let it fall as it may. When it comes down to it, achieving beautiful looking hair is hard to do outside of a salon, especially well defined and perfect curls.
It takes time, patience, and a lot of heat and styling products to get frizz free curls, at least that’s what most of us commonly assume. However, there is a much easier and less expensive alternative to traditional methods of curling hair. Best of all, you can do this yourself at night right before you go to bed.
When you wake up all you need is 5 minutes or less for your hair and that’s it! There is no heat, irons, or dryers necessary for this, you don’t even need to shower, but you will need a brush, plastic drinking straws, a spray bottle with water, and some bobby pins.
First you should brush your hair to get any tangles out and make it easier to work with. Take a section of hair and damp it with the spray bottle and water. Then take a straw and wrap the hair around it, starting at the top near your scalp, and working down to the ends. Once the section of hair is completely wrapped around the straw, take a bobby pin and secure the top part to your scalp.
Take another bobby pin and fold the bottom portion of the straw back, so that it naturally seals the lower end of the hair, and pin it into place. Repeat these steps for the rest of your hair until all of it has been sectioned off and secured in place. At a minimum, wait a couple of hours or longer until you’re positive that all your hair has completely dried before taking it out.
The longer you keep the straws and bobby pins in the better, and you can leave them in overnight. When you wake up, or are sure that your hair is dry, simply take a section of hair and remove the bobby pins before sliding the straw out. You can tussle it up and disarrange it for a messier look and add a little hairspray to better hold the curls.
For a quick volume boost try flipping your hair over and spritz some hairspray near the roots, wait a few seconds for it to dry, then flip your head back up. All in all, it’ll only take about 5 minutes to style your curls and you’ll look great.
It really is easy to master and this technique can give you bouncy, frizz free, beautifully defined curls. There’s no need for any products or gadgets, and since it can be done overnight you’ll free up a lot of time in your morning routine, yet still look great.
This video will show you exactly how to curl your hair with straws and it provides a lot of great tips on the process. Check it out and try it tonight!
Please SHARE This With Family and Friends