
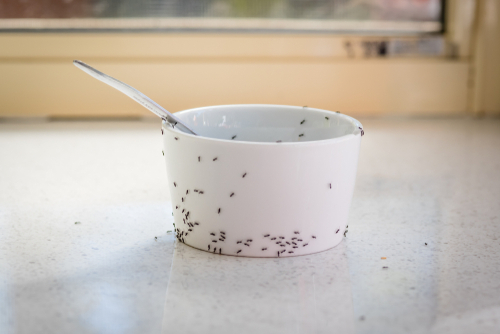
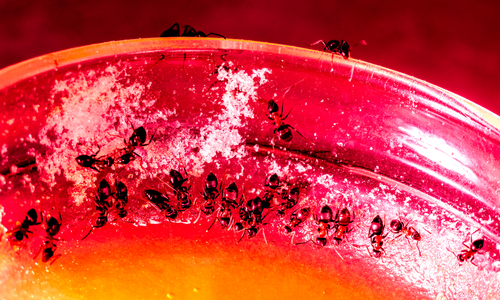
Instead of Spending $200 on an Exterminator Do THIS $2 Trick To Get Rid of Your Ant Problem!
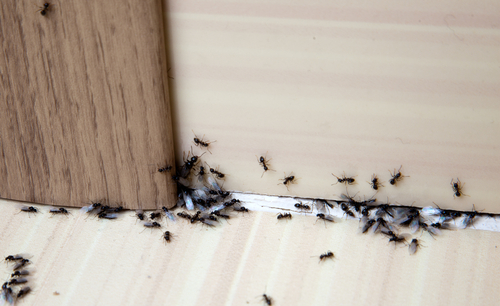
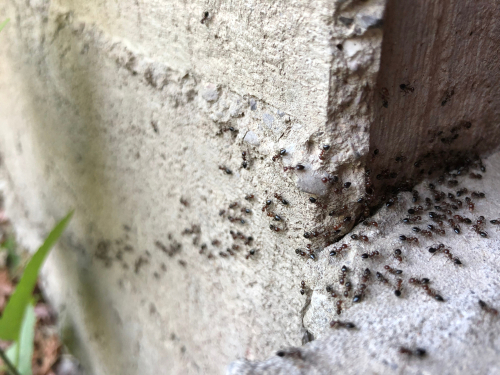
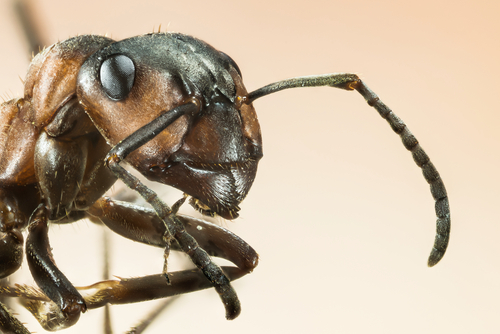
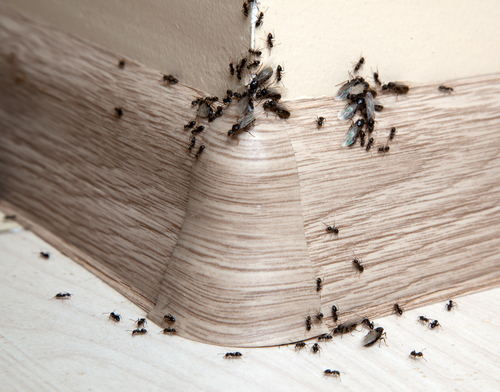
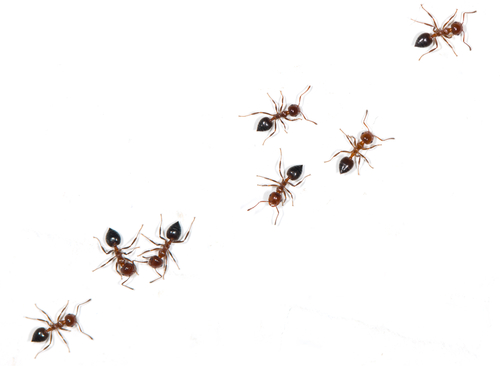
Ants can be found in virtually every corner of the world, but the one place that nobody ever wants to see them is inside their house. Even if you happen to see one lone ant, the chances are high that hundreds or thousands more are lurking somewhere nearby. If you ever have a dreadful infestation, or just need to get rid of a few pesky ants, definitely try this simple all-natural solution.
It’s a much safer and less harsh alternative to using a toxic chemical based insecticide, such as Raid, yet it’s just as effective. Plus, the best thing about it is that it’s cheap to make, so stir up a batch and restore your home back into an ant-free setting!
In the accompanying video Greg The Gardener demonstrates how to mix up and use this ant control solution which calls for hot water, borax, sugar, honey, and a spray bottle. Start out by boiling up some water. While you wait, grab a cup and combine 6 teaspoons of sugar with 6-8 teaspoons of Borax in it.
Once the water is boiling, carefully pour in some water and stir until the sugar and borax mixture completely dissolves. Next, add some honey to the cup and more hot water if it’s needed, stir it all together and let it sit. When it’s cooled, pour the mixture into the spray bottle, and now you’re ready to go find some ants to get rid of.
Spray the mix on and around ant trails and focus on cracks and places where they may be entering the house. Allow the solution to pool in high problem ant traffic areas and spray around the foundation. A word of caution, only use this spray outside the house, but it’s safe to use on plants.
Do NOT let pets or animals near it because they can get very sick if they lick or ingest it. You can take a small plastic bottle cap or similar object and pour some of the solution into it, then place it somewhere that animals can’t reach. Also, to be extra safe block access to the mixture even further by placing a pot or cover over it.
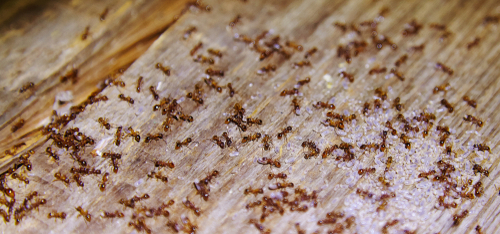
This works so well because the ants will be attracted to the sugar and honey. They’ll go back and tell all their fellow ants about it and lead them strait to the sugar source. Once they ingest it, the borax builds up a gas inside of them which causes their death. In particular, this is a great way to get rid of carpenter ants that may be causing a lot of damage to your house, deck areas, and stored lumber or wood piles.
This simple spray is by far the safest, cheapest, and easiest ant control solution I’ve ever come across. As you can see, the comments under the video say that it works extremely well and since it can be made for around fifty cents or so, you may as well try it!
Please Share This Tip With Family and Friends
She Starts Cutting a Pie Crust Using a Pizza Slicer. But When She’s Done YUM!
Apple pie fries are a fun and delicious take on dessert that everyone will love to chow down on. The ‘fusion’ food blends together the shape of fried potato sticks and their finger-food friendly functionality with the sweet, yummy taste of all-American apple pie. The pie fries are topped with salt, aka sparkling sugar, and served with a side of ketchup, aka warm gooey caramel sauce!
Even if you’re not a baker you can manage to pull this recipe off, it’s quick, easy, and much more convenient than making a traditional apple pie from scratch. They will make your house smell amazing and come out the oven all crispy, warm, crunchy, and sugary sweet. Is your mouth watering yet?!
Here’s what you need and how to make them:
Ingredients:
1 can of apple pie filling – 2 pie crusts (Pillsbury were used in the video) – 1 egg (for egg wash) – ¼ cup sugar – 1 teaspoon cinnamon – ¼ teaspoon of nutmeg – sparkling sugar (coarse, large grained sugar)
Directions:
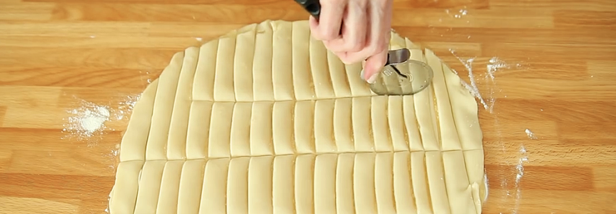
Set the oven to 350 degrees Fahrenheit. While that’s heating up, place the can of apple pie filling in a food processor and pulse or blend it until smooth or the chunks are tiny. Lightly dust a flat surface with flour and lay out one of the pie crusts. Evenly spread the apple pie filling over the entire crust and then place the remaining pie crust right on top of it.
Use a pizza cutter to slice a series of vertical lines down the crust, then run a few horizontal cuts across it to make fry shapes. Refer to the video for a better idea on how to space the lines and exactly how large to make the fries. Cover a baking sheet with parchment paper and use a spatula to transfer the fries onto it.
In a bowl mix together ¼ cup of sugar, 1 teaspoon of cinnamon, and ¼ teaspoon of nutmeg. Make an egg wash by mixing one egg with a dash of water, brush it over the fries, and then sprinkle the sugar mixture over them. Lightly sprinkle them with a little bit of sparkling sugar before baking for 15-20 minutes at 350 degrees. Remove and allow them to cool before serving.
These taste great on their own but are definitely kicked up a notch when served with whipped cream, caramel, chopped nuts, or whatever toppings and dipping sauces you like!
Please Share This Recipe With Family and Friends 🙂
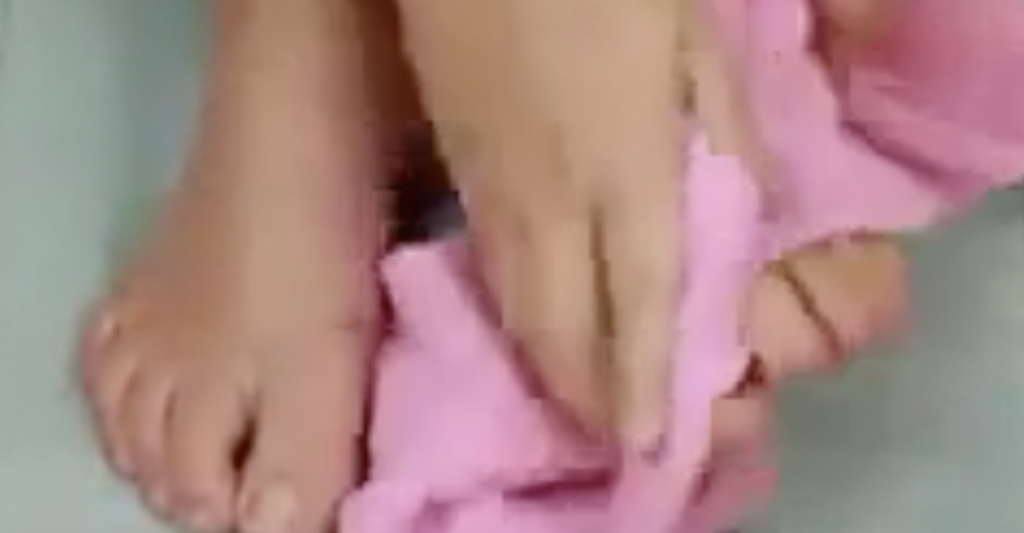
If You Have Dry and Cracked Feet THIS Simple Foot Hack Will Get Rid Of It For Good!
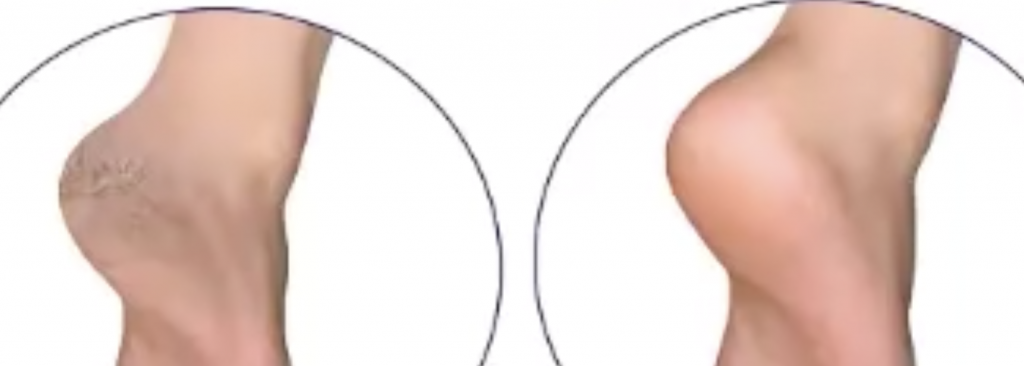
Dry, rough or cracked heels, is a common problem most people face at one time or another. With summer here, we become more conscious of it as our feet are exposed in sandals. The reason our feet suffer from intense dryness is that there are no oil glands in them, making sweat glands their sole source of moisture, as they bear the weight of our entire body each day!

As sweat glands alone usually aren’t enough to keep our feet comfortably moisturized, it is necessary to avoid things that cause excessive dryness. Finding home remedies that will replace moisture, needed to avoid uncomfortable cracked heels, is provided in the video you are about to watch below.
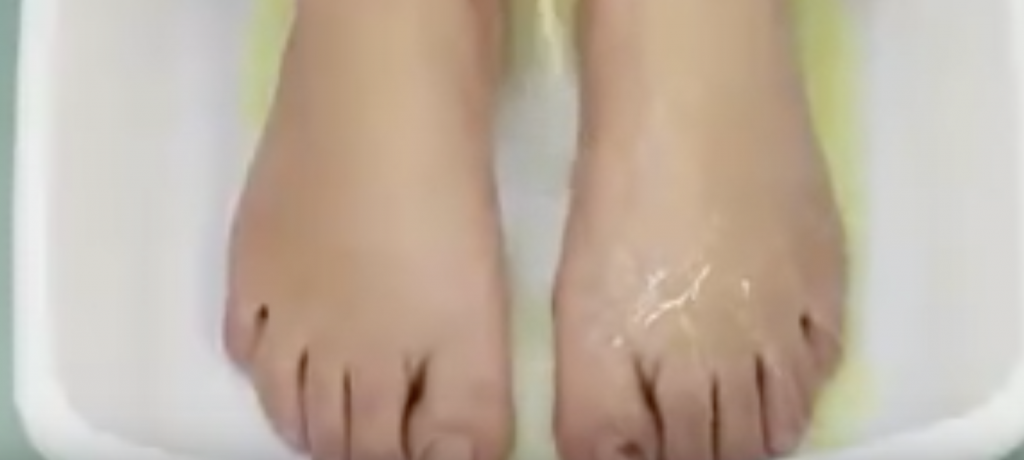
Cold weather, drying soaps, aging, low humidity, overly hot and prolonged showers and sun exposure are the usual suspects that contribute to dry feet, according to “Foot Vitals.” Their recommendations for home remedies include a 10-minute lemon juice foot bath, because the acid helps to dissolve dead skin; a homemade cream of olive oil mixed with lavender essential oil or lemon help to soothe and heel.

“Livestrong” recommends Vaseline spread over your entire feet and covered with cotton socks overnight for a great healing effect over time, as well as an exfoliating scrub with equal parts of olive oil and brown sugar for 10-15 minutes. Sesame Oil, Honey and Milk as well as some other great solutions are illustrated in the VIDEO below. It offers some easy-to-follow remedies to resolve troublesome cracked heels.
Please SHARE This With Your Family and Friends
He Cuts an X His Peaches As Soon As He Gets Home. But When He’s Done YUM!
Summer is the best time of year to eat fresh fruits and vegetables because it’s when the majority of them are in season. It’s also when we tend to crave them the most, especially sweet juicy peaches. When it gets hot and humid outside nothing tastes better than a ripe peach or two. They just hit the spot and are the perfect, most refreshing, light and healthy food to snack on.
While there are all sorts of different varieties of peaches readily available at the grocery store, freshly picked and locally grown options can be easily found at farmer’s markets and roadside stands. They often have the absolute tastiest fruits at bargain prices which have been picked right of the tree only hours before you buy them. If you come across any, pick up a bunch to enjoy both right away and later on in the year.
With this clever storage method, you can preserve fresh peaches and have them on hand all year round. The frozen fruits are perfect for blending into smoothies or yogurt and can be used to make baked goods or simply eaten on their own! So gather up a bushel of ripe peaches and prepare them for storage with the following list of items:
Large pot filled with boiling water
Bowl filled with ice water
Knife
Cookie sheet
Plastic wrap
Freezer-safe storage containers
The accompanying video from the Better Homes and Gardens channel covers everything you need to know about freezing fresh peaches so check it out for more information and read on below for instructions:
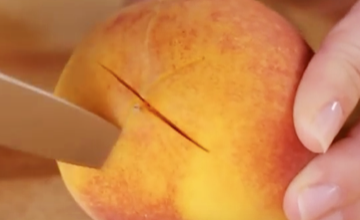
Bring a large pot of water to a boil and get the ice bath ready. Take a knife and on the bottom end of each peach slice a shallow X. Marking it like this is key because it allows for the fruit to expand when it’s cooking and it lets out pressure, so the peach won’t split open randomly or get mushy.
Place a few of the cut peaches into the boiling water at a time and remove them promptly after about 30 seconds. Transfer them immediately into the ice water and remove the skins once they’ve cooled down enough. Next, take out the pits, slice the peaches into evenly-sized pieces, place them on the baking sheet so they’re not touching, and cover it completely with plastic wrap.
Pop the baking sheet in the freezer for the night and the next day take it out. Transfer the frozen peach slices to freezer-safe containers and then stick them back in the freezer. Whenever you’re in need of a peach, you’ll have fresh ripe ones on hand that are ready to be enjoyed!
Please Share This With Family and Friends
She Begins Hot Glueing Marbles To a Ball Made of Foam. But When She’s Done It’s STUNNING
If you’re looking for a quick and easy way to make your lawn or garden pop, then you have to check out these beautiful homemade gazing balls. They shimmer and sparkle when they catch the sunlight and add an extra-special touch to the landscape. They’re fun and easy to make, but the best part about them is that they’re super affordable and won’t cost you more than a few dollars. In comparison, store bought versions can be very pricey and the less expensive ones are usually dull, plain, cheaply made, and not too exciting to look at!
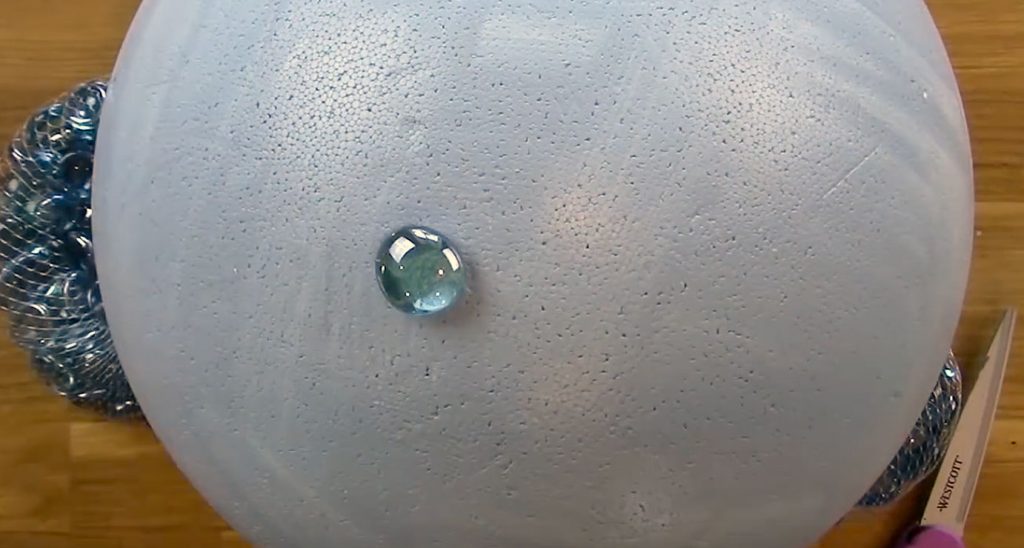
This craft project is also something that kids will enjoy making and it allows them to really get creative. You can make different sized balls in any color or combination and you can customize them to your exact standards. All you really need are Smoothfoam balls and flat glass marbles that most dollar stores carry in stock.
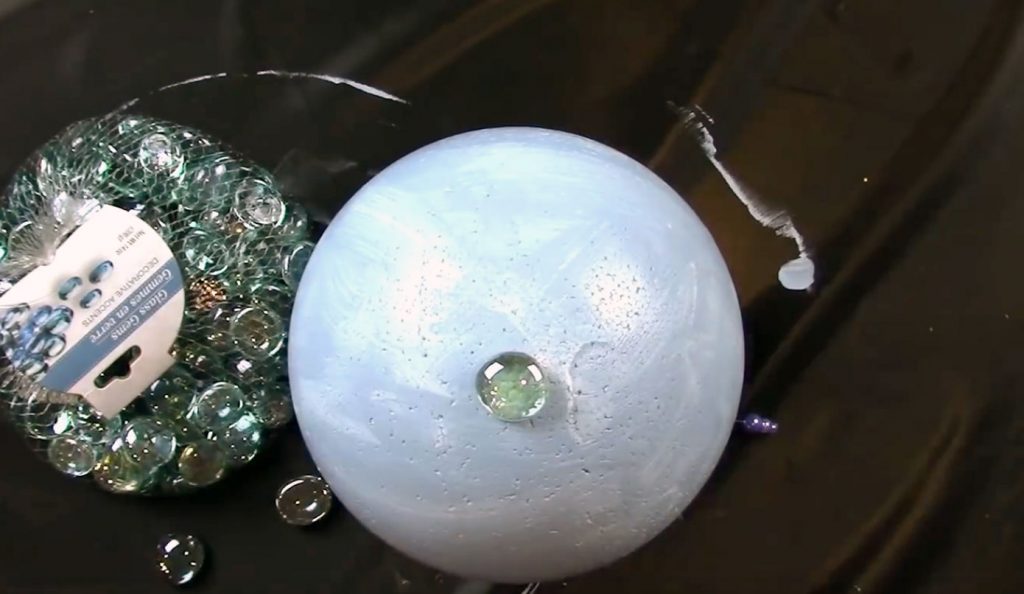
Craft extraordinaire Jennifer Priest, who runs her own blog named Hydrangea Hippo, shows us how to make them in the accompanying video. She conveniently included a list of all the supplies that she used and links to them as well. The materials you will need include Smoothfoam balls, flat glass marbles, a hot glue gun, acrylic paint, and a foam brush.
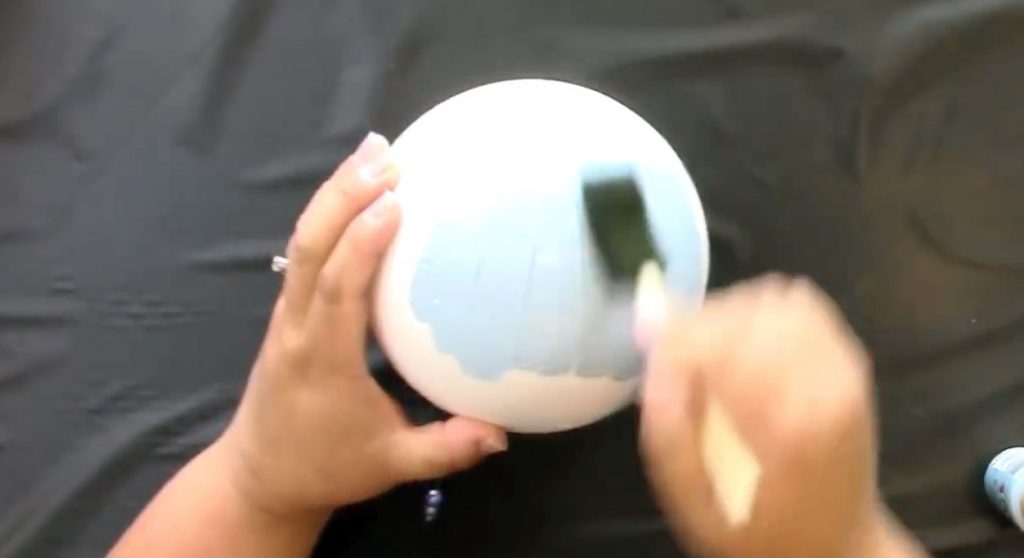
It’s important that you use Smoothfoam balls and not Styrofoam ones because Styrofoam will absorb all the paint you put on it and melts very easily. You’ll also want to use something that you can stick into the foam ball to hold on to, like a chopstick or long pin, that way you can paint the entire ball without making a mess and getting your hands all dirty.
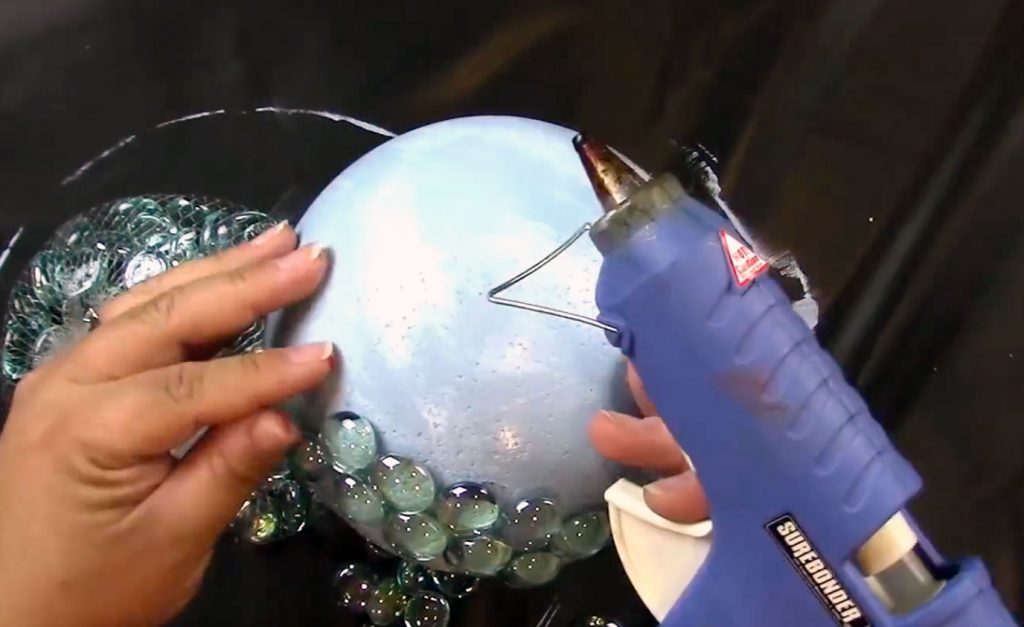
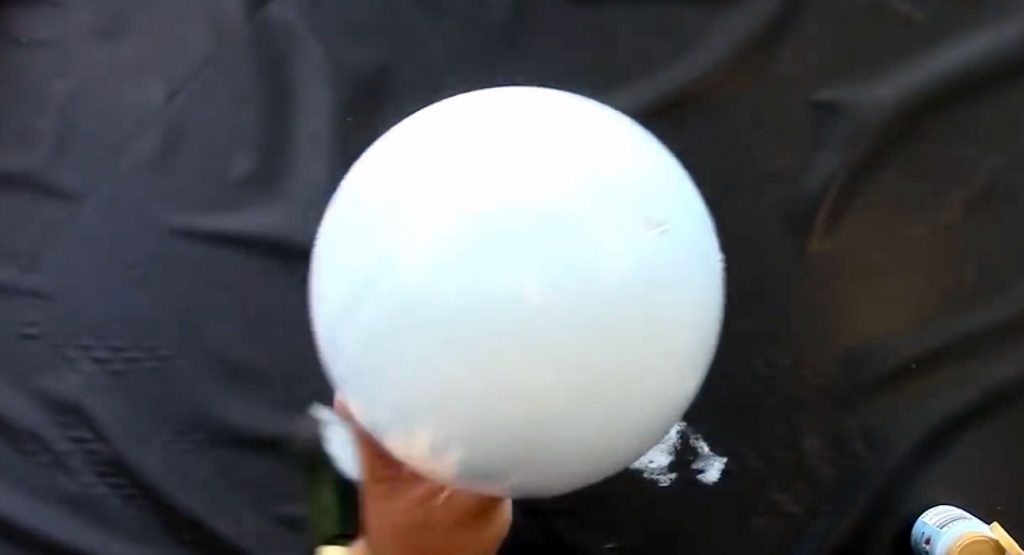
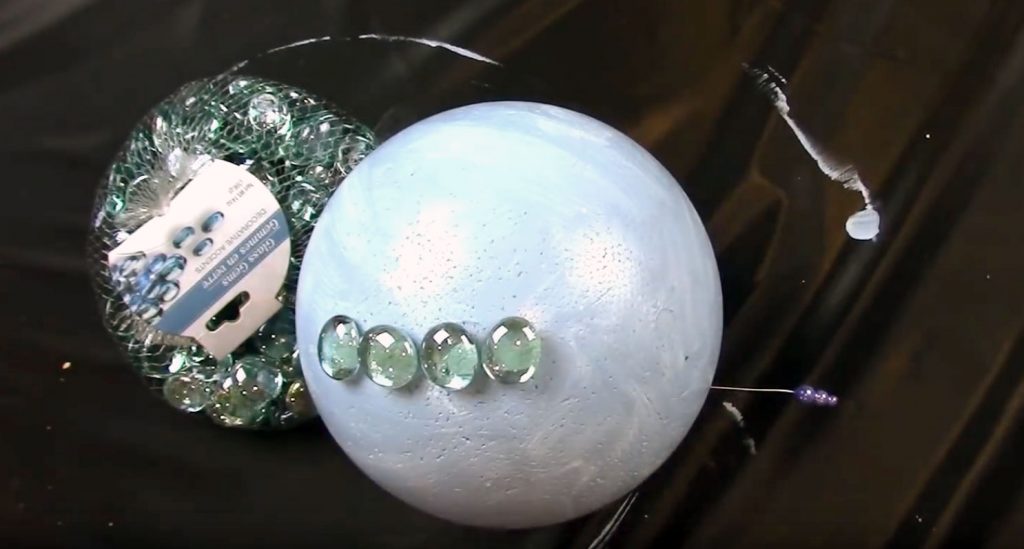
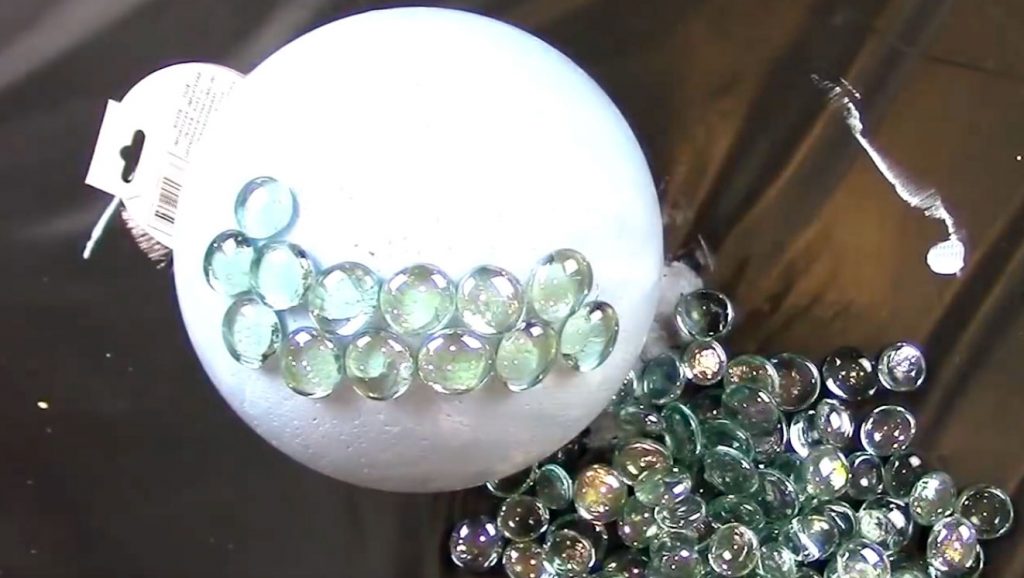
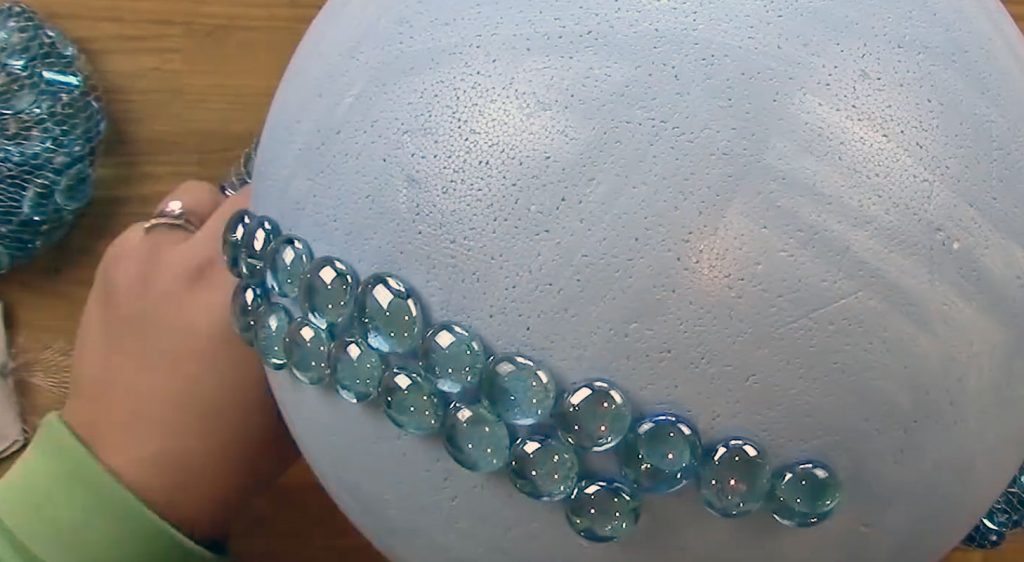
Start out by painting the foam balls and then set them aside to dry. Once the paint has completely dried fire up your glue gun and apply a dab of glue to the smooth side of each marble. Stick them onto the ball smooth and glued side down and as close to one another as you can until the entire thing is coated in marbles.
Now you can place the ball in the garden, flower beds or pots, on a pedestal or stand, or wherever else you desire. They can be hung as well, just stick a small screw hook into the side and it’s ready to be strung up. The decorating uses for these go beyond lawn and garden and they make beautiful additions to party or wedding décor as well.
These gazing balls turned out looking anything but cheap and you’d never guess they were made with simple items from the dollar store. They would make a lovely and thoughtful Mother’s Day gift and with everything starting to really bloom, now is the time to make them!
Please Share This With Family and Friends 🙂
She Places Fondant Over This Cake. When She’s Done A STUNNING Surprise!
Watch this lifelike 3-D cake come to life before your eyes! What takes 4 days is shown in 4 minutes. Anyone can try their hand at crafting a sculptured cake at home. The ideas and possibilities are limitless. Any occasion can merit a personally created cake that is sure to be a crowd pleaser.
Some helpful insights into the process include starting with a quality, moist cake as your base. Try to avoid any mix-ins like chocolate chips or nuts as they make the carving process difficult. Next, whip up a smooth ganache or buttercream for your cake layers. The smoother the better for when the sculpting part comes.
Depending on your design the next step may involve inserting doweling rods down into the cake to ensure the structure stays secure. Once the cake layers have been assembled, the carving begins.
Try and have a selection of knives for this part and experiment to see which ones work best for the creation your working on. Another helpful tip is to place the cake on a turntable. It will make the shaping and moving of the cake much easier.
Once your cake has been designed and shaped it is time for the icing. Many professionals use fondant, an edible type of icing that molds to your cake and is easy to shape. Typically it is smoothed out with a rolling pin and then draped over and fitted to the shape of the cake, with the excess being cut off.
You can also make shapes out of it and add further details by painting it as well. When your done it is time to store your cake in either a safe place or the refrigerator. Lastly, it is time to eat your cake!!
Remember, there is no one way to carve a cake. Trial and error are inevitable and overall just have fun with it. Get creative and add candies, decorative touches and personalized messages with piped icing. People will love that you even tried, so go forth and carve cake!!
Please Share With Family and Friends


