This Woman Places Crayons In A Pot And Starts Melting Them. But The End Result Is Incredible!

image via – youtube.com
With beautiful warm weather comes annoying biting insects. Now that bug season is upon us it’s time to start breaking out the repellent, zappers, and swatters. Nothing ruins a picnic or backyard BBQ faster than a swarm of disease carrying mosquitoes buzzing around.
However, instead of driving yourself crazy, and slapping yourself silly trying to kill the little suckers that land on you, turn the tables on the mosquitoes. Make the environment and air around you a safe, mosquito-free haven by perfuming it with citronella candles. Citronella oil is derived from the leaves and stems of lemongrass plants and it makes an excellent, all natural insect repellent.
Studies have shown that it is effective at repelling mosquitoes, and if you burn it off through candles you can keep an area skeeter-free. Which leads us to this awesome video tutorial on how to make citronella candles! The whole project is cost effective and easy. Forget buying expensive candles at the store, these are even prettier and can be custom colored.
All that it requires is wax pieces, candle wicks, citronella oil, jars (mason jars are perfect- resealable, cheap, and sold everywhere), plus a bowl and boiling water. First determine how much wax you’ll need by pouring it into the container you plan on using as a candle holder. Boil a pot of water and then place a glass bowl in it.
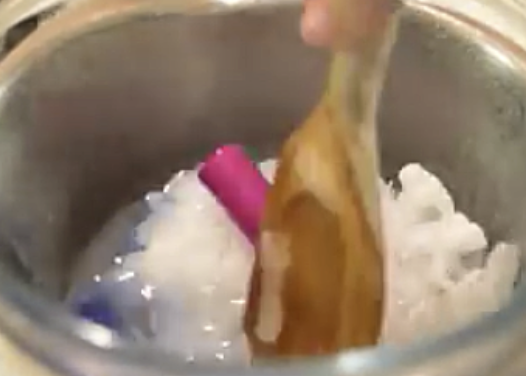
Pour the wax into the glass bowl and allow it to completely melt. If you want to color the wax simply add in a wax crayon or two and melt it down. When all the wax and crayons are fully dissolved mix in a teaspoon of citronella oil. Attach the wicks to the bottom of the jars with a small piece of tape, then carefully pour the wax into the jars.
To keep the wicks in place as the wax sets, hold them up between two chopsticks over the top of the jar. Once the wax is firm again trim the wick to about an inch above the candle line. One last thing I want to mention is that many store bought citronella candles use a synthetic type of citronella which is vastly inferior and not as effective as the real essential-oil type.
They are often labeled “citronella scented” but don’t contain any of the natural variety’s properties, so they won’t repel bugs. Also, don’t use tiki torch oil/fuel, make sure to use citronella essential oil in the candles. I hope you enjoy the video and candles as much as I have been.
Let us know how yours turned out! 🙂
Please Share With Family and Friends
He Cuts The Ends Off This Orange Next He Slices One Large Cut Down The Middle. The Reason Is Genius!

image via – youtube.com
If you have ever struggled through attempts at peeling open an orange then you need to see this video. It shows you how to properly go about removing an orange rind in a simple, quick, and efficient manner. The whole process can be done with only 3 cuts in less than 60 seconds.
Best of all, it leaves a minimal mess and reduces the likelihood of orange juice getting sprayed in your eyes. Start by positioning the orange down securely so that it sits length-wise. Carefully take a sharp knife and slice off each of the 2 ends. Then slice width-wise down the middle, but only cut to the center and not all the way through, so you still have one in-tact piece.
Take the orange and open it up at this last cut. It should unfold and reveal the delicious inner fruit pieces that you can now easily peel off the rind and eat. And voila the perfect way to peel an orange your probably never knew existed!
After learning this I want to challenge a friend to an orange peeling contest to see who can do it fastest. It’d be a quick way to make a buck if we bet on it….But seriously, try this technique next time you eat an orange and definitely watch the video to really see how it’s done.
Try it out and let us know if it works for you!
Please SHARE With Family and Friends
2 Brothers To Make A Nice Video For Their Mother’s Day. The Result Made Me Spit My Drink Out!

image via – youtube.com
With Mother’s Day finally here it is time to show that special lady in your life exactly how you feel about her. Whether it’s with flowers, cards, or just having a nice family dinner people all over the country are celebrating their mothers. Who is more important in this world than your own mom? Probably no one!
In the following video the boys from BaratsAndBareta attempt to make a digital Mother’s Day card by taking a Mother’s Day photo. The two boys get some sibling rivalry going, and the results are absolutely hilarious. This Mother’s Day video has gotten over 12 Million views and rising rapidly.
These brothers show their love in a comical and unique way which is sure to put a smile on your face. After watching it I just couldn’t stop laughing. I hope you enjoy this heart felt and hysterical Mother’s Day homage! Enjoy! 🙂
Please SHARE With Family and Friends
She Wrapped An Egg In Silk. But When She Unwraps The Egg It’s STUNNING!

image via – youtube.com
There are many ways to dye an egg. Some people use Kool-Aid, food coloring, store bought kits, nail polish, and all sorts of other things. One lesser known method is an old fashioned way that uses dye from silk scarves to decorate hard boiled eggs. The scarves intricate patterns and colors transfer to the eggs, which turn out absolutely beautiful and truly unique, thanks to their level of detail.
All you need is eggs (uncooked), 100% silk scarves or ties, a ½ yard of white fabric, twist ties, white vinegar, and vegetable oil. You will also need scissors to cut the fabric and a pot of water to boil the eggs in, but that’s it! The whole process is neat and easily doable in under an hour.
However, do not use any of your favorite or treasured silk items because they will be altered by this; not completely ruined, but faded. Also, be sure to use only 100% silk to get the right results. Second hand or thrift stores are a great place to find them at the lowest cost.
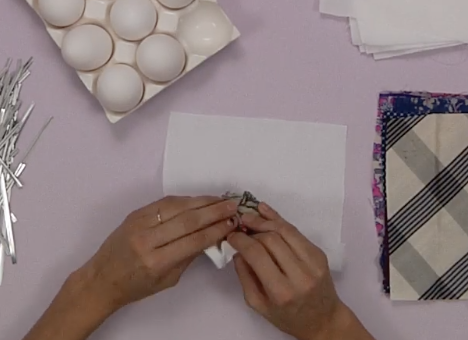
To start, cut the silk and white fabric into 7 inch by 7 inch squares. Take an egg and wrap it very tightly in a silk square, then wrap that in a white fabric square, and secure with a twist tie. Once all the eggs are wrapped up place them in a pot and fill with water. Add 3 tablespoons of white vinegar to the water and boil for fifteen minutes.
Remove the eggs from the stove and allow them to cool off. Unwrap them from the fabrics and your done! If desired, rub the vegetable oil onto the finished eggs to give them a glossy sheen. The video says that the silks can be used 2-3 times in this fashion to dye eggs. The eggs are also edible, you start with raw ones and they becomes hard boiled by the end of the process.
The whole project is a great way to try something new, cheap, and easy with family and friends. Check it out!
Please Share With Family and Friends
Girl Escapes Zip Ties With THIS Easy Trick. The Results Could Save Your Life One Day!

image via – youtube.com
Self-defense technique classes are given all around the world. In martial arts training, self defense is one of the cornerstones of their teachings. Besides for martial arts training, there are courses given that specifically deal with real world situations and how to defend yourself.
There are a large number of of self defense classes taught commercially and many are targeted to specific audiences, for example, how to defend against an attempted rape or self defense for kids and teens. Some of us carry mace or pepper spray and always lock our doors, but it couldn’t hurt to be extra prepared for a circumstance we would never expect to be in.
With all being said we really hope you never find yourself in a situation where your hands are zip tied together, however the following video will show you a quick and easy technique to escape.
You will need to place your hands above your head, then in one quick movement, swing them down so your forearms hit your hips with a ton of force. The zip tie will break and you will be free!
Please Share This Technique With Your Family and Friends
This 17 Year Old Built His Own Mortgage-Free House. But When You Step Inside Whoa!

image via – youtube.com
One boy’s school project turned into a new lease on life, or actually mortgage-free life, when he ended up building a tiny house for himself. Austin Hay began building his tiny home when he was a fifteen year old freshman in high school and finished it at age seventeen. It all began when he was assigned to do a research project on anything he was passionate about.
His interest in the tiny house movement was already budding and after looking more into it he decided this would be perfect for his assignment. To start, he bought a used trailer for around two thousand dollars and the rest was built up from there. Money he had saved from summer jobs and basic knowledge gained from one woodworking class he had taken were all applied to the project.
After he had framed and put a roof on it he began work on the interior and design elements that would make it compact, comfortable and perfect for what he needs. Many of the items he used in building the house were found at junk yards and are second hand parts, such as the doors, windows and flooring.
He put in a lofted bed and even fit a complete bathroom with a hot water shower and composting toilette. By the time he finished his tiny house, Austin had spent around twelve thousand dollars and gained a lot of knowledge about construction, materials and building in general. He even had an open house for people to come by and check out the finished project.
In the future he plans on living in it through college and beyond, taking it with him wherever he ends up. The video gives a guided tour of the tiny house and shows it in various stages of completion. It includes reactions and interviews with his friends and family as well.
Austin’s sense of pride and joy at accomplishing the home is well earned, and shared by his grandfather, whose interview in the clip is especially touching. Check it out!
Please Share With Family and Friends


