Have You Ever Transferred Your Old VHS Tapes Onto Your Computer? THIS Is The Easiest Way To Do It!

image via – shutterstock.com
Technology is constantly being improved and advanced upon, which makes it hard to keep up with. This has inevitably led to a number of once brand new and highly innovative products being rendered obsolete. VHS players are a perfect example of this since the previously popular and must have items are now a thing of the past.
As a result, many people’s extensive collections of VHS tapes featuring home videos and recordings go unused and end up sitting in boxes taking up space around the house. Besides being bulky dust collectors, those tapes may also be deteriorating and you risk losing anything on them.
VHS tapes have a shelf life which varies by brand and how used or rough they have been handled. If you want to preserve the homemade videos and memories they contain, transferring the tapes onto a computer is the ideal way to go.
By saving them in a new, updated digital format you can easily share them with others, edit the content, and watch videos without having to break out the old VHS player. Transferring VHS tapes to a computer can be simple and easy if you know what you’re doing.
In this quick video tutorial CNET senior editor Donald Bell walks through the transfer process and if you follow what he does, you’ll be all set. First and foremost, he makes it very clear that this is only for archiving home video footage and not copyrighted TV shows or movies.
It’s illegal to duplicate and/or distribute such programs as doing so violates their copyrighted content and can get you in a lot of trouble. To do this type of transfer you need a VCR player with audio and video output, VHS tape(s), a computer with room on the hard drive, and a compatible adapter to connect the computer and VCR.
One hour of video will take up approximately 750 megabytes of storage on your computer’s hard drive, so if you prefer to save space on your computer an external hard drive is recommended. Also, the adapter must be compatible with the type of computer you’re using, PC or Mac, or it won’t work.
To start, first plug in the adapter’s color coded ends to their matching connections on the backside of the player. The yellow connection is for video, white is for mono audio, and white/red is for stereo audio. Install the software included with the adapter and follow the steps it takes you through until you’re able to see and hear the video, this shows that it’s properly connected.
Now you can name the file and start the transfer. Press the record button and hit play on the VCR to record in real time. Real time recording means that you have to wait for the whole thing to play through and press stop recording when you’re done.
After that you can edit out any unwanted portions from either the beginning or the end of the video. Finally, a file path to the location of the file you just created will show up, along with options to watch, upload, or further edit the video.
Now you can burn the videos onto DVDs or transfer them to other computers and send copies of them to friends and family. Best of all, you can throw out all those bulky VHS tapes or put them away in storage for good!
Pass this information along to others whose video collections could use an upgrade and help them preserve all the memories and milestones they’ve captured on VHS in digital format.
Please SHARE This With Your Family and Friends
He Pours Molten Aluminum Into THIS Fish Tank. What’s Revealed Inside Is So Awesome!
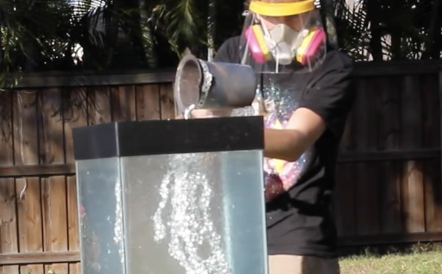
image via – youtube.com
SCIENCE MEETS ART in this really cool video you are about to watch. YouTube’s “The Backyard Scientist” demonstrates how adding polymer beads to water creates an environment that will allow molten aluminum to turn into magnificent pieces of sculpture.
When he pours 10,000 tiny polymer beads into an aquarium filled with water, the beads absorb the water, becoming nearly 200 times their weight! They provide an environment for the molten aluminum that he dangerously heats, to be transformed.
He amusingly interviews his dog, providing him with protective goggles which he reluctantly dons a pair for himself as well, and then procedes to throw the molten aluminum inside the tank of water.
You simply won’t believe your eyes as the aluminum becomes solid and he removes each unique piece from the large tank. Voila! Instant truly beautiful coral-like sculptures that I, myself, would like to own. Let us know what you think.
Have you ever seen anything like this before? Enjoy! 🙂
Please SHARE This With Your Family and Friends
He Mixes THIS Paste Using a Household Product That Will Reverse Gum Disease And Whiten Your Teeth!
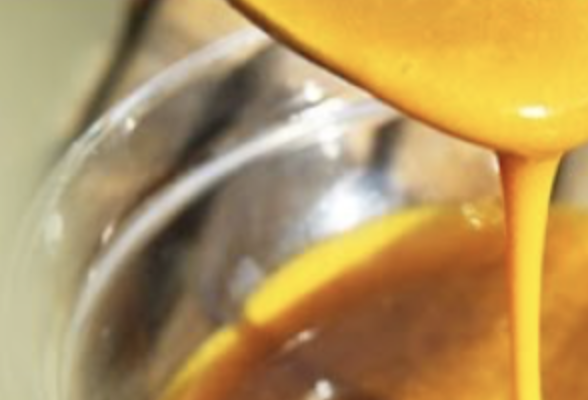
image via – youtube.com
Many of us want whiter teeth; as your teeth become more yellow it has a stark aging effect, even on younger people. Coffee, tea and wine are common culprits that stain teeth over time. Some people go the costly route of having their teeth whitened cosmetically by a dentist, while others use the store-bought white strips to do so.
For some people those alternatives work well, but for many, the chemicals in these methods cause damage to the enamel, heightened sensitivity in the teeth and irritation to the gums. This can occur in individuals who have pre-existing sensitivity in their teeth, as well as inducing sensitivity in those who have never had that problem.
For those of you who wish to whiten your teeth at home, improve your dental hygiene overall and avoid sensitizing your teeth and gums, the video you are about to watch below is for you. The remedy discussed and illustrated in this footage not only promotes oral hygiene while whitening, but adds to your overall health; the reason for this is the key ingredient, TURMERIC!
Turmeric has anti-inflammatory properties which reduce gum disease; when it is combined with several other natural ingredients that you will see in the video, it creates an amazing tooth whitening homemade toothpaste! The results are sensational, and the added bonus is that the toothpaste is delicious.
Have you tried this before? Watch the video for further and more in depth information.
Please SHARE This With Your Family and Friends
She Just Figured Out And Revealed The 1 Unexpected and Surprising Secret To Strong and Flawless Nails!
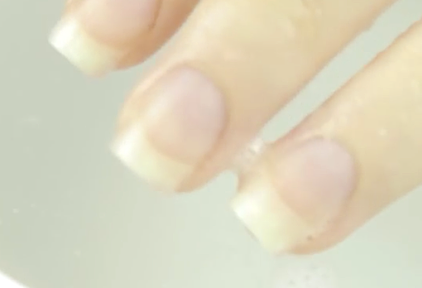
image via – youtube.com
Our hands are quite possibly the most used parts of our bodies and because of that they often end up taking a beating. Day after day we wash them over and over, every now and then things smash into them, and other times we jam them into places like doors and tight cracks.
Inevitably this leads to other parts of our hands sustaining damage, especially our nails. The wear and tear nails go through can often make them weak, brittle, and unattractive looking. It isn’t always feasible to go to the salon and get them fixed up every week, but there are a few simple steps you can take at home to make your nails stronger and healthier.
One of the main culprits that causes nail damage is polish remover. The stuff is just very strong and very harsh, so if you ever need it, make sure to use an acetone-free type. Your nails will be stronger in the long run because acetone-free nail polish remover is much more gentler and doesn’t strip away moisture like other removers do.
One area of nail care that many people get wrong is filing their nails. If you’re serious about having stronger nails, you’ll need to invest in a crystal nail file. These are superior to other types of files because they lessen the likelihood of ending up with chipped, peeling nails, and leave nail edges smoother. Also, never file back and forth, instead only file in one direction.
Next, you can’t overlook cuticles and smearing on a little bit of cuticle cream throughout the day on them will soften and smooth both nails and cuticles. It also makes pushing back cuticles easier, which you should aim to do at least once a week to keep nails looking neat and pretty.
Hand skincare is also essential, especially in cold, dry winter weather. Use moisturizer daily and after washing your hands to keep them soft and moisturized. There are hundreds of hand creams on the market and in case you’re not sure which works best, YouTube channel cute polish recommends her favorite, which is O.P.I avojuice.
Also, when washing dishes or cleaning with chemicals and sprays around the house, always use a pair of gloves to protect skin and nails from harsh cleaning products.
Finally, to remove ugly polish stains on nails it’s best to lightly buffing the surface of them. If the stains won’t come off try using a nail cleaner, like Bubble White from Sally’s Beauty Supply. To help prevent nail stains in the first place, always paint on a base coat before applying colored polish over it.
The base coat also protects nails and helps keep them strong, so don’t skip it! These are the most basic and essential steps that you can take at home to both achieve and maintain stronger, healthier, beautiful looking hands and nails.
Try them out you’ll see the results in no time at all!
Please Share This Tip With Your Family and Friends 🙂
She Sculpted This Whole Cake Into A Rose Shape. But When Slices and Reveals The Inside? WOW!
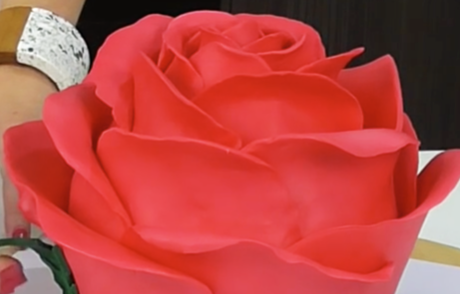
image via – youtube.com
If you want to make an extra special Valentine’s Day treat, or simply a gorgeous looking dessert, you have to try your hand at this rose cake recipe. It’s basically a work of art and even though it looks really hard to make, it can be accomplished.
All you have to do is follow along and watch what Vanessa from Cake Style does in this video tutorial and copy her every step of the way. She also included some really helpful links to the other recipes she used to make the cakes, frosting, and modeling chocolate, so be sure to check them all out.
Before you can begin decorating you’ll need to bake two 6 inch round cakes ahead of time and whip up a batch of sweet butter cream frosting. Add some red food dye to color it pink or red and then make a batch of the modeling chocolate that she uses.
Modeling chocolate is similar to fondant in that it’s easy to mold, shape, and add color to, but it’s made from mainly melted white chocolate and corn syrup which makes it taste a lot better. The main issue with fondant is that it tastes gross, so modeling chocolate is definitely the way to go.
Once you have those three main components you’ll need to gather up a few things including a large spatula, bread knife, metal or plastic scraper, small rolling pin, 3 ¾ inch round cake plate, 12 inch square cake board, cornstarch, small paintbrush, Exacto knife, water or clear alcohol, toothpick, parchment paper, cutting board, turntable, and 2¾, 2½, and 3¾ inch cookie cutters.
It may sound like a lot, but all of these things will make your cake turn out looking like a professional made it. The decorating instructions are best left to Vanessa to explain and this is something you truly have to see in order to understand and replicate it.
She does an excellent job describing everything that you’ll need to know and by the time your done you’ll have a seriously sweet looking rose cake.
Try it out, even if it turns out less than perfect, it’s the thought that counts. Plus, it’ll still be edible!
Please Share This Recipe With Your Family and Friends 🙂
He Begins Cutting Potatoes In A Strange Shape Then Puts Them In A Pan. When He’s Done YUM!
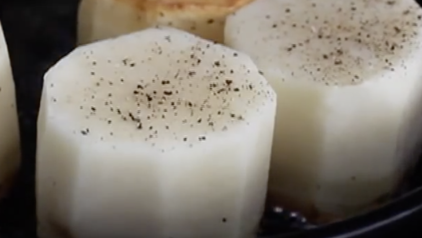
image via – youtube.com
One of the most popular and versatile food items that’s readily available and can be found at virtually any local grocery store is potatoes. Just like corn, rice, and wheat, potatoes rank among the world’s top grown crops and most widely consumed foods.
They are easy to whip up and a simple potato can be transformed and prepared lots of different ways. They can be served hot or cold and people love them mashed, baked, fried, hashed, steamed, chipped, and so on.
This recipe uses a combination of frying and baking to cook potatoes into a golden, delicious perfection. It’s super easy and unless your European, chances are you may not have heard of it yet. They’re called fondant potatoes and in the dead of winter when it’s freezing cold, they hit the spot. Here’s how you make them:
You’ll need russet potatoes, butter, vegetable oil, chicken stock, salt and pepper, and thyme (optional). Begin by cleaning and cutting the ends off the potatoes. Take one and turn it up on end before carefully slicing down the sides to remove the peel, as if you were skinning a pineapple, so you end up with an octagonal-type shape.
Cut it evenly in half and then slice up the rest before soaking them in a bowl of cold water for 5 minutes and pat them completely dry with a paper towel. Heat about two tablespoons of vegetable or grape-seed oil in a skillet over high and place the potatoes in when the oil is hot enough and appears shimmery.
Lower the heat to medium-high and cook for about 5-6 minutes, or until browned, and sprinkle salt and pepper on top. Flip them over and blot the tops with a paper towel, then place a lump of butter and a few sprigs of thyme in the pan.
Spoon some melted butter over the tops and sprinkle more salt and pepper on. When the butter starts to brown up, pour ½ a cup of chicken stock in the skillet and place that in a preheated 425 degree oven.
Roast it for 30-35 minutes or until the potatoes are thoroughly cooked all the way through and are tender on the inside. Drizzle any leftover thyme butter over the tops and allow them to cool before serving.
If you follow the recipe above, you’ll end up with beautiful looking oven roasted potatoes that are creamy on the inside and browned, crusty, and golden shelled on the outside. Let your taste buds tingle and try them tonight, bon appetit!
Please Share This Recipe With Your Family and Friends 🙂

