She Grabs Scissors And Starts Cutting 3 Worn Out Bath Towels Then Reveals An AWESOME Surprise!
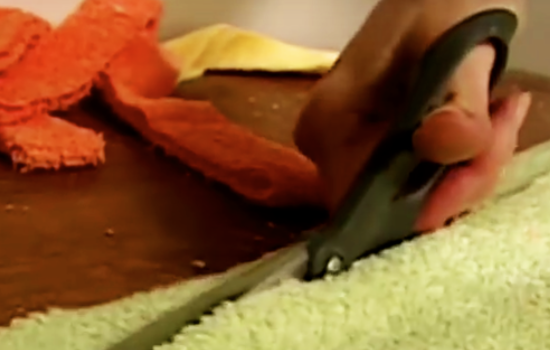
image via – youtube.com
There comes a time in life when old and worn out bathroom towels need to be replaced. They usually get kind of ratty looking, sometimes the edges fray, and they just don’t feel as comfy as they used to. Once towels have served their purpose most people toss them out or give them away to second hand stores.
Instead of doing either of those two things, put them to further good use and recycle them into a new spiral rug. This crafty project from the HGTV Handmade channel on YouTube is very easy to accomplish and shows you an environmentally friendly way to reuse any old bathroom towels you may have on hand.
All you need is 3 bath towels, a pair of scissors, sewing needle, and thread. In the video tutorial Linda Facci guides us through the steps and while she chose to make a rug out of green, yellow, and orange towels, any color and combination will work.
She first folds each towel in half and then cuts them up into one inch wide strips. A medium sized rug like the one she is making requires about 13 strips but you can add more or less to make a larger or smaller version of it.
Once all the towels have been cut, take three strips and sew their ends together. Then start braiding them into a cord all the way to the end, folding the raw edges of the strips as you go to make the braid appear neater looking.
Next, take three more towel strips and sew the ends of them onto the end of the piece you just braided. If you’re using different colors and want a more uniform look, try arranging the strips so they match what you just made.
Repeat this process until you have one long braided strip of towel. At this point you’re ready to make it into a rug. Take one end of the braided strip and start coiling it around in a circular fashion. Sew the very center part together and continue sewing all of the coils together as you move outwards and add new layers.
It doesn’t even matter if you’re not great at sewing because you won’t end up seeing the thread, just make sure you pass the needle through the layers so that they’ll end up staying well connected. Once you reach the very end of the braided piece sew the three ends of the strip both together and to the outermost coil as well. Flip it over and you’re done!
These up-cycled and colorful towel rugs are perfect for in the bathroom or anywhere in your house where you may want to protect floor or need it. They easily absorb a lot of water and moisture and can keep floors safe and dry when you step out of the shower or trudge in from outside.
Plus, if it gets all dirty and trampled on it won’t even matter since it’s recycled and virtually cost free. Try making one the next time you replace your bath towels and help cut down on waste!
Please Share This With Family and Friends
THIS Is The Unexpected Secret Meaning of That Black Diamond On Your Measuring Tape!
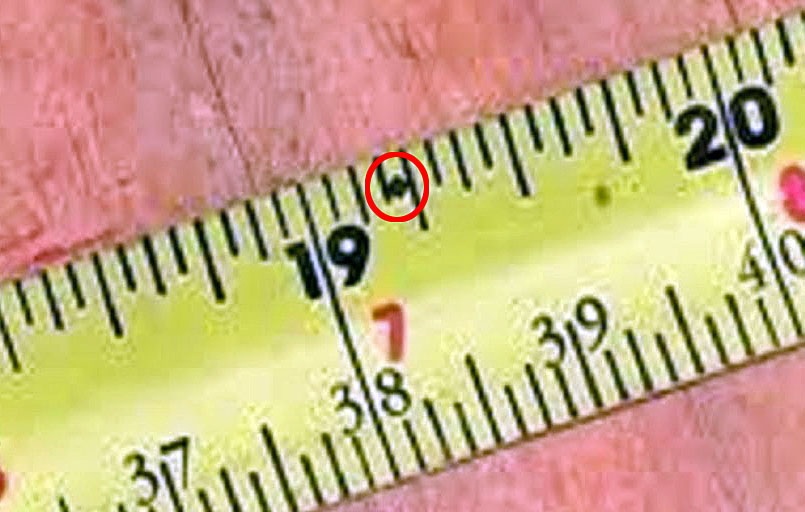
image via – youtube.com
There are all sorts of tools, gadgets, and other things that we use everyday without really thinking about. They’re easy to overlook and take for granted, but without them life would be a whole lot harder. While most of us assume that we know all that there is to know about the most common everyday household items we use, there are likely a few hidden tricks and secrets that you don’t even know about.
Anyone who likes to enjoy a nice glass of wine or champagne has probably noticed how there is an indent on the bottom of the bottle. It’s not there so producers can give you less wine, the dip is actually there to make the bottle stronger for high pressure beverages and stand evenly.
If you’ve ever bought a clothing item and found that it came with an extra swath of fabric, you likely assumed it was for patching up a small hole. While that could be a use for it, the real reason for the extra little piece is for washing before you wash the clothes. That way you can tell if it is colorfast or likely to shrink.
Those winter hats with pom poms on the top were not originally meant to be decorative as they are today. The Scandinavians originally used them in order to gather the seams in the hat back neatly, way before knitting winter hats became more common like it is today.
Every time you pop something in the microwave you pass by the black grading that covers the front window. All microwaves must have this important safety feature that’s called a Faraday shield. It protects you by preventing harmful electromagnetic fields from leaving the inside of the microwave while it is turned on.
Most homes have standard walls featuring six studs that are spaced sixteen inches apart. The black squares on measuring tapes are spaced sixteen inches apart in order to help you better find and mark the studs. In addition to the black squares, tape measures also feature black diamonds (sometimes they are triangles) which are spaced 19.2 inches apart and they are there for truss layouts of 8-foot sheet goods.
These are just a few of the many other interesting facts and features covered in the video about everyday household objects you may not know about. Be sure to check it out for more and maybe you’ll learn something new!
Watch the video below for more unknown uses and symbols you probably don’t know about:
Please SHARE This With Family and Friends
This Woman Pours Baking Soda Onto Her Entire Mattress The Reason Is The Best Life Hack Ever!
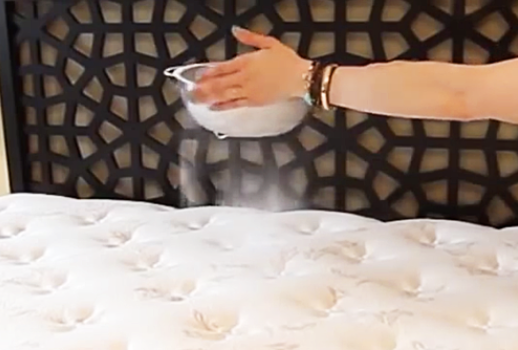
image via – youtube.com
On average, we spend around one third of our lives in bed and every single night we perspire out about ½ a pint of sweat. That’s a lot of sweat, especially considering that we replace our mattresses only after having slept on it for hundreds, if not thousands, of nights in a row.
On top of the sweat and dust that mattresses pick up there’s also dirt, food crumbs, other spills, blood, soil, and who knows what that accumulates on our beds. People rarely clean their mattress, if at all, and it’s clear to see why; they’re hard to clean! You can’t stick it in the washer and where would you even begin?
Thankfully Melissa Maker, of the YouTube channel Clean My Space, posted a video explaining how to clean and maintain a mattress so that it will stay fresh and comfortable for longer than ever. She covers a lot of insightful tricks and information, and here are a few of her best tips:
Vacuum Your Mattress- This removes a lot of the dead skin cells, dust, and other stuff that accumulates over time on your mattress. She recommends vacuuming every time that you rotate it and stresses that you use a clean upholstery attachment. If you don’t use a clean one, you run the risk of spreading even more dirt and crud onto your bed.
Deodorize Your Mattress- Make it smell fresh again with the odor neutralizing power of wonderfully affordable baking soda. All you have to do is sift some baking soda all over the top of the mattress and allow it to sit. After about 30 minutes vacuum it up with a clean upholstery attachment.
Stain Fighting- According to Melissa, stains come in 3 varieties which include protein, grease, and tannin. The protein type is the most common one you’re likely to encounter and blood, sweat, vomit, and urine all fall under this category.
The best way combat these types of stains is by cleaning them ASAP before they have time to really set in. Liquid stains should always be blotted up with a cool damp cloth. Never scrub or use warm/hot water because that sets it and will only make it worse.
DIY Cleaning Solutions- If you’re dealing with a fresh stain it can be treated with a mixture of equal parts salt, baking soda, and water. Mix this into a paste, apply it directly onto the stain, and brush it off 30 minutes later.
Then, using a cool damp cloth, wipe away any excess mixture that may still be on the mattress and allow it to fully dry. If that doesn’t work quite as well as you’d like, try this stronger cleaning mixture of 2 parts hydrogen peroxide combined with one part dish soap.
Place a very small amount of this solution on the stain and softly brush it in with a clean toothbrush. After about 5 minutes you can wipe it off with a cool damp cloth.
Keep Your Mattress Dry- In general, aim to keep all liquids off your bed. A key factor in both cleaning and maintaining a mattress is to always make sure that it’s completely dry before using or sleeping on it. If and when you need to clean it or it does get wet, use fans to help it dry faster.
If you fail to allow it completely dry you risk ending up with mold or other nasty things growing on it, so take the time to allow it to dry!
Flip Your Mattress- This should be done every season or at least twice a year. Also, rotate it around so that you are not always sleeping on one part of the mattress. Rotating helps the mattress stay even all around, especially if you and/or your partner tend to sleep on certain sides and do not weigh the same.
Now you know how to clean a mattress and hopefully you can put some of this information and these awesome tips to good use. Try them today and be rewarded with a better night’s sleep!
Let us know how the life hacks work for you! Enjoy!
Please Share This With Your Family and Friends
He Poured A Full Cup Of Salt Down The Drain. THIS Reason Is Unexpectedly GENIUS
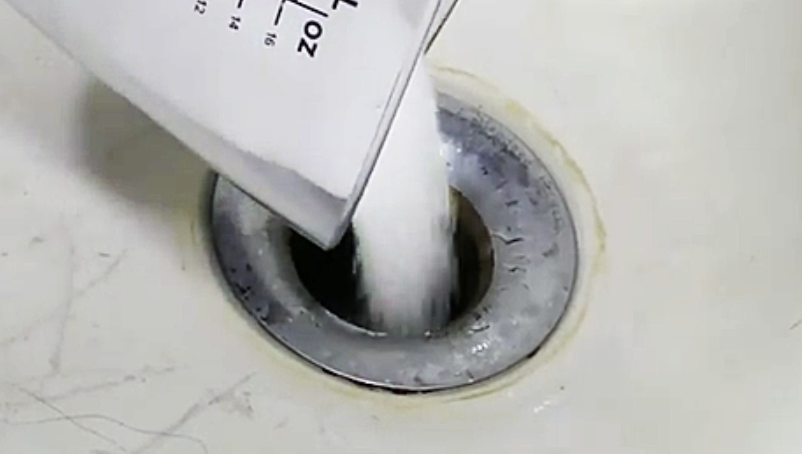
image via – facebook.com
Salt is a common mineral which can be found all over the Earth, including in practically every kitchen and household in the world. It’s not only vital for our bodily health, it’s also a food staple that has been used to flavor and preserve foods for thousands of years!
Besides that, there are tons of different uses for salt which extend far beyond simply seasoning tasty dishes. Household Hacker, one of the most inventive and ingenious YouTube channels out there, compiled a few of the most useful salt hacks known to man in this video.
These are truly helpful so be sure to check it out because somewhere down the line at least one of them is guaranteed to come in handy! Without further ado, here is a breakdown of everything you need to know that’s covered in the video.
If you ever find that your clothing iron has something sticky or gross and gooey melted onto the bottom of it, try this simple trick to clean it off completely. Set the iron to hot and while it heats up grab a sheet of wax paper and sprinkle on a layer of plain old table salt.
Rub the iron back and forth across the salted wax paper and soon the salt will pick up the residue and cause it to clump, leaving behind a clean iron. Next up is some clever hacks for the kitchen. Eggs can be a real pain to clean up.
If you ever accidentally drop one simply pour salt over the runny mess and wait 10-15 minutes before cleaning it up. The salt will turn the liquid part to gel and when you wipe it up it’ll stay together and won’t drip or run all over, saving you lots of paper towels in the process.
Another cooking oriented salt hack involves dangerous grease fires which cannot, and should not ever, be put out with water. Pouring water on a grease fire simply spreads it and makes it worse. Instead, you want to smother the fire and one of the best ways to put it out is by pouring salt directly onto the flames, thereby cutting off what’s fueling the fire, oxygen, and extinguishing it immediately.
If you have pots and pans that are all dirty with caked, burnt on crud, salt can help clean them up. Coat the bottom of the pan with a layer of salt, add a little water, wait 10 minutes, then wipe away the mess and rinse it off. In similar fashion, salt can also clean grease and burnt crud off of a dirty sponge.
Place 2 cups of water in a small container, dissolve in ¼ cup of salt, submerge the dirty sponge and allow it to soak overnight. The next day all you have to do is remove the sponge, it should be clean and back to being usable.
This next one is my personal favorite salt hack, which I have successfully used on many occasions. It makes cleaning one of the hardest areas of the bathroom to get spotless, aka the stains on tubs and sinks, a breeze.
The method for cleaning them is a little harsh but extremely effective and you’ll need a pair of rubber safety gloves and proper ventilation, so open a window and be cautious handling the solution. Mix together equal parts turpentine and salt, about one cup of each will do, then apply the solution and undissolved salt to a sponge and use it to scrub the stains.
After about a minute you should begin to notice the spots disappearing and when you’re done the bathroom will be shiny and clean. While you’re cleaning the tub, if you have a clogged drain, salt can also help you clear it up.
First, remove as much of the blockage and hair as you can before combining ¼ cup of baking soda with a ¼ cup of salt. Mix it up and pour it down the drain, then pour about a ½ cup of white vinegar down right after, and watch as it fizzles up like a soda pop.
Let this sit for at least 15 minutes while it works its magic and eats away at the clog. Meanwhile, bring a pot of water to a steady boil and them pour it directly down the drain to clear out any remaining clog.
Hopefully these inventive salt uses will come in handy and make your life easier. Try them out and see how helpful and inexpensive they really are!
Please SHARE This With Your Family and Friends
She Drops Hydrogen Peroxide In Her Ears 3x Per Week For a Month. The Reason Is Unexpectedly GENIUS!
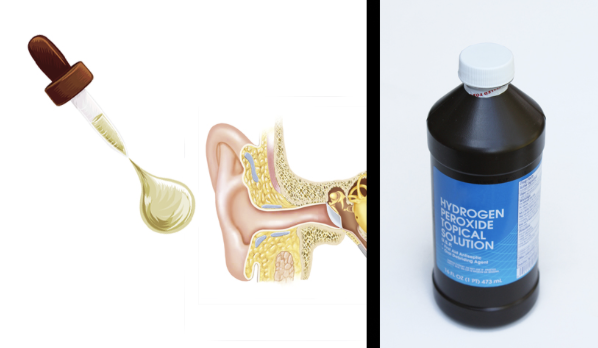
image via – shutterstock.com
Hydrogen peroxide is something that most people keep on hand at home. The bottled solution can usually be found in the medicine cabinet or stored under bathroom sinks and lasts for years. While people tend to only use it when they need to clean small cuts or scrapes, there are many other ways it can be utilized that go beyond first-aid.
The health and beauty, cleaning, and disinfecting tips that follow below are resourceful ways to save money and clean up around your house. All you need is the standard 3% hydrogen peroxide concentration, which can be found in any pharmacy or store. Depending on what you wish to do, you may also need a few other basic things, like a spray bottle, baking soda or water. Either way, these are all very simple and effective:
Clean stains on tile or stone counters- In a bowl combine hydrogen peroxide with flour until a thick, pasty consistency is achieved. Apply the paste over the stains so they are completely covered and then place a layer of plastic wrap atop it. Allow it to sit overnight while it works its magic, then remove and clean away the paste. The stains should be gone or vastly improved.
Remove wine stains from carpet- Mix together equal parts hydrogen peroxide and liquid soap. Apply it to the stained area and let it soak in for at least one minute. Using a towel, carefully blot it up while trying your best to avoid rubbing it in, before washing the spot with warm water.
Clean windows- Simply spray peroxide on the glass and wipe it off with a clean cloth. This works for other types of glass beyond windows that you may wish to clean. Clean humidifier- Pour a little bit of peroxide in with the water and run it through as normal. Any mold and bacteria that may have been present in the machine will be killed. Clean shower curtains- If your shower curtain and liner are safe to put in the wash you can treat them prior to washing by spraying hydrogen peroxide on them liberally. It will help to remove any mold, mildew, and soap scum more effectively.
Hydrogen peroxide in ear- To clean your ears and remove wax build up, soak a cotton ball with peroxide. Tilt your head to the side and gently squeeze the cotton ball to apply it into your ear. Wait a few minutes while gravity does the work for you before tilting your head the other way and draining it out.
Clean makeup brushes- In a cup mix equal parts hydrogen peroxide and water together. Place the brushes in the solution for at least five minutes, remove and rinse. Do this weekly to keep your makeup brushes clean and free of bacteria. Disinfect sponges- Soak dirty, smelly sponges or rags in peroxide for 20-30 minutes, then rinse and dry them off. Disinfect cutting boards- Spray on a layer of peroxide and wipe them clean.
Brighten whites- Instead of bleaching white clothing, soak them in hydrogen peroxide for about 30 minutes to remove stains and yellow discolored spots. Wash immediately after soaking and only use this on white clothes because peroxide will remove color!
Toothache relief- Mix equal parts water and hydrogen peroxide before applying it to the infected area. Try your best to hold the solution in place for at least a minute, then rinse your mouth out. This also works for canker sores, simply swish the solution around for a minute or so and then rinse.
Clean and disinfect toothbrushes- Soak the bristle end of the brush in hydrogen peroxide for a few minutes, then rinse it off thoroughly under hot water.
Whiten nails- Mix together peroxide and baking soda into a paste and then cover your nails. Keep it on for three minutes before rinsing nails clean with warm water.
In addition to the above uses, hydrogen peroxide is also an excellent, non-toxic, and cost effective way to get rid of mold. Mold is one of the most stubborn things to effectively remove. The nasty spores can infect and spread rapidly through an otherwise clean home and it thrives in damp, dark, wet places.
Some types of mold are extremely unhealthy, and potentially deadly, to breathe in or be around. The accompanying video shows the best way to deal with mold removal using hydrogen peroxide, so if you’re dealing with the tricky stuff you’ll definitely want to check it out.
Here’s how to do it; Pour some hydrogen peroxide into a spray bottle, apply it directly onto the moldy spots, wait at least 10 minutes, then wipe it off. This should work well on a variety of surfaces, and since it’s an antibacterial and anti-fungal solution it works fast to kill the mold spores.
These lesser known uses for hydrogen peroxide are handy resources to keep in mind because you never know when you may need to use them. Hopefully they will end up saving you time and money now or in the long run!
Please Share This With Family and Friends
If Your Hands Are Zip-Tied and You Are In Grave Danger THIS Simple Trick Will Get You Out Of The Bind In Seconds!
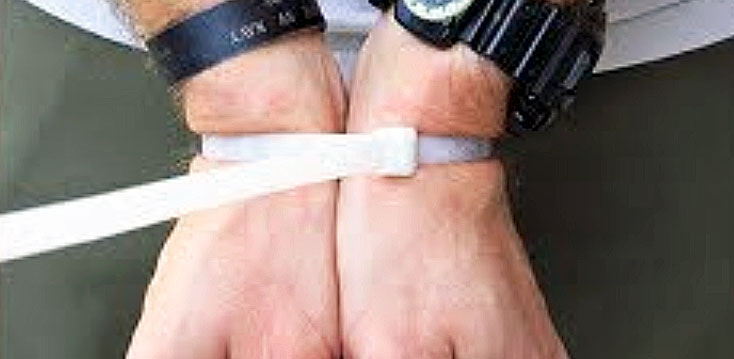
image via – youtube.com
The idea of being kidnapped is equally terrifying as it is unlikely. Despite this, there are new stories of individuals being kidnapped every day. For this reason, it can be good to have basic strategies for escaping a kidnapper. One common example is kicking out the brake light of a car if you’re ever locked inside a truck. Recently, an organization has come up with a strategy for escaping zip ties.
Brian Black is the founder of Imminent Threat Solutions or ITS. He was previously in the U.S. Navy. While serving, he learned a lot about taking care of himself during dangerous circumstances. After he left the military, he founded ITS.
ITS is a website that teaches its readers skills that can help get them out of unsafe situations. One such situation is kidnapping. Kidnappers often use zip ties to bind their victim’s hands. Admittedly, some will prefer to use rope or duct tape.
ITS released a youtube video demonstrating how to escape zip ties if the victim’s hands are bound in front of them. In the video, the instructor tightly binds his hands with a zip tie. The tighter they are, the easier it will be to escape. He then proceeds to bring his arms down quickly while “chicken-winging” his arms.
Essentially, he raises his arms up and then brings them down quickly with his arms in a triangular position. While it is very unlikely you will ever be kidnapped, knowing techniques like this could make the difference between life and death.
Watch the video below for the full tutorial:
Please SHARE This With Family and Friends

